![[used] Mould damp 2](https://media.product.which.co.uk/prod/images/original/gm-9e03c336-e645-4fc4-9bdc-ef9e801405cd-used-mould-damp-2.jpg)
By clicking a retailer link you consent to third-party cookies that track your onward journey. If you make a purchase, Which? will receive an affiliate commission, which supports our mission to be the UK's consumer champion.
How to get rid of damp

Damp can be a potentially harmful problem if it’s given time to fester. To avoid the cost of tackling the issue and your frustration growing in size along with the damp patches on the wall, this guide will help you get rid of damp before it becomes a major problem.
You will find general advice for dealing with damp, plus specific treatments for rising damp and penetrating damp.
The rising damp section explains how to check, repair and insert a damp-proof course and membrane, then provides answers to common questions and concerns about the process. The penetrating damp section offers guidance for identifying and fixing the problem, such as the six key signs to look for.
If your home is suffering from condensation and to avoid it leading to a damp problem, check out our guide on how to stop condensation.
How to get rid of damp
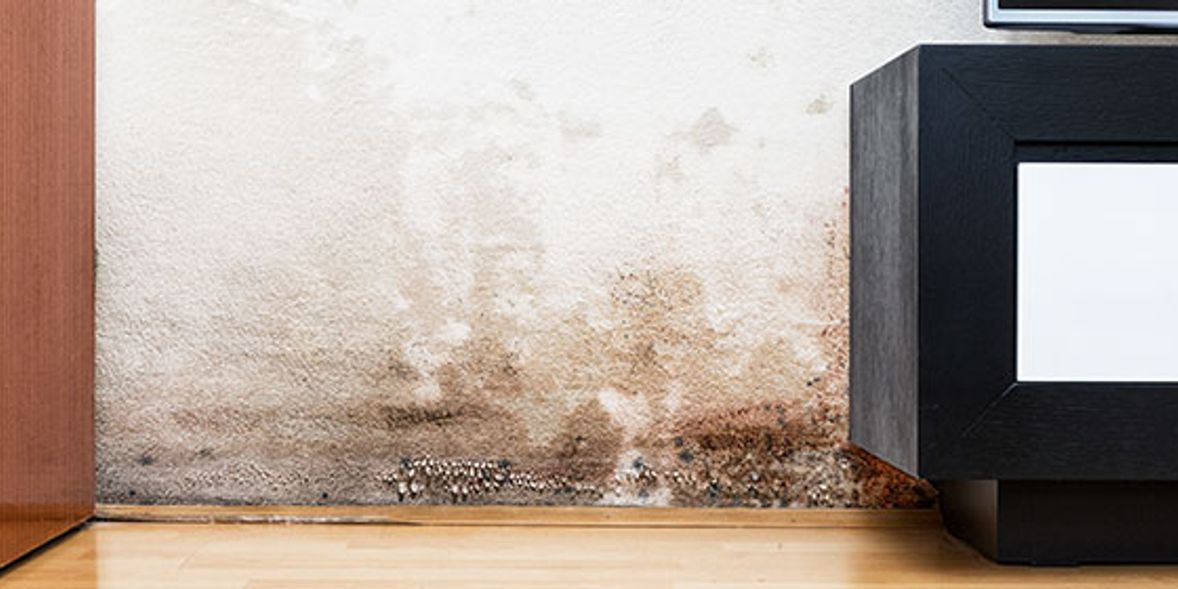
The earlier you can spot signs of damp the easier it will be to get rid of. Look for clear indications on your walls, such as wet or damp patches, peeling wallpaper and flaking plaster. Other signs around the house are damp and musty smells, rotting wood such as skirting boards, or mould and mildew appearing on walls, floors or ceilings. Read on to find out how to overcome these problems.
Buy a dehumidifier

Dehumidifiers draw moisture out of the air, so can be particularly useful if you often dry clothes inside the house – another common source of excess humidity. Dehumidifiers can also help if you notice moisture in the air from every day activities such as showering and cooking - all of which can lead to high levels of humidity.
If you notice water stains on your walls or ceiling, condensation on your windows, mould spores in your shower or a general musty smell, it could be worth buying a dehumidifier.
There are various types and brands available, so read up on the best dehumidifiers to find one that’s right for you. Make sure you consider the differences between refrigerant and desiccant humidifiers.
Ventilate your home
Condensation is the most common type of damp and is also the easiest to fix. It can often be solved cheaply and quickly, and sometimes without the need for professional help.
Improving your home’s ventilation can help clear condensation and prevent it returning.
Bathrooms and kitchens are responsible for most of the moisture in your home. If you don’t have an extractor fan in your bathroom and kitchen, you should consider installing them to reduce condensation.
When you can, always try to limit the amount of condensation produced in your home:
- Regularly clear your windows of condensation, so it doesn’t cause damage or develop into mould. You can do this easily with a towel, tissues, or for windows that open, a squeegee. If you're considering getting a window vacuum, compare the best window vacs.
- Open windows regularly; especially when cooking, washing up or showering.
- Try to dry clothes outside on sunny days, rather than on a clothes rail indoors.
- Add window vents to the tops of window frames.
- Build air bricks into outside walls.
- Install air vents to internal walls and sealed chimneys for airflow.
- Fit roof ventilation tiles to allow air through the loft.
Check your gutters

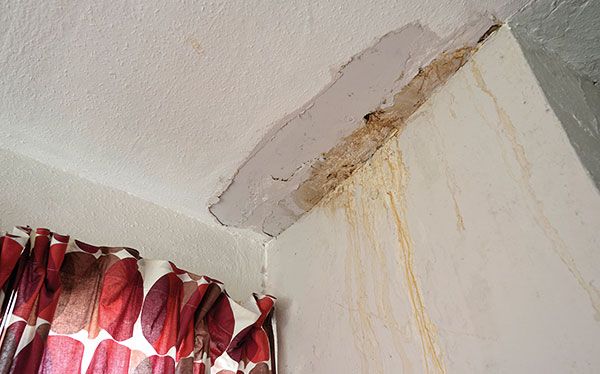
Penetrating damp is caused by water leaking through walls. It tends to happen as a result of structural problems, such as faulty guttering or roofing, or cracks in external walls.
Fixing penetrating damp can be easy and cheap to do yourself. You’ll need to identify the issue first, then decide if you need professional help.
The first sign of penetrating damp is usually wet or leaking walls. Look out for:
- a discolouration of interior walls
- damp patches
- mould
- blistered plaster
- water droplets
- a wet surface.
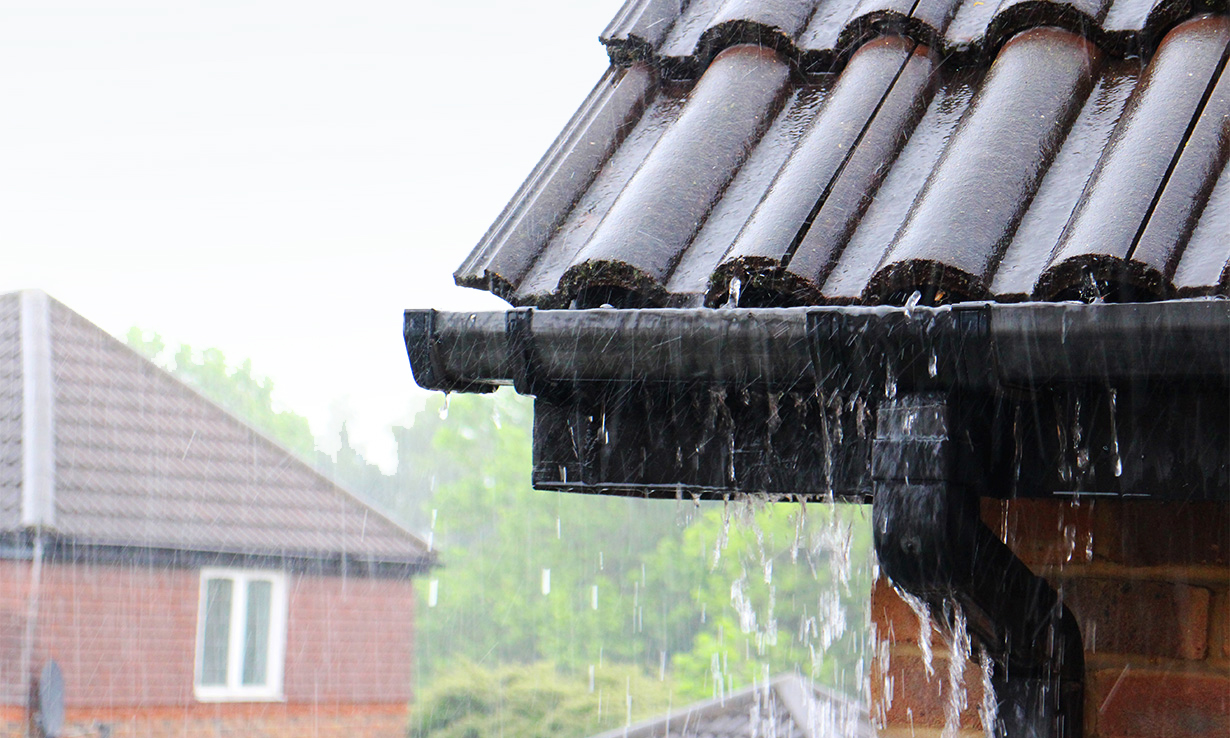
Penetrating damp can be caused by water leaking from gutters and downpipes on the outside of your home, so examine them for cracks. Fixing them could solve the problem.
Try damp-proof paint

Old bricks can become porous and allow water into your home. If this is happening, you may need to get them replaced.
However, one easier option to try first is painting the bricks with an exterior silicone water-repellent fluid or limewash. This will seal your walls again, while still allowing them to breathe.
Damp-proof exterior paint can also be a good preventative measure, but seek professional advice first on what would work best for your home’s age and building materials.
Check for signs of rot
Rot in timber can be a major cause of structural damage to your home and occurs primarily due to damp or poor ventilation. It can be very serious – if you suspect you have rot, you should call in specialist help.
Wet rot tends to grow on very wet timber where there is a constant source of moisture. It doesn't spread through brickwork and stops growing when the source of moisture dries up. Signs of wet rot include a black fungus and timber that feels soft and spongy and is possibly discoloured. There may also be a damp, musty smell.
Dry rot needs less moisture and can grow into non-timber materials, such as plaster and bricks. Signs of dry rot include white or orange growths, crumbling timber, deep cracks and a mushroom-type smell.
Be cautious of free damp surveys
If you're considering getting a ‘free survey’ by a company promising to fix a damp problem, get at least three different traders to come to your property and quote for the work before you choose the best deal.
If there are inconsistencies in the type of work recommended, or if you're concerned that the companies may be recommending unnecessary treatment, consider getting an independent damp specialist to assess your home.
An independent damp specialist will have no vested interest in recommending unnecessary work, so should be able to give you an unbiased opinion on what kind of remedial treatment is necessary – however, the report could cost between £100 and £750.

Rising damp treatment
Rising damp can be expensive to fix. Find out what the treatment options are before you call in a professional.
Check your damp-proof course
The first thing to do if you have rising damp is to find out whether you have a damp-proof course (DPC) and damp-proof membrane (DPM), which should stop water from the ground soaking into ground-level walls or floors (see image below).
Regulations making them compulsory in new houses came into force in 1875, so houses built before then probably won't have one. You may be able to spot a damp-proof course by looking for a thin strip near the bottom of the external wall. You'll need to get an expert to confirm this and to try to ascertain whether there is also a damp-proof membrane.
If your home does have a damp-proof course or membrane but is still experiencing damp, then they may have become damaged or worn over time. If they aren't working effectively, you'll need them to be repaired or replaced.

How to treat damp walls internally
The most common remedy for a missing or damaged damp-proof course is for a builder or damp specialist to drill holes into your wall and inject damp-proof cream to act as a new course.
But there are alternative solutions, such as cutting grooves into the brickwork and installing a piece of damp-proof course rather than a chemical one. This is more invasive than just drilling holes, so may be less easily hidden. Our guides to damp costs shows typical prices for both of these approaches.

Repair or replace a damp-proof membrane
If there is just a small patch of damp on your floor, you may be able to remedy it by painting over the patch to stop any more water coming through. You'll need to apply two coats of bitumen latex waterproof emulsion, which you can buy from many DIY stores, underneath the floor covering. For extra protection, some experts recommend laying reflective foil building paper (foil side up) before the paint is dry.
This is only suitable for minor cases, though. If the damp is extensive, you may need to have the damp-proof membrane entirely replaced. This is likely to be costly, but may be necessary if the damp is widespread or other solutions haven't worked.
Check exterior ground level
If you have a perfectly good damp-proof course, your damp problem could be because the ground outside has been built up above the damp-proof course, which should be 15cm above ground level. The problem can be solved by digging away excess soil on the exterior side of the damp wall to below the level of the damp-proof course. You could do this yourself, or you could get a professional to do it.
Tank walls and floors with damp-proof materials
Tanking a wall or floor is a building term that effectively means sealing it to protect it from moisture. This is usually done to areas that are already damp, and might be done by coating the surface in asphalt (a thick liquid) or a membrane. For walls this would be underneath the plaster and for floors it would be under the concrete. The areas have to be prepared first, tanked and then decorated on top, so it's a big job.
Tanking can be very expensive (our damp costs page has details) and disruptive, so, like other costly damp work, it's worth getting a few expert opinions to help you decide whether it really is necessary before committing.
If you're looking for a damp specialist, you can use our Which? Trusted Traders website to find recommended tradespeople who have been through our rigorous checks.
You can use our Trusted Trader search tool below to find a reliable damp-proofing specialist in your area.
Questions and concerns about damp-proofing
Is damp-proofing work guaranteed?
Most companies offer a guarantee – make sure you find out what's included in the price or available at an extra cost. Property Care Association members may also offer an additional insurance-backed guarantee that will cover you if the company goes bust.
How can I ensure my damp-proof course continues to work?
Generally, a damp-proof course should look after itself. However, you can avoid repeat problems by ensuring the external ground level remains 150mm (6in) below the damp-proof course, not bridging it with internal or external coats of plaster and making sure it's quickly repaired if damaged by any building alterations.
My new damp-proof course hasn't worked, and a new surveyor said it was unnecessary.
Under the Consumer Rights Act, a service should be provided using ‘reasonable care and skill’. If your new damp-proof course work was unnecessary, the company that installed it has failed to use reasonable care and skill and is therefore in breach of contract. To make a claim, you will need to prove this is the case. This is usually done by asking an independent expert agreed upon by you and the company to assess whether the work was necessary.
If the expert agrees the work was unnecessary, you can claim back money spent on the work. You may need to take the company to the small claims court to achieve this. For more information, see our guide on how to use the small claims court.
Penetrating damp treatment
Fixing penetrating damp can be easy and cheap to do yourself. But, before you can treat it or decide whether to get in a professional, you'll need to identify the issue.
The gallery below takes you through the main causes of penetrating damp, and how to get rid of it.
Six signs of penetrating damp
1. Leaking walls
The first sign of penetrating damp is usually wet or leaking walls. Look out for a discolouration of interior walls, damp patches, mould, blistered plaster, water droplets and a wet surface, as these are all signs of penetrating damp. You'll probably need to use a specialist builder to identify and repair any long-term structural issues - you can use our Trusted Traders search tool to find a reliable trader in your local area.
2. Air gaps
Gaps in (or damage to) window frames and doors can lead to penetrating damp. Make sure your property is airtight and get damage fixed promptly if it occurs.
3. Burst gutters and pipes
You might find that your penetrating damp is being caused by water leaking from gutters and downpipes on the outside of your home, so examine them for cracks. Fixing them could well solve the problem.
4. Porous bricks
You might also find that old bricks have become porous and are allowing water to get into your home. If this is the case, you may need to get them replaced. However, one easier option to try first is painting the bricks with an exterior silicone water-repellent fluid or limewash that will seal your walls while still allowing them to breathe. Damp-proof exterior paint can also be a good preventative measure, but seek professional advice first on what would work best for your home's age and building materials.
5. Cavity wall problems
Occasionally, penetrating damp can be caused by problems with cavity walls. Walls in modern homes (and many built since 1920) are usually constructed as two layers of wall with a cavity between them, so that moisture penetrating from outside can evaporate before it gets to the inner wall.
If something 'interrupts' the wall, such as a window or pipework, you may have or need a cavity tray (see image below). These come in many different forms but effectively act as a way to drain water away from the inner wall to the outside through weep holes (holes in a part of the outer wall).

If a cavity tray is defective, or there isn't one in place, you could end up with penetrating damp. In this case, you'll need to have the tray repaired or added.
The cavity itself can also cause damp, if it has become filled with debris, such as broken mortar or bits of brick, which take in moisture from the outer wall and pass it to the inner wall. In these cases, the debris will need to be cleared out to rectify the problem.
Find out how much these types of repairs may cost in our damp costs page.
6. Poor cavity insulation
Lastly, in some rare cases, cavity wall insulation can cause damp problems. This is usually only the case if your home is exposed to severe levels of wind-driven rain or if your walls are poorly constructed or in very bad condition.
How to avoid other problems caused by damp
- Wait until clothes or bed linen are fully dry before putting them into storage, to avoid damp smells.
- Open and clean storage areas that don’t receive sunlight, such as cupboards, wardrobes and drawers, to help ventilate and prevent damp.
- For a DIY way to get rid of damp smells, try boiling some lemons or lemon peel in a pan of water. When the fresh lemon smell is emerging, place the pan in a room suffering from damp smells, but don’t leave it unattended. Once the mixture has cooled, pour it into a sprayer bottle and disperse it throughout your home for a fragrant boost.
Clearing up after a storm
If you have severe storm damage following a storm, clearly a moisture absorber isn’t going to make much difference to you.
The Met Office recommends that, after a flood, you:
- Check with the emergency services that it’s safe to return to your property, if you’ve had to leave it.
- Contact your insurance company and follow its advice.
- Seek advice from specialists before embarking on any repairs to your property, as most of the repair work will need to be undertaken by professionals appointed by your insurers.
- Contact the National Flood Forum on 01299 403055, or via its website, if you don’t have insurance.
- Wash your hands thoroughly after any contact with flood water, which can contain sewage, chemicals and animal waste.
- Wear gloves, a face mask and sturdy footwear when cleaning your home.
If you need help repairing your home after storm damage, use Which? Trusted Traders to find reliable, trustworthy professionals.


