
By clicking a retailer link you consent to third-party cookies that track your onward journey. This enables W? to receive an affiliate commission if you make a purchase, which supports our mission to be the UK's consumer champion.
How you can make Windows 11 easier to use: accessibility tips and tricks
Navigating your computer's menus and apps can be tricky in some instances, which is why Microsoft offers accessibility features to improve your experience.
The available tools fall into three categories: vision, hearing and mobility. If you know where to look, you can adjust your display's colours, activate closed captions for audio content and make use of eye control to steer your mouse pointer.
Keep scrolling for instructions on how to enable and use key accessibility tools on Windows 11.
Jump to features: Vision accessibility | Hearing accessibility | Mobility accessibility

Each month, we feature one of the most popular questions answered by our Tech Support team.
Question of the month: How can I make Windows 11 more accessible?
'I’ve just bought a new Windows 11 PC for my dad so he can shop and do his banking online. He’s eager to use the computer but has issues with his vision and hearing, as well as arthritis in his hands. How can I make it easier for him to use?'
Which? Tech Support member
Our expert says:
Windows 11 contains a host of settings and tools to assist users with visual, auditory and mobility impairments. These features can help everyone to have an independent and trouble-free experience using tech. See below for the details.
Vision accessibility features
Magnifier – for dealing with small text
The Magnifier tool on Windows 11 enlarges parts of your display to make text and images easier to see. You might find it useful if you're reading a news article written in small font, or sifting through your Photos folder to try to find a specific snap.
To get started, go to Settings > Accessibility > Magnifier. Toggle the switch to On. Once Magnifier is activated, you can use the following commands:
- Windows key + Plus (+) to zoom in
- Windows key + Minus (-) to zoom out
- Windows key + ESC to turn off the Magnifier.
Colour filters – for help dealing with colour blindness
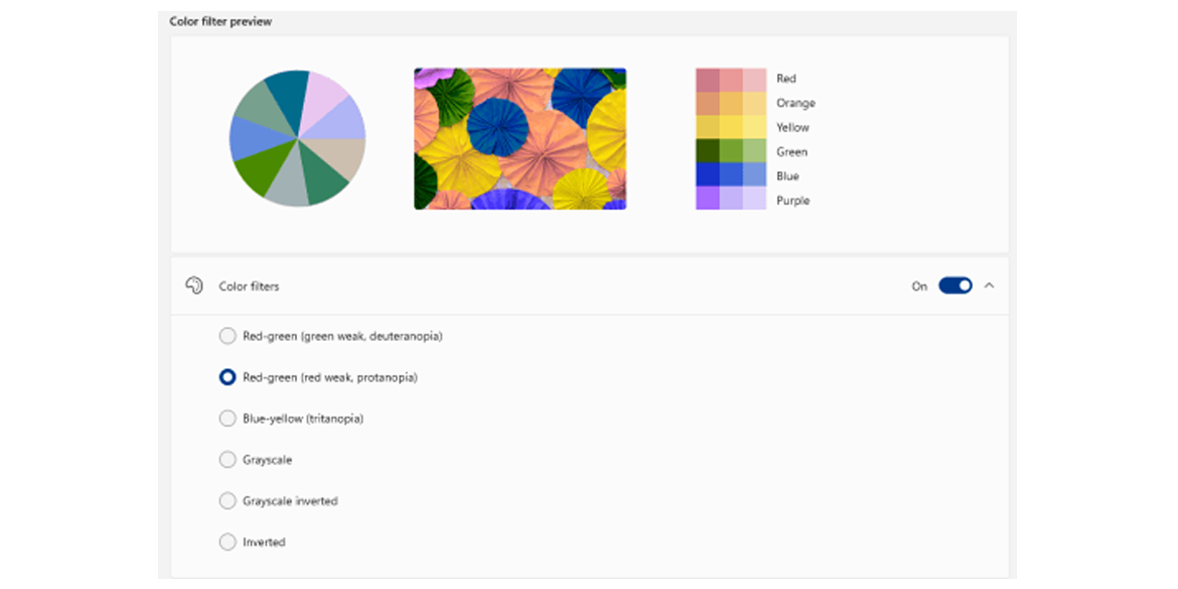
Colour Filters change the colour palette on-screen to help users with colour blindness or light sensitivity. In changing the filters, the tones on the display become more distinguishable.
To get started, go to Settings > Accessibility > Color Filters. Toggle the switch to On.
You can now select a filter from the list. Options include grayscale, inverted grayscale (for improved contrast), a red-green filter (for users with deuteranopia or protanopia) and a blue-yellow filter (for users with tritanopia).
High-contrast themes – for making on-screen content clearer
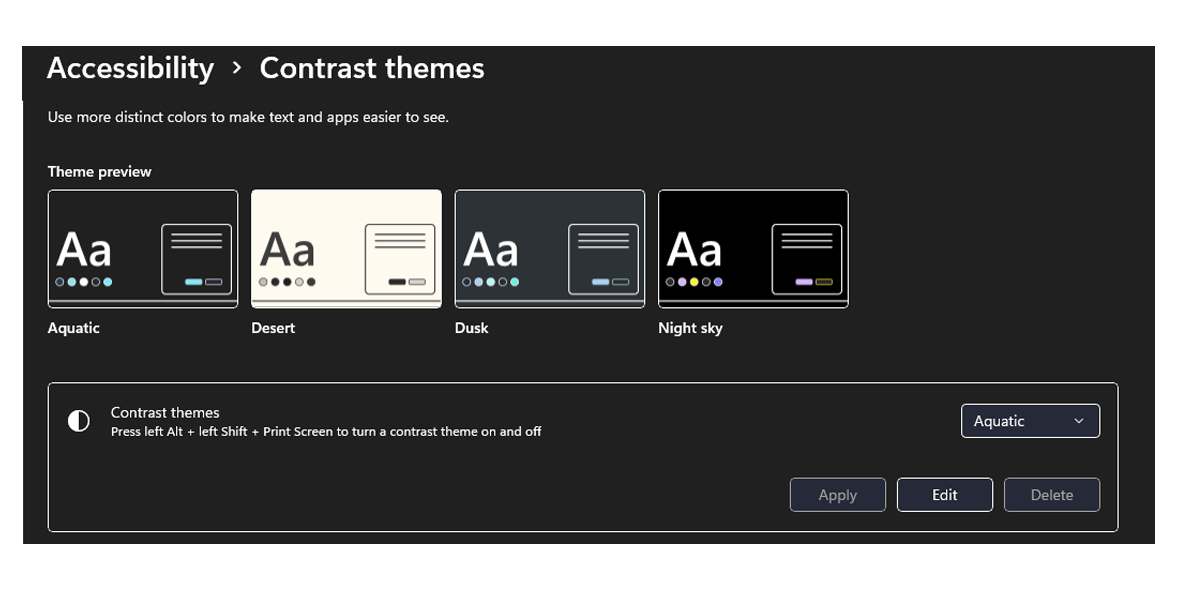
These are designed to improve the readability of your screen by using distinct colours for text and backgrounds. For example, displaying dark backgrounds with white text can often aid users with visual impairments.
To try out custom themes for yourself, go to Settings > Accessibility > Contrast themes.
You can now select a Windows 11 theme that suits your needs – for example, Night Sky (dark background) or Desert (light background).
News, deals and stuff the manuals don't tell you. Sign up for our Tech newsletter, it's free monthly.
Narrator – for navigating Windows
The screen-reading Narrator tool is designed to support blind and partially sighted users. As well as reading blocks of text aloud, it can also describe what's showing on your screen.
To try Narrator, go to Settings > Accessibility > Narrator. Toggle the switch to On. Once it's enabled, use Windows key + Ctrl + Enter to start or stop Narrator. You can press the Ctrl key to stop Narrator from reading at any time.
See also: Complete guide to Narrator (Microsoft website)
Text size – for improved readability
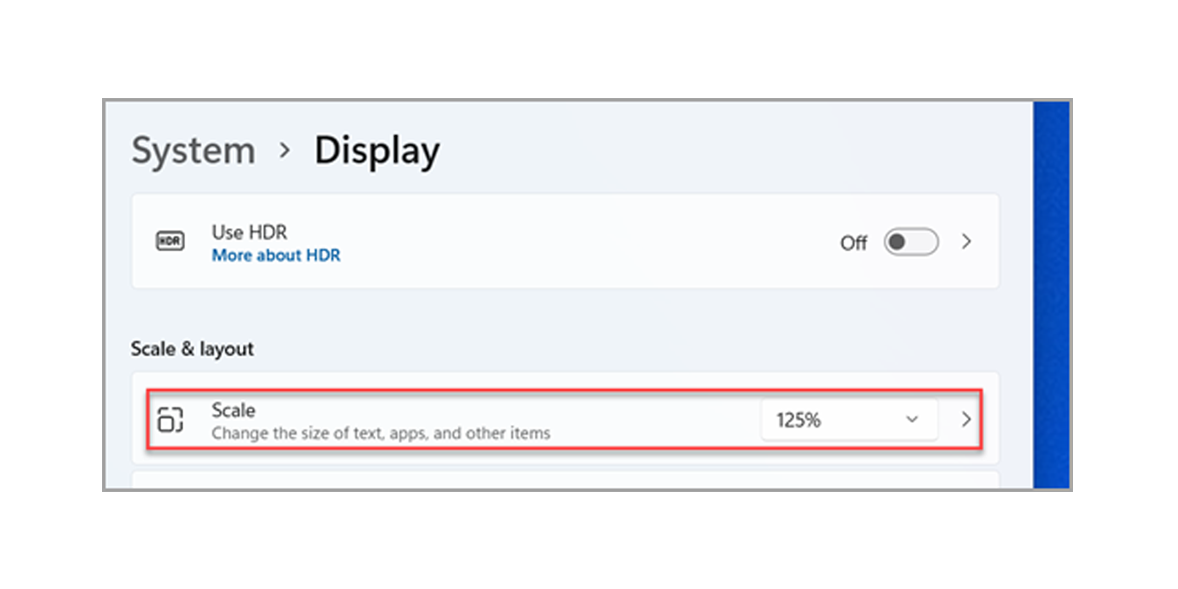
Adjusting the text size on Windows 11 makes navigating the system easier. To adjust it to your needs, go to Settings > Accessibility > Text Size.
From there, you can use the slider to increase or decrease the text size. Remember to select Apply to save the changes.
To make everything on-screen larger (including images), choose Display and pick an option from the drop-down menu next to Scale.
If you're dealing with a sluggish computer, it might be time for an upgrade. See our expert pick of the best laptops
Hearing accessibility features
Live captions – for understanding audio
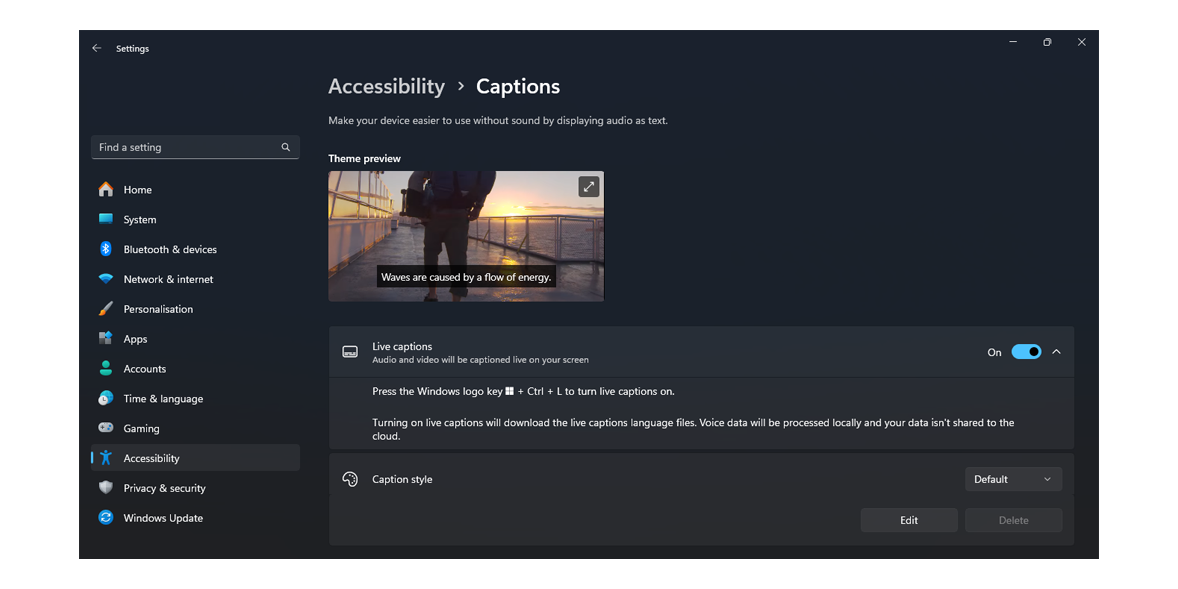
The Live captions feature on Windows 11 provides a text overlay for audio content, making it easier for users with hearing impairments to follow along.
To activate the feature, go to Settings > Accessibility > Captions and turn on Live captions.
You can tweak how the captions are displayed by hitting the Settings option within the live captions window. Choose Position and then pick between Above screen, Below screen or Overlaid on screen.
Mono audio – for hearing all sounds in one channel
The mono audio setting combines your stereo sound channels into one, ensuring that no audio information is missed if you have an impairment affecting one ear. This feature will also come in handy if you're using just one headphone.
To activate this audio tweak, head to Settings > Accessibility > Audio. Toggle the switch for Mono Audio to On.
From the same Audio menu, users who have difficulties hearing audio alerts can select Flash my screen during audio notifications.

Mobility accessibility features
Sticky Keys – for selecting multiple keys simultaneously
Sticky Keys allows users to press keyboard shortcuts one key at a time instead of all at once. The tool can also provide audible notifications when keys are selected.
To activate Sticky Keys, go to Settings > Accessibility > Keyboard. Toggle the switch for Sticky Keys to On.
You can choose to Turn on Sticky Keys when Shift is pressed five times or Show the Sticky Keys icon on the taskbar.
On-screen keyboard – for typing with your mouse (or touchscreen)
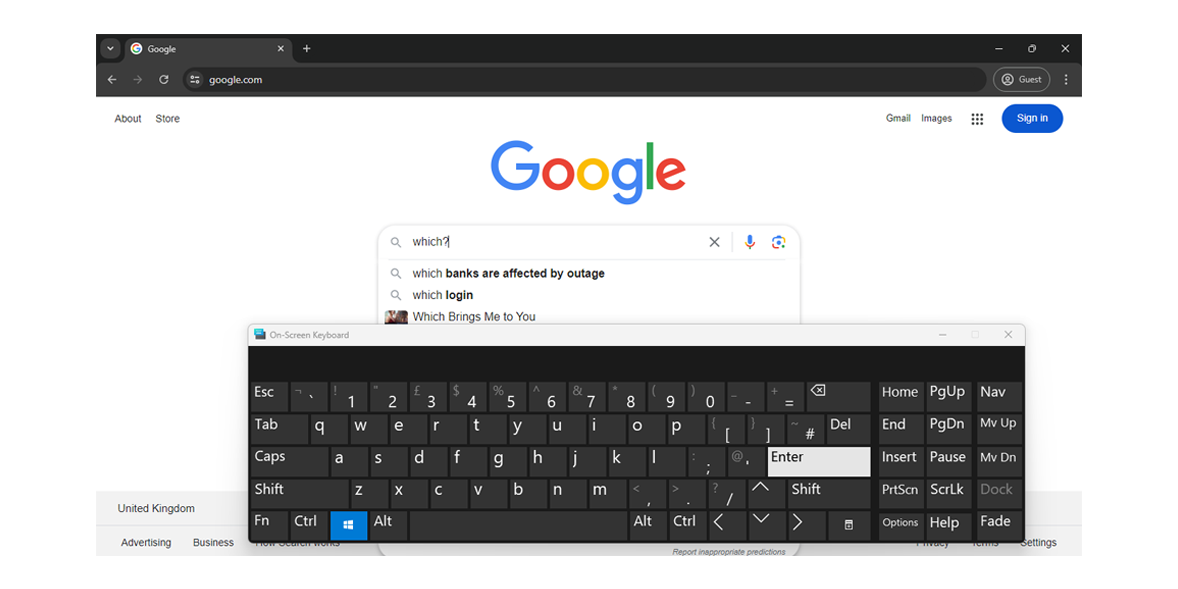
The On-Screen Keyboard found within Windows 11 provides a virtual keyboard on the screen for users who have difficulty using a physical keyboard.
Go to Settings > Accessibility > Keyboard. Toggle the switch for the On-Screen Keyboard to On.
Once the keyboard appears on-screen, select the Options key to personalise the interface. You can choose to hear a click sound when each button is pressed, for example, or activate shortcut keys that quickly move the keyboard from one side of your screen to the other.
A Text prediction mode is also available if you'd like the keyboard to suggest words as you type.
Protect your data from scammers – we reveal the best antivirus
Voice typing – for typing without a keyboard
Microsoft's Voice Typing feature enables speech-to-text, meaning you can type without using a keyboard. However, you'll need an active internet connection and a working microphone to use it – you might already have a microphone built into your computer, but a USB microphone will also work.
To activate voice typing, simply press Windows key + H. If you need to disable the tool, simply say 'Stop listening' or press the microphone button on the voice-typing menu.
Join Which? Tech Support
Get Which? Tech Support for £49 a year or £4.99 a month
Stay on top of your tech and get unlimited expert 1-2-1 support by phone, email, remote fix and in print.
Find out moreWhich? Tech Support can help you keep on top of your home tech. Our experts explain things clearly so that you can resolve issues and feel more confident using your devices.
Get unlimited 1-2-1 expert support:
- by phone – clear guidance on choosing, setting up, using and resolving issues with your home tech devices
- by email – outline the issue and we’ll email you our answer
- by remote fix – we connect securely from our office to your home computer and resolve issues while you watch
- in print – Which? Tech Magazine, six issues a year delivered to your door.
You can join Which? Tech Support.


