Painting Tiles: The Ultimate Step-by-Step Guide
Painting tiles can give your kitchen and bathroom tiles a new lease of life - these tips are essential for doing it right

Painting tiles is a fast, effective, low-cost alternative to replacing old tiles.
A specialist tile paint will give your kitchen and bathroom tiles a great finish for at least a couple of years, especially if you avoid areas exposed to water such as showers or behind kitchen sinks. Try a clear lacquer to prolong the lifespan of a painted title.
Floor tiles will look great when first painted, but they can quickly start to look scruffy in high traffic areas where they take a lot of wear and tear.
To ensure the best results, here are all the tips, tricks and knowledge you‘ll need to give your tiles a new lease of life and a professional finish.
(MORE: Best grout cleaners)
What You'll Need For Painting Tiles
First, your tool list for painting tiles:
- Brushes
- Brush cleaner
- Roller and roller tray
- Sandpaper
- Painters tape or masking tape
- Sponge, scourer and bowl
- Cleaning solution
- Primer
- Tile paint
- Tile grout
Preparation
Before you think about painting an area, make sure you prepare it properly. Clear the area of any objects that will get in the way, then once clear the next step is to clean the tiles.
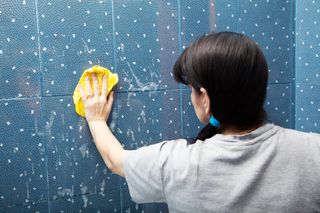
Tiles will need to be completely free from dirt, grime and grease. Use a commercial kitchen/bathroom cleaner and abrasive sponge - or wire wool - to get the tiles as clean as possible.
Don’t forget to clean the grout as well. Wash it down with warm water to remove any cleaner residue and dry. The cleaner the surface, the better the paint will adhere to the tiles. The same principle applies if you are prepping floor tiles or tiles outdoors.
(MORE: Best bathroom flooring options)

Repair Tiles, Sand and Clean
If your tiles have hairline cracks or chips then use an epoxy resin like Gorilla Epoxy to fill and wait to dry. If there is any missing grout then fill with tile grout and wait for it to set.
The next step is to sand the surface of the tiles to help rough up the glaze for better adhesion - for this it's best to use a 120-220 grit sandpaper.
If you have a hand sander then use this to speed up the process and ensure a more even finish. Brush down the tiles and vacuum up any dust, then get a damp cloth and wipe down the tiles and nearby surfaces, and wait to dry.
Use masking tape or painters tape to protect any surfaces where they meet the tiles. For added protection, you can also cover flat surfaces such as kitchen worktops with newspaper, plastic sheets or dust sheets.
Finally, give the tiles a last quick wipe with a damp cloth to remove any dust or debris and leave to dry.
Application
For a longer lasting tile makeover in a kitchen or bathroom, tile small areas where paint won’t last too long such as showers. Paint big areas where tiles are not exposed to water and heavy use.
To ensure that paint adheres well to tiles it is best to apply a primer first. This is not essential, but it will lead to a much more durable - and longer lasting finish.
For this, a shellac-based primer such as Zinsser B-I-N Shellac-Based Primer Sealer is a good choice. This works on glossy surfaces and is quickly touch dry, but takes around 24 hours to be fully dry.
If you are using a brush to paint your tiles, then use a 2-4 inch brush. Work into the grout first and then paint the tiles. If you want a smoother finish use a short pile or foam roller. First use a 1-2 inch brush to paint the grout before rollering, then once the primer is dry give a quick light sand to get the tiles ready for the next coat.
(MORE: Best bathroom paint)

Tile Grout: Paint or Regrout?
If you want to add a pattern to your floor tiles use a stencil to get the pattern you want. This is more time-consuming than just painting a floor, but the results will be worth it.
Test a pattern on a tile sized piece of cardboard - to test your painting skills - and see how the pattern looks against your floor.
Realistically, you will not be able to avoid painting the grout. This would be intricate and extremely time-consuming.
However, there are a couple of options if you want to keep the grout its original colour.
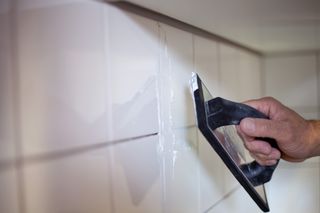
The quick solution is to use a grout pen after you have finished painting (although this won't offer as good a finish as regrouting). The alternative is to remove old grout before you paint the tiles and then regrout aftwards. Make sure you allow plenty of drying time for the last top coat. This is time-consuming, but it will give the best finish.
A specialist tile paint is needed to get the best finish, and there are a few worth a try. For indoor projects, try:
Try Zinsser AllCoat Exterior for outdoor projects.
All of these paint are available in white, but if you want a different colour then check each range to see what is available. If you're painting floor tiles then try something heavy duty, such as Leyland Trade Heavy Duty Floor Paint.

A general rule for painting anything is to start at the top and work your way down. This helps ensure that no drips get on to your newly painted areas.
When painting floor tiles, start in a corner and work your way towards the door. If you are painting white on white - or a darker colour on white - you might only need one coat. Wait until completely dry (the average drying time is around four hours) and make a judgement call.
If you think another coat is needed then apply as before. If you're painting white over a darker colour you will probably need at least two coats - again, make a judgement call after one coat.
Maintenance
A painted tile does not have the surface strength of a standard glazed tile, so when it comes to cleaning use non-abrasive liquid cleaners such as washing up liquid in warm water and a soft cloth or a sponge. Simply wipe over the tiles and dry.
Do this on a regular basis to keep your painted tiles looking good and to increase their longevity.
Try to avoid abrasive powder cleaners, strong detergents and abrasive sponge pads, wire wool and brushes, if you can. These will shorten the lifespan of the paint and may cause your tiles to start peeling.
Get the Homebuilding & Renovating Newsletter
Bring your dream home to life with expert advice, how to guides and design inspiration. Sign up for our newsletter and get two free tickets to a Homebuilding & Renovating Show near you.
Steve Jenkins is a freelance content creator with over two decades of experience working in digital and print and was previously the DIY content editor for Homebuilding & Renovating.
He is a keen DIYer with over 20 years of experience in transforming and renovating the many homes he has lived in. He specialises in painting and decorating, but has a wide range of skills gleaned from working in the building trade for around 10 years and spending time at night school learning how to plaster and plumb.
He has fitted kitchens, tiled bathrooms and kitchens, laid many floors, built partition walls, plastered walls, plumbed in bathrooms, worked on loft conversions and much more. And when he's not sure how to tackle a DIY project he has a wide network of friends – including plumbers, gas engineers, tilers, carpenters, painters and decorators, electricians and builders – in the trade to call upon.
