Painting Skirting Boards: How to Tackle the Task in 5 Easy Steps
Planning on painting skirting boards to keep your home looking it's best? This handy step-by-step guide has got you covered

Painting skirting boards on a DIY basis can be a cost-effective way to spruce up your home.
Skirting boards are there to protect the walls and in the line of duty will get dirty, scuffed and chipped. Giving them a fresh coat of paint - or varnish - will smarten up a room and keep them protected.
Any DIYer can tackle painting skirting boards themselves, and do a good job if they do the prep work properly. This includes choosing the right paint - a primer for bare wood, undercoat and top coat for a durable and fresh finish. To keep natural wood skirting boards protected - and looking good - a couple of coats of tough varnish will do the job.
Follow this step-by-step guide to get a professional finish for a fraction of the price.
Typically skirting boards should be the last part of a room you should paint. But if you are hanging wallpaper, paint the skirting boards first. Make sure you paint onto the wall by approximately one inch. This creates a sharp finish between the skirting board and wallpaper.
Remember, when decorating a room you start at the top and finish at the bottom, making skirting boards - and architrave - last in the process. This helps prevent any drip marks from ruining newly painted skirting boards and architraves. And, it means you won’t have to spend another day painting your skirting boards again.
(MORE: Painting a Ceiling)
You Will Need...
- Primer
- Undercoat
- Gloss/satin paint
- 2” paint brush
- Dust sheets
- Masking tape
- Sandpaper
- Wood knot solution
- Sugar soap
- Sponge.
Preparation
Step 1: Clear the Floor
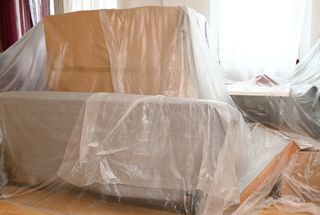
Ideally, you want to be painting all the skirting boards in a room at the same time. So the first step is to move furniture into the centre of the room and cover with dust sheets to keep clean.
Give yourself at least a couple of feet of space from the wall to make painting the skirting boards comfortable. Give yourself more space if you can - an empty room is good.
Step 2: Protect the Floor Before Painting Skirting Boards
You will need to protect the floor to prevent getting paint on it.
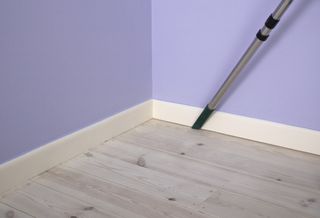
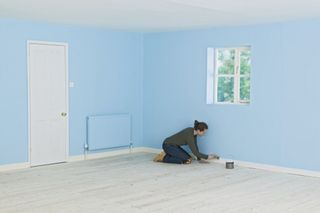
If you have bare floorboards, a strip of masking tape will do the job. Sweep or vacuum the floor first for better tape adhesion. A strip of masking tape will help stop dust and debris getting in the brush. You can cover the bare floorboards if you don't want to get paint on them. But if flooring/carpet is being laid later it doesn’t matter too much.
If you have flooring that needs protection, like carpet, vinyl or wood, there are a few options. Put down a strip of masking tape as close to the skirting board as possible - put down a double strip if you want to be extra careful. In the case of carpet, you may even be able to tuck some of the masking tape between the carpet and the skirting.

To make sure no paint gets onto any flooring, put down dust sheets across the whole floor. You can tape down edges of the dust sheets near the skirting board for more secure protection. Alternatively, you can tape down newspapers near the skirting board and then use dust sheets to cover the rest of the floor.
If you have enough of a gap between the flooring and skirting board - this is more likely if you have vinyl or wood flooring - you can use plastic sheets. Stretch out the sheets and gently push the plastic sheet into the gap using a flat paint scraper or filling knife.
If you are a confident DIYer you can use a decorators paint shield. Place firmly up against the skirting board and paint the section above. Move and paint the next section and repeat until complete.
Step 3: Clean, Treat and Sand the Skirting Boards

Need more advice or inspiration for your project? Get two free tickets to the Homebuilding & Renovating Show
Bare Wood Skirting Boards
If you have bare wood skirting boards, such as pine or oak, you need to give them a quick sand to get rid of any imperfections and improve adhesion. Use a fine grade sandpaper (120 grit is fine).
If your skirting boards have wood knots, treat with an appropriate wood knot solution to stop any resin seeping out after painting and ruining your beautifully painted skirting boards. The same method needs to be applied to MDF skirting boards. A lot of MDF skirting boards come pre-primed so will need a quick sanding to improve adhesion.
Painted Skirting Boards
Skirting boards that have already been painted will need cleaning and sanding. Use sugar soap and a sponge to get rid of dirt and grease. Wipe dry and then sand down with a fine grit sandpaper. Use a hand sander (if you have one) to speed up the process. To get rid of any dust, first vacuum and use a damp cloth to finish.

Application
Step 4: Prime and Paint the Skirting Boards
If you are right-handed start painting skirting boards from the right. If left-handed, do the reverse. This won’t affect the finish but it will make it easier for you to paint.
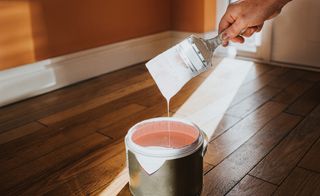
The first coat on bare wood skirting boards needs to be a primer. This will seal the wood and stop it from absorbing too much paint. For maximum adhesion and longevity an oil-based wood primer is the best choice. Alternatively, you can buy an all-in-one primer and undercoat such as Dulux Wood White Wood Primer & Undercoat.
To apply the paint to a skirting board, a 2-inch brush is needed. This is good for cutting in along the top edge of a skirting board and provides good coverage in detailed and flat areas. You might want to switch to a 1-inch brush to get crisp straight lines in the corners.
Start at the top of the skirting board when applying the primer and make sure you don’t overload the brush. This helps stop drips and runs.
If you are confident you can cut in and create a straight edge. If you are not so confident, use masking/painters tape along the top of the skirting board. Take your time and make sure that the tape is close to the skirting board and is in a straight line.

Radiator pipes are typically close to skirting boards. To keep paint off the pipes use masking tape. Put on in vertical strips, starting at the back of the pipe. You shouldn’t need more than two strips.
Paint in one metre sections. If you are using ogee or decorative skirting boards add paint into all the grooves, then go back over with consistent brush strokes to even out the paint. Once the top of the skirting board is done finish the rest of the section. Now repeat until you reach the corner.
Go back and check coverage. If there are any runs or drips, lightly run the brush over them to spread the paint for an even finish.
Once the primer is dry (this should take 2-4 hours) rub down with a fine sandpaper.
Next, clean and apply a coat of undercoat - this typically takes around 1-2 hours to dry. Repeat the process and add a second coat of undercoat.
When dry rub down lightly and apply the top coat. Gloss provides a good tough finish, but if you want something with a little less sheen, but still a good finish, try satinwood or eggshell. This typically takes around 2-4 hours to dry.
To make sure the paint is completely dry, leave for an extra hour or two.
Step 5: Remove the Masking Tape
Now remove the masking tape to finish the job. Peel off slowly and hold at a 45-degree angle as you pull. If the tape is proving difficult to remove, run a Stanley knife - or razor blade - along the edge of the tape where it meets the skirting board to cut and create a straight edge. Be careful. Hold the knife at a 45-degree angle so not cut the skirting board or flooring.
Maintenance
How to Keep Painted Skirting Boards Looking Fresh
Skirting boards attract dust and are prone to getting to the odd scuff mark, so to keep them clean they need regular dusting.
For stubborn dirt or scuff marks, use warm soapy water and a cloth. Washing up liquid is good. If needed, use a sponge scourer - but be gentle. Try not to use strong detergents or sprays for regular cleaning as this can affect the paint.
How to Touch Up Any Knocks or Chips
Skirting boards are often kicked or knocked which can leave dents or chipped paint.
For dents or chips you need to fill and paint - or just paint depending on size and depth. Get a decent wood filler such as Ronseal High Performance Natural Ready Mixed Wood Filler and fill - if needed. Let dry and rub down with a fine 120-grit sandpaper.
Then apply undercoat, let it dry and give a gentle rub down. Use a small 1-2 inch brush. Apply another coat if needed and gently rub down. Finally apply a top coat.
Get the Homebuilding & Renovating Newsletter
Bring your dream home to life with expert advice, how to guides and design inspiration. Sign up for our newsletter and get two free tickets to a Homebuilding & Renovating Show near you.
Steve Jenkins is a freelance content creator with over two decades of experience working in digital and print and was previously the DIY content editor for Homebuilding & Renovating.
He is a keen DIYer with over 20 years of experience in transforming and renovating the many homes he has lived in. He specialises in painting and decorating, but has a wide range of skills gleaned from working in the building trade for around 10 years and spending time at night school learning how to plaster and plumb.
He has fitted kitchens, tiled bathrooms and kitchens, laid many floors, built partition walls, plastered walls, plumbed in bathrooms, worked on loft conversions and much more. And when he's not sure how to tackle a DIY project he has a wide network of friends – including plumbers, gas engineers, tilers, carpenters, painters and decorators, electricians and builders – in the trade to call upon.
