Painting a Garage Door: Your Step-by-Step Guide
Painting a garage door can transform your home’s exterior with a fresh new look. Here's how to do it yourself while still achieving a professional finish
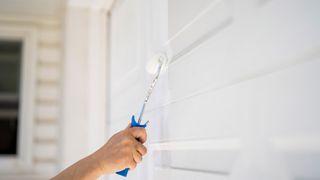
Painting a garage door will add instant kerb appeal to your home. New paint will also weather protect your garage door and add a few more years before you need to replace it.
Any competent DIYer will be able to take on the job, you just need to make sure that you get your prep done and choose the right paint.
It won’t take more than a day or two to paint a garage door but the weather conditions need to be right. Too cold, too hot or too wet and you won’t get the best results. So make sure to plan ahead.
Here’s everything you need to know from your essential tool kit to applying the paint.
(MORE: Best Garage Doors)
How Much Does Painting a Garage Door Cost?
The cost will vary depending on the size of the door and if you need to purchase any gear such as brushes and rollers etc.
A typical single garage door is 6ft 6in x 7ft (approximately 45 sq ft), and a double door will be around 14 ft x 7ft (approximately 98 sq ft). You will need approximately 0.5 litre for one coat of paint on a single door and 1 litre for a double door.
Paint for a single garage door with a primer and two coats would cost you around £50, plus any materials if needed, totalling approximately £70. Double the cost for a double door.
The pros charge around £15-20 an hour plus paint. So expect to pay around £120+ for a single door with little or no prep needed, and around £200+ for a single garage door with prep and a primer and two coats.
You Will Need
Essential Tools for Painting a Garage Door
- Brush
- Roller
- Paint
- Dust sheets
- Paint scraper
- Sponge
- Sugar soap
- Masking tape or painters tape
- Sandpaper
- Filler
- Putty Knife
Choosing the Right Paint for Painting a Garage Door
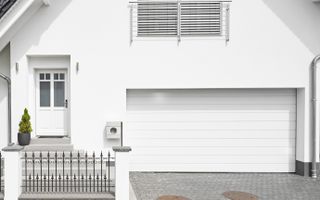
Garage doors can be made from a range different materials:
- wood
- metal
- GRP (glass reinforced polyester)
- PVCu.
Wood and metal garage doors are the common choice for painting, while PVCu doors aren’t manufactured with the intention of being painted but can be. The same applies to GPR doors; it’s a job best left to the professionals.
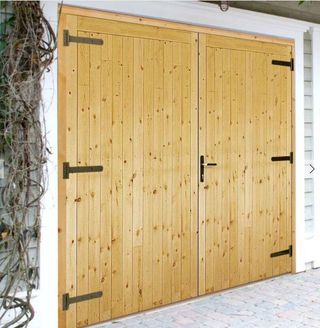
Bare wood doors should start with a wood primer and be finished with exterior wood paint like Ronseal 10 Year Weatherproof Exterior Wood Paint. Previously painted doors just needed exterior wood paint. Alternatively, if you want to keep a natural wood finish try a varnish such as Ronseal Exterior Yacht Varnish.
When choosing a colour for your garage door consider taking a colour that is already being used on the outside of your home. If you have grey windows, eaves or fascia try painting your garage door grey. This will give a much more cohesive look.
Bare metal garage doors will need a specialist primer such as Hammerite Special Metals Primer to get the best finish. Then use a specialist metal paint with rust inhibitors to finish off the door.
Hammerite does a wide range of metal paints, try Hammerite Direct to Rust Metal Paint for a gloss finish. Alternatively, try Hammerite Garage Door Paint or Rust-Oleum Universal Paint.
For a PVCu door try Dulux Weathershield Multisurface Paint. The manufacturer says you don't need a primer, but for a better finish we suggest using one such as Zinsser 123 Bulls Eye Primer/Sealer.
Preparation
Step 1. Clean the Area
Before you start cleaning, decide if you need to remove your garage door to get the finish you want. Typically you won't, but if your door is easy to remove - and you don't need it for security reasons - it can be an option. But, if unsure, do not remove it.
Before any paint is put on your garage door, it needs to be cleaned. First, brush over the door to remove any dirt, dust and cobwebs. Don’t forget to include the frame if you are going to paint this.
Also, sweep around the area by the bottom of the garage door. This is to help ensure that no dirt or dust on the ground gets on your wet paint.
Step 2: Fill and Sand Any Cracks or Dents
If your door has flaking paint or rust spots, use a paint scraper to remove the worst of it. Now fill in any cracks or dents. If you have a wooden door, use an appropriate exterior filler - Everbuild High Performance Wood Filler is a good choice and it sets rock hard.
If you have a dent in a metal door, first sand with the area for extra adhesion. A 80-120 grit sandpaper is good for this. Now fill with a suitable exterior filler - Big Boy Metal Filler is a good choice. Sand down the filler with 120 grit sandpaper and a lighter 150-180 grit to blend the edges.
The next step is to give the complete door a sand. Use a medium grade sandpaper to smooth out the surface and get rid of any rust spots if you have a metal door.
Use an electric hand sander - if you have one - to speed up the process. If you are painting the garage door frame, don’t forget to repair and sand as you would the door.
Step 3: Reclean and Cover Any Door Furniture
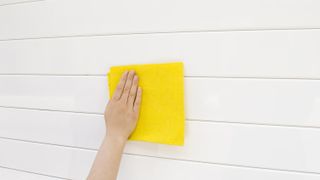
Once the door has been prepped it will need a final wash to remove any debris, dirt and grease. First brush down or vacuum to remove all loose material. Now wash down with warm soapy water (washing up liquid will do).
If you have any stubborn stains that need a little more elbow grease, invest in some sugar soap. Hose down the door and wait for the door to dry.
Finally, cover any garage door furniture such as door runners - typically up and over doors - and door handles with masking tape. Remove door handles if possible.
Now lay down any dust sheets. If you are spraying the frame and door you will need to cover the wall with plastic sheets or cardboard. Cover at least 12 inches from the frame/door.
Application
Step 4. Apply a Primer
If your garage door is bare wood, bare metal or PVCu, then the first coat should be a primer. This can be applied with a brush and a roller. Depending on the paint, drying time can range from one to eight hours.
Step 5. Paint the Frame
We recommend that you start by painting the frame first.
Use a brush for this and check the finish when dry. If needed, give it a quick sand over with a fine-grit 220 sandpaper.
Step 6. Paint the Garage Doors
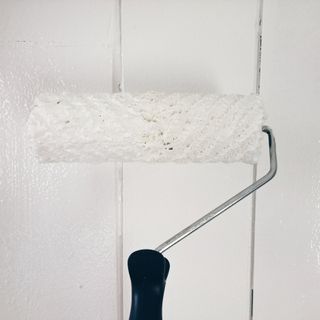
The next step is to paint the door itself. Start by using a brush on the thin edges of the garage door. Garage doors have a large surface area so a 9-inch roller is a good choice - use a foam roller for a smooth finish.
If your door has panels, insets or glass, then you will need a brush as well. Probably a 2-4 inch brush to get into the panel edges. Use masking tape and newspaper to protect any glass.
You don’t want to get paint drips on an area you have already painted, so make sure you start in a top corner. Then work your way across and then down, across, down and across etc, until you get to the bottom of the door.
Do in 12-inch wide sections. As always, when painting large areas, do not apply too much paint in one go as this will cause runs.
Many paints claim that you only need a single topcoat. Take a look after the first topcoat has dried and make a judgement call.
If you are happy, you can leave it, but adding a second will give a better finish and offer better protection against the weather. The same principles apply if you are painting a door or using a varnish.
Can I spray paint a garage door?
Using an electric spray gun will give a lovely smooth finish - much like a car. You will need to apply a base coat, and at least two topcoat coats, and you will need to cover the brickwork around the garage door. So a bit more prep work is required.
Runs can easily occur, especially if you are new to the art of paint spraying. You will need to apply several thin coats, which makes paint spraying a little more time-consuming. If you are set on having your door sprayed, it might be a good time to call in a professional. Check local tradespeople for prices, but a rough guide is £200 for a standard door.
Can I add a second colour?
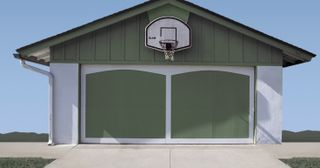
Typically a garage door is one colour and this keeps it simple. But, you may want to add another colour or two. For example, you may want to paint panels on your white garage door a darker colour. A simple rule is to add the lightest shade first such as white. Once dry, you can mask off all areas not to be painted the darker colour and paint.
If it’s a dark door and you want light panels, paint the dark areas but do not paint the areas you want to paint the lighter colour. When the paint is completely dry, mask off the areas you aren’t going to paint with tape and newspaper or plastic sheets to protect and apply the second colour.
Typically, it will take more coats to fully cover the dark colour with the light. Make sure the paint is fully dry before applying another coat and rub down with fine sandpaper in-between coats for a smoother finish.
Introducing a second colour will mean that painting the door will take almost twice as long as painting a single colour.
Maintenance
How to Touch-up Paint Chips
A newly painted garage door will need a little maintenance to keep it looking as good as new. As time passes a door can get a knock that chips the paint or, as it weathers paint can start to peel.
To repaint an area - this applies in general to all types of garage doors - first remove any debris and then sand down the area and clean.
Then paint as before and remember to add a primer if its bare wood/metal.
Dab on paint with a small brush and smooth out with light strokes. If needed gently rub down with a fine grit sandpaper, 220-320, and add a second coat when the first one is dry.
How to Clean Your Painted Garage Door
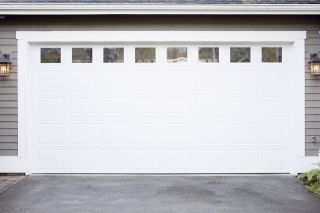
To keep a garage door looking fresh you need to clean it regularly. Ideally every six months. First, clean off with a brush and wash down with a garden hose to get rid of loose dirt and debris.
Next, get a bucket of warm water with a squeeze of washing up liquid and wash down the door with a sponge. Rinse off with a garden hose (not a pressure washer) and leave to dry. Remember to clean the frame and any weather strips.
(MORE: How to Paint a Room)
Get the Homebuilding & Renovating Newsletter
Bring your dream home to life with expert advice, how to guides and design inspiration. Sign up for our newsletter and get two free tickets to a Homebuilding & Renovating Show near you.
Steve Jenkins is a freelance content creator with over two decades of experience working in digital and print and was previously the DIY content editor for Homebuilding & Renovating.
He is a keen DIYer with over 20 years of experience in transforming and renovating the many homes he has lived in. He specialises in painting and decorating, but has a wide range of skills gleaned from working in the building trade for around 10 years and spending time at night school learning how to plaster and plumb.
He has fitted kitchens, tiled bathrooms and kitchens, laid many floors, built partition walls, plastered walls, plumbed in bathrooms, worked on loft conversions and much more. And when he's not sure how to tackle a DIY project he has a wide network of friends – including plumbers, gas engineers, tilers, carpenters, painters and decorators, electricians and builders – in the trade to call upon.
