How To Lay Decking: A Step By Step Guide
Learn how to lay decking with this easy-to-follow tutorial and transform your garden ready to enjoy this summer

Learning how to lay decking is a great idea if you're a competent DIYer — it's a pretty achievable and low-risk project, and it'll save you a lot doing it yourself in comparison to hiring in a tradesperson.
While this tutorial specifically focuses on an example using timber decking, much of the process of creating the base for the decking is the same when you have composite decking. You can then refer to the manufacturer's guide when it comes to fixing your composite decking boards.
(MORE: 10 Ways to Get Your Garden Summer Ready)
Creating a decked area can be quite heavy in its use of materials. For example, this 4.5 x 3.3m deck project took:
- 48 linear metres of wood
- 36 deck boards
- 800 screws
How much would a similar project cost for a professional to make? We'd estimate around £250-500 to build a deck of similar dimensions, something worth costing up against the investment in the required tools for future projects if you don't already own them.
Tool List:
- Tape measure
- Drill
- Jigsaw
- Hammer
- Nail gun (optional)
- Spirit level
- Screwdrivers
- Battery drill/ screwdriver
- Workbench
- Gloves
- Mitre saw
(MORE: Best Cordless Drills)
Materials:
- Weed control fabric
- Wood for framework
- 50mm number-8 decking screws
- 100mm nails or nail gun ‘clips’
- Wood preserver
- 25mmx50mm wood for stakes
- Decking
- Slabs
How to Lay Decking Step by Step
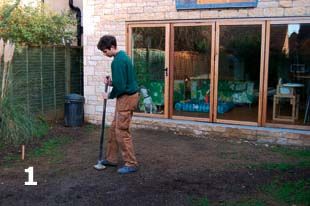
1. Work out where you want to build the deck and compress any loose soil with a thumper or a heavy roller.
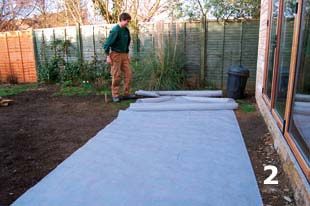
2. Lay weed-control fabric over the whole site to stop unwanted greenery from poking through and ruining the finished appearance of your decking.
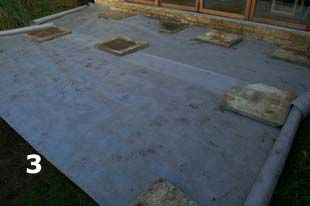
3. Lay concrete slabs at the corner and centre points of the space you want to deck. The slabs provide a solid, load-spreading foundation for the deck and keep the wooden frame clear of the damp ground. Put a straight piece of wood on top of the slabs and check for level. Get the level as close as you can now by adding more slabs, if necessary.
Other options for this foundation part of the job include concreting pressure-treated wooden posts in the ground at regular intervals to support the frame this is particularly useful for creating a level deck on a sloping site. Dedicated deck blocks that are slotted to take the joists of the frame are also available.
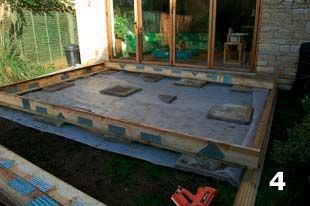
4. Make up a simple box frame that will allow the decking to overhang by the thickness of a board at each edge (around 32mm but check the thickness of the boards you are using).
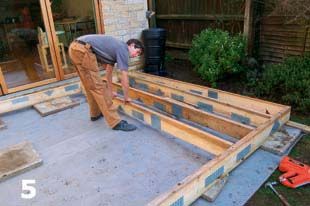
5. Lay the joists inside the frame so that they have 400mm gaps between them.
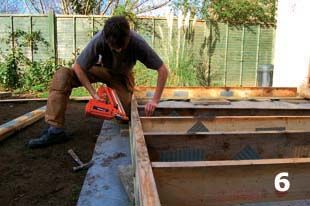
6. Nail the joists in place. A nail gun comes in very handy for this part of the job. Most tool hire outlets stock them.
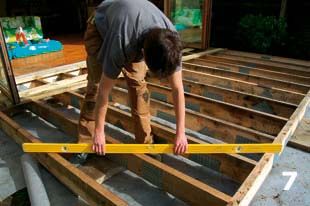
7. Once the main frame is built, check it for level. If the frame needs lifting by a small amount to make it level, sections of slate or even floor tile can be inserted where necessary.
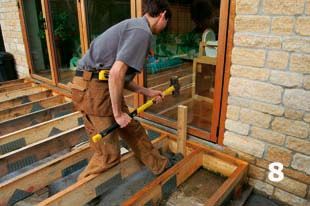
8. Make up some 600mm pointed stakes from 25mm x 50mm timber. Treat these with a couple of coats of wood preserver and hammer them in at eight inside corners around the frame. Screw through the stakes into the frame to prevent the structure moving around.
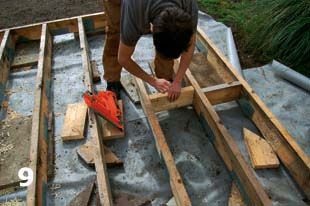
9. Measure, cut and fit noggings staggered along the centre line of the frame. These provide extra strength.
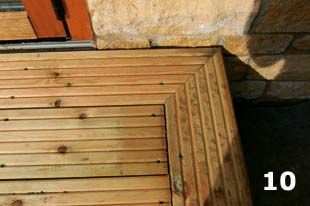
10. For this project we decided to run the outside edges at 90 degrees to the main decking planks that were to run parallel with the back of the house. To get this attractive effect to work well, you’ll need to mitre the point where the decking planks meet. A manual mitre saw is available quite cheaply from most DIY stores.
Lay the planks roughly in position before you cut them and then put a pencil line across the plank in the direction you want the mitre to be. Set the saw to 45 degrees and make sure it is pointing in the same direction as the pencil line; insert the plank and cut. Repeat for the adjoining plank.
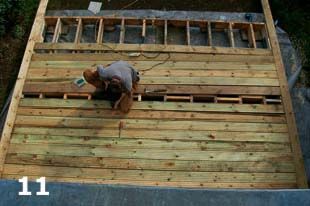
11. With the inner corners mitred you can now start to lay the decking planks. Fix the planks 5mm apart with two screws at each joist.
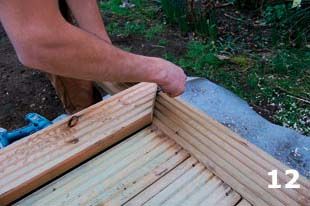
12. Once the decking planks are fixed, mitre the outside corners using the method described in step 10. Plane and sand a rounded edge on the outer corners.
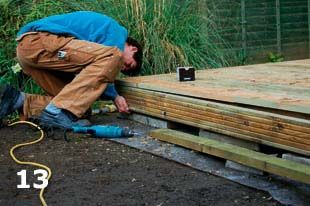
13. Fix a decking plank to the front, back (if seen) and sides of the frame. The face of this plank should fit flush with the edge of the outer panels.
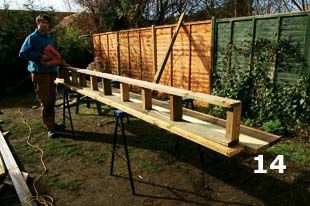
14. If there’s a big drop off the deck onto the garden, you can easily add a step. Make up a framework wide enough to take two decking planks. If you want to face the vertical part of the step with decking, reduce the width of the frame by the thickness of the deck plank you are using.
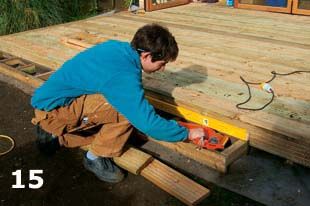
15. Level and fix the frame all round the deck.
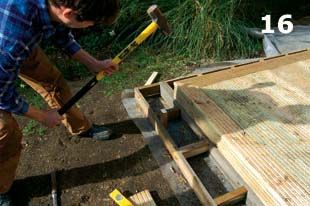
16. Make up stakes (see step 8) and hammer in place. Screw through to the frame to secure the framework.
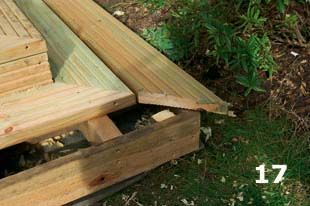
17. Mitre and lay the decking planks for the steps and fix in place with two screws at every joist. Finally, screw decking panels to the front face of the step to create a neat finish.
Get the Homebuilding & Renovating Newsletter
Bring your dream home to life with expert advice, how to guides and design inspiration. Sign up for our newsletter and get two free tickets to a Homebuilding & Renovating Show near you.
Ben is a writer and a keen DIYer, and has undertaken a multiple of tasks from installing loft insulation, tiling, painting windows to fitting garden fences and reviving period fireplaces. He has also converted his loft on a DIY basis.
