Ta bilder med iPad-kameran
Lär dig hur du tar bra bilder med kameran ![]() på iPad. Välj mellan kameralägen som Bild, Panorama eller Kvadrat och använd kamerafunktioner som bildserier och Live Photo-bilder.
på iPad. Välj mellan kameralägen som Bild, Panorama eller Kvadrat och använd kamerafunktioner som bildserier och Live Photo-bilder.
Fråga Siri. Du kan t.ex. säga: ”Öppna Kamera.” Läs om hur du frågar Siri.
Ta en bild
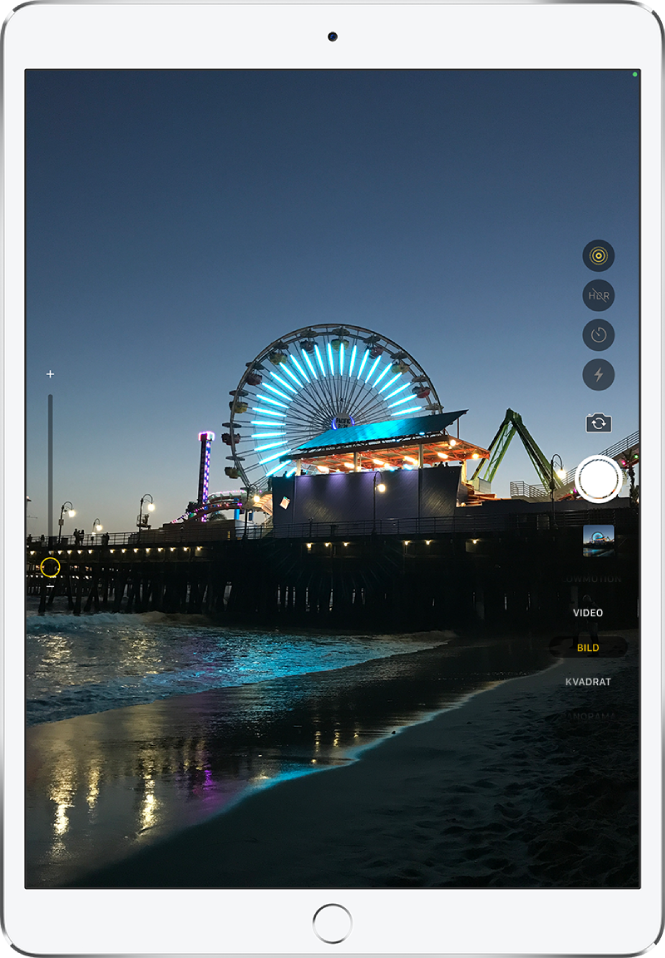
Bild är det förvalda läget när du öppnar Kamera. Använd bildläget till att ta stillbilder. Svep lägesväljaren åt uppåt eller nedåt om du vill välja ett annat läge som video, panorama, uppsnabbat, slowmotion och porträtt (på modeller som stöds).
Öppna Kamera i bildläget genom att trycka på
 på hemskärmen eller svep åt vänster på låsskärmen.
Tryck på slutarknappen eller tryck på någon av volymknapparna för att ta bilden.
Om du vill slå på eller stänga av blixten på modeller med stöd för True Tone-blixt eller Retina-blixt trycker du på ![]() och väljer Auto, På eller Av.
och väljer Auto, På eller Av.
Om du vill ställa in en timer stabiliserar du iPad och komponerar bilden. Tryck på ![]() och tryck sedan på 3 sek eller 10 sek.
och tryck sedan på 3 sek eller 10 sek.
Obs! Av säkerhetsskäl visas en grön punkt högst upp på skärmen när kameran används. Se Styra tillgången till maskinvarufunktioner.
Zooma in eller ut
Zooma in eller ut genom att öppna Kamera och nypa ihop eller dra isär fingrarna på skärmen (alla modeller).
På iPad Pro 11 tum (andra generationen och senare) och iPad Pro 12,9 tum (fjärde generationen och senare) trycker du på 1x till vänster om skärmen när du vill zooma ut och växla mellan 1x och 0,5x. Om du vill zooma in håller du på 1x och drar reglaget uppåt.
På alla modeller kan du dra reglaget till vänster på skärmen uppåt eller nedåt.
Ta en panoramabild
Välj panoramaläget och tryck sedan på slutarknappen.
Panorera långsamt i pilens riktning och håll den på centrumlinjen.
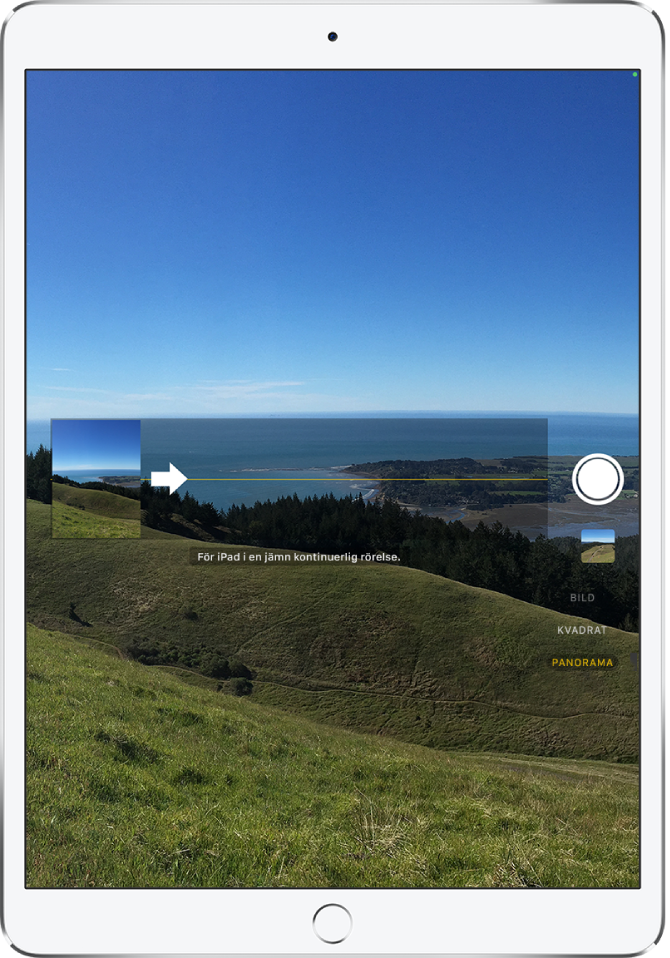
Tryck på slutarknappen igen för att slutföra.
Tryck på pilen för att panorera åt andra hållet. Om du vill panorera vertikalt vrider du iPad till liggande riktning. Du kan även byta riktning på vertikal panorering.
Ta en selfie
Växla till kameran på framsidan genom att trycka på
 eller
eller  (beroende på modell).
Håll iPad framför dig.
Tryck på slutarknappen eller tryck på någon av volymknapparna för att ta bilden.
Tips: På iPad Pro 12,9 tum (femte generationen) och iPad Pro 11 tum (tredje generationen) trycker du på ![]() till vänster på skärmen när du snabbt vill zooma ut och öka synfältet. Tryck på
till vänster på skärmen när du snabbt vill zooma ut och öka synfältet. Tryck på ![]() för att zooma in igen.
för att zooma in igen.
Om du vill ta en spegelvänd selfie som sparar bilden som du ser den i den främre kamerans ram, öppnar du Inställningar ![]() > Kamera och slår på Spegelvänd kameran på framsidan eller Spegelvänd bilder från framsidan (tidigare modeller).
> Kamera och slår på Spegelvänd kameran på framsidan eller Spegelvänd bilder från framsidan (tidigare modeller).
Ta en selfie i porträttläge
På modeller som stöds kan du använda en skärpedjupseffekt när du tar en selfie med kameran på framsidan. Effekten skapar en vackert oskarp bakgrund med ditt ansikte i fokus.
Välj porträttläget.
Kameran på framsidan är nu aktiv.
Placera dig själv i den gula porträttrutan.
Ta bilden genom att trycka på slutarknappen.
Justera porträttljuset för en selfie i porträttläge
På modeller med stöd för porträttljus kan du använda ljuseffekter av studiokvalitet på en selfie som har tagits med porträttläget.
Välj porträttläget och arrangera din selfie.
Dra
 för att välja en ljuseffekt:
Naturligt ljus: Ansiktet är i skarpt fokus medan bakgrunden är suddig.
Studioljus: Ansiktet får en kraftig belysning och bilden får ett allmänt rent utseende.
Konturljus: Ansiktet har dramatiska skuggor med högdagrar och lågdagrar.
Scenljus: Ansiktet är belyst mot en kolsvart bakgrund.
Scenljus mono: Effekten påminner om Scenljus, men bilden är i klassiskt svartvitt.
Svartvitt high key-ljus: Skapar ett motiv i gråskala på en vit bakgrund – endast iPad Pro 11 tum (andra generationen och senare) och iPad Pro 12,9 tum (fjärde generationen och senare).
Ta bilden genom att trycka på slutarknappen.
Justera djupet i en selfie i porträttläge
På modeller som stöder djupkontroll kan du använda reglaget Djup till att justera hur oskarp bakgrunden är i selfiebilder som är tagna med porträttläge.
Välj porträttläget och arrangera din selfie.
Tryck på
 till höger på skärmen.
Reglaget Djup visas till höger.
Justera effekten genom att dra reglaget uppåt eller nedåt.
Ta bilden genom att trycka på slutarknappen.
När du har tagit en bild i porträttläge kan du använda reglaget Djup i Bilder för att ytterligare justera oskärpeeffekten för bakgrunden. Se Justera djupet i bilder tagna med porträttläge.
Ta actionbilder med bildserieläget
Bildserieläget tar flera bilder i hög hastighet så att du kan välja mellan en rad bilder. Du kan ta bildserier med kamerorna på framsidan och baksidan.
Välj läget Bild eller Kvadrat.
Håll på slutarknappen för att ta en rad bilder i snabb följd.
Räknaren visar hur många bilder du tog.
Du slutar ta bilder genom att lyfta fingret.
Du väljer de bilder som du vill behålla genom att trycka på bildseriens miniatyr och sedan på Välj.
Grå punkter under miniatyrerna markerar förslag till bilder att behålla.
Tryck på cirkeln i det nedre högra hörnet av varje bild som du vill spara som en separat bild och tryck sedan på Klar.
Om du vill radera alla bilderna i bildserien trycker du på miniatyren och sedan på ![]() .
.
Ta en Live Photo-bild
En Live Photo-bild spelar in det som händer precis före och efter att du tar bilden samt ljudet.
Välj bildläget på modeller som har stöd för Live Photo-bilder.
Slå på eller stäng av Live Photo-bilder genom att trycka på
 (gul är på).
Ta bilden genom att trycka på slutarknappen.
I albumen markeras Live Photo-bilder med ”Live” i övre vänstra hörnet. Du kan redigera Live Photo-bilder och lägga till effekter som Loopa och Studsa. Se Redigera Live Photo-bilder.