Set a default font in Pages on Mac
You can set a default font and font size for the templates in the Basic category. Each time you begin a new document using these templates, your preferred font and font size are used.
For other templates, you can set your own fonts for paragraph styles, then save the template as a custom template. The next time you start a new document, choose your custom template from the My Templates section of the template chooser and just start typing.
Set a default font and font size for Basic templates
The font and font size you choose apply to the Body paragraph style. Other paragraph styles use the same font, and their sizes adjust according to the font size relationships of the original template. For example, if you choose Lucida Grande and 12 points, the Title paragraph style in the Blank template uses Lucida Grande and its size is 33 points instead of 30 points.
Choose Pages > Settings (from the Pages menu at the top of your screen).
Click General, then select the checkbox next to “Set font and size for new Basic documents.”
Click the Font pop-up menu and choose a font.
Click the arrows next to Font Size to choose a font size, or type a value in the text field.
Click OK.
After you make the update to the setting, it applies to any new documents; it doesn’t change the font for existing documents. If you later want to revert the templates to their original fonts, deselect the “Set font and size for new documents” checkbox.
Create a custom template with your font choices
In Pages, choose File > Open, then click New Document.
The template chooser opens.
In the template chooser, double-click any template.
In the Format
 sidebar, click the Style button near the top.
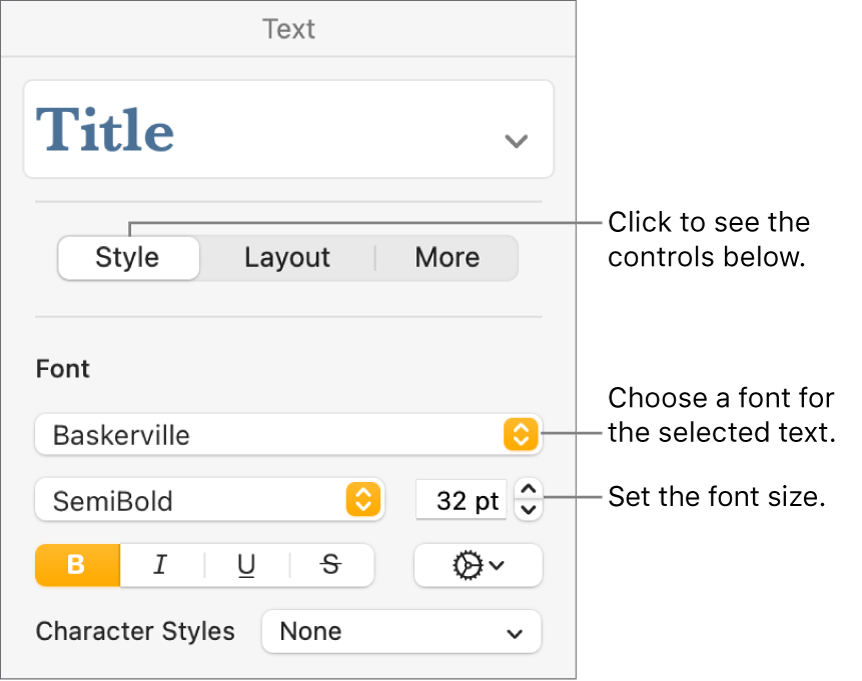
Click the paragraph style at the top of the sidebar (in the example above, it’s Title), then choose the style you want to modify.
Tip: You don’t have to modify every paragraph style in the template; for example, for a simple letter or document, you may want to modify only the body text style and a heading style.
In the Font section of the sidebar, choose a font and font size for the paragraph style you selected.
You can also use other controls in the Font section to choose character styles like bold and italic, and change the text color.
Update the paragraph style with your changes:
If there’s an Update button: Click Update.
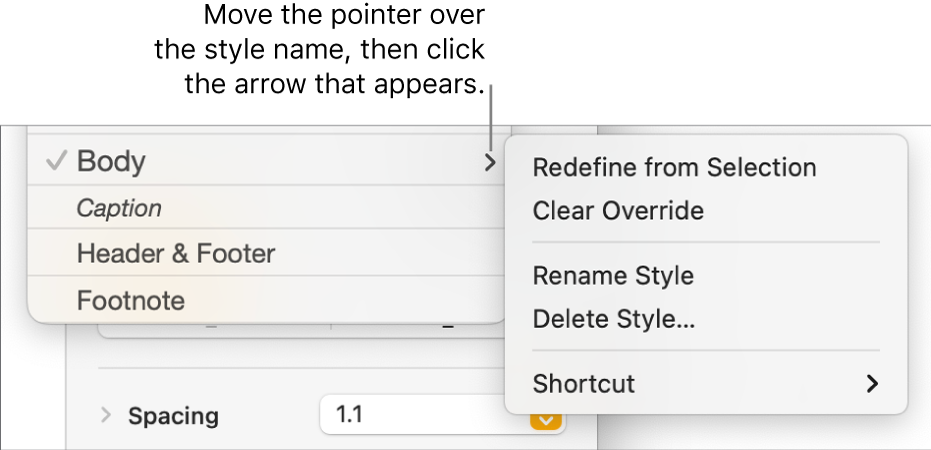
If there’s only an asterisk next to the paragraph style: Click the style name, then move the pointer over the style name in the Paragraph Styles pop-up menu. Click the arrow that appears, then choose Redefine from Selection.

You can rename the style and delete styles you don’t want to keep.
If you typed in the template, delete any text that you don’t want to appear every time you open the template.
For example, you may want to include your name and address in a letter template, but not sample text that you typed to set up your paragraph styles.
When you’re finished, choose File > Save As Template (from the File menu at the top of the screen).
The original Blank template is still available from the template chooser.
Click Add to Template Chooser, then type a name for your new template.
The template is added to the My Templates category of the template chooser.
Tip: In Pages settings you can set your template to always open when you choose File > New. To learn how, see Create new documents from a specific template.
For more information about creating and installing custom templates, see Create and manage document templates.
You can set Pages to automatically start new documents with any template you designate.