Layer, group, and lock objects in Keynote for iCloud
You can work with and arrange the objects on a slide in a number of ways:
Layer (or stack) objects to create the appearance of depth
Group objects to more easily move, resize, or rotate them as a single unit
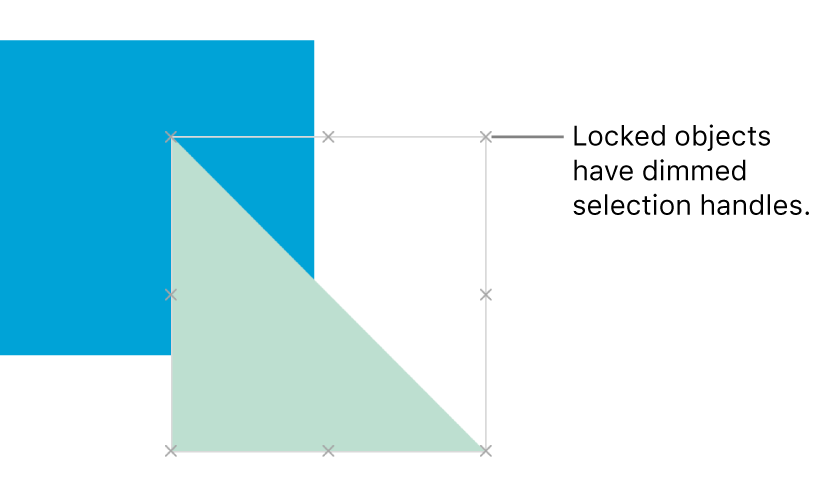
Lock objects to avoid inadvertently moving, modifying, or deleting them
Layer objects
Click the object so its selection handles (blue dots) appear, or if it’s a table, so the row numbers and column letters appear.
Drag to overlap it with one or more other objects.
If the object is a table, you need to drag it by the square in the top-left corner of the table.
To change its position in the stack, click Arrange at the top of the Format
 sidebar on the right, then do one of the following:
Move an object a layer at a time: Click Backward or Forward.
Move an object to the very top or bottom of the stack: Click Back or Front.
Group objects
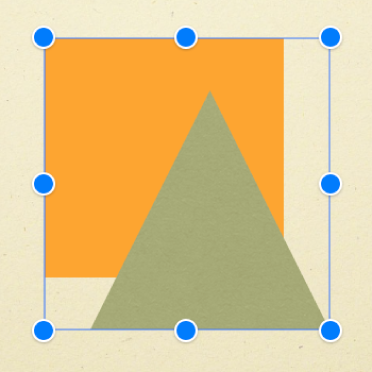
Select two or more objects you want to group together.
Click Arrange at the top of the Format
sidebar on the right, then click the Group button.Note: If the Group button is dimmed or doesn’t appear, the selected objects can’t be grouped.
The grouped objects have one set of selection handles, instead of separate selection handles for each object.
To separate grouped objects, select the group, click Arrange at the top of the sidebar on the right, then click the Ungroup button.