Logic Pro User Guide for iPad
- What’s new in Logic Pro 1.1
-
- What is Logic Pro?
- Working areas
- Work with function buttons
- Work with numeric values
-
- Intro to tracks
- Create tracks
- Create tracks using drag and drop
- Choose the default region type for a software instrument track
- Select tracks
- Duplicate tracks
- Reorder tracks
- Rename tracks
- Change track icons
- Change track colors
- Use the tuner on an audio track
- Show the output track in the Tracks area
- Delete tracks
- Edit track parameters
- Start a Logic Pro subscription
- How to get help
-
- Intro to recording
-
- Before recording software instruments
- Record software instruments
- Record additional software instrument takes
- Record to multiple software instrument tracks
- Record multiple MIDI devices to multiple tracks
- Record software instruments and audio simultaneously
- Merge software instrument recordings
- Spot erase software instrument recordings
- Replace software instrument recordings
- Capture your most recent MIDI performance
- Use the metronome
- Use the count-in
-
- Intro to arranging
-
- Intro to regions
- Select regions
- Cut, copy, and paste regions
- Move regions
- Remove gaps between regions
- Delay region playback
- Trim regions
- Loop regions
- Repeat regions
- Mute regions
- Split and join regions
- Stretch regions
- Separate a MIDI region by note pitch
- Bounce regions in place
- Change the gain of audio regions
- Create regions in the Tracks area
- Convert a MIDI region to a Drummer region or a pattern region
- Rename regions
- Change the color of regions
- Delete regions
- Create fades on audio regions
- Access mixing functions using the Fader
-
- Intro to Step Sequencer
- Use Step Sequencer with Drum Machine Designer
- Record Step Sequencer patterns live
- Step record Step Sequencer patterns
- Load and save patterns
- Modify pattern playback
- Edit steps
- Edit rows
- Edit Step Sequencer pattern, row, and step settings in the inspector
- Customize Step Sequencer
-
- Effect plug-ins overview
-
- Instrument plug-ins overview
-
- ES2 overview
- Interface overview
-
- Modulation overview
-
- Vector Envelope overview
- Use Vector Envelope points
- Use Vector Envelope solo and sustain points
- Set Vector Envelope segment times
- Vector Envelope XY pad controls
- Vector Envelope Actions menu
- Vector Envelope loop controls
- Vector Envelope release phase behavior
- Vector Envelope point transition shapes
- Use Vector Envelope time scaling
- Use the Mod Pad
- Modulation source reference
- Via modulation source reference
-
- Sample Alchemy overview
- Interface overview
- Add source material
- Save a preset
- Edit mode
- Play modes
- Source overview
- Synthesis modes
- Granular controls
- Additive effects
- Additive effect controls
- Spectral effect
- Spectral effect controls
- Filter module
- Low and highpass filter
- Comb PM filter
- Downsampler filter
- FM filter
- Envelope generators
- Mod Matrix
- Modulation routing
- Motion mode
- Trim mode
- More menu
- Sampler
- Copyright
Filter cutoff and resonance
In every lowpass filter (ES2: LP mode for Filter 1; Filter 2 is a lowpass filter), all frequency portions above the cutoff frequency are suppressed, or cut off, hence the name. If you’re new to synthesizers and the concepts behind filters, see Filters.

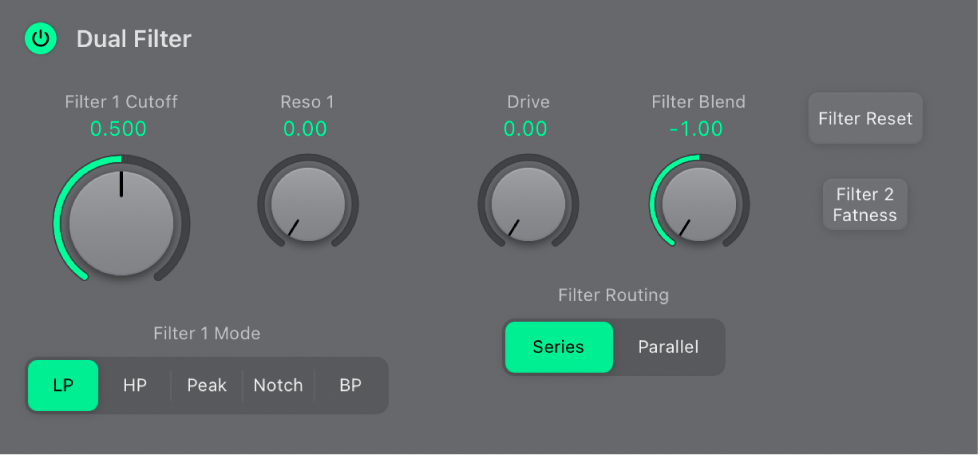
Cutoff and resonance parameters
Cutoff Frequency knob: Control the brilliance of the signal.
In a lowpass filter (LP), the higher the cutoff frequency is set, the higher the frequencies of signals that are allowed to pass.
In a highpass filter (HP), the cutoff frequency determines the point where lower frequencies are suppressed and only upper frequencies are allowed to pass.
In a bandpass (BP) or band rejection (notch) filter, the cutoff frequency determines the center frequency for the bandpass or band rejection filter.
Resonance knob: Emphasize or suppress portions of the signal above or below the defined cutoff frequency.
In a lowpass (LP) filter, Resonance emphasizes or suppresses signals below the cutoff frequency.
In a highpass (HP) filter, Resonance emphasizes or suppresses signals above the cutoff frequency.
In bandpass (BP) or band rejection (notch) filters, resonance emphasizes or suppresses the portions of the signal—the frequency band—that surround the defined frequency, set with the Cutoff Frequency parameter.
Use Filter Reset to drive the ES2 filters to self-oscillate
If you increase the filter Resonance parameter to higher values, the filter begins to internally feed back and, as a consequence, begins to self-oscillate. This results in a sine oscillation—a sine wave—that is audible.
To start this type of oscillation, the filter requires a trigger. In an analog synthesizer, this trigger can be the noise floor or the oscillator output. In the digital domain of the ES2, noise is all but eliminated. Therefore, when the oscillators are muted there is no input signal routed to the filter. Turn on Filter Reset to provide a trigger signal that can be used to drive the filter to self-oscillate.
In Logic Pro, tap the Filter Reset button to turn on.
When this button is enabled, each note starts with a trigger that makes the filter resonate/self-oscillate immediately.
Compensate for high resonance values with the ES2 Fat parameter
In Logic Pro, tap the Filt 2 Fat button.
An increase of the resonance value results in a rejection of bass—low frequency energy—when using lowpass filters. Use the Filt 2 Fat button to compensate for this side effect and to obtain a richer sound.
Download this guide: PDF