Intro to simple transcoding in Compressor
When you add a source file to Compressor and apply output instructions (all done in Current view), you create a transcoding job. You can submit a single job for transcoding, or add more source files (and output instructions), then submit a batch of jobs for transcoding.
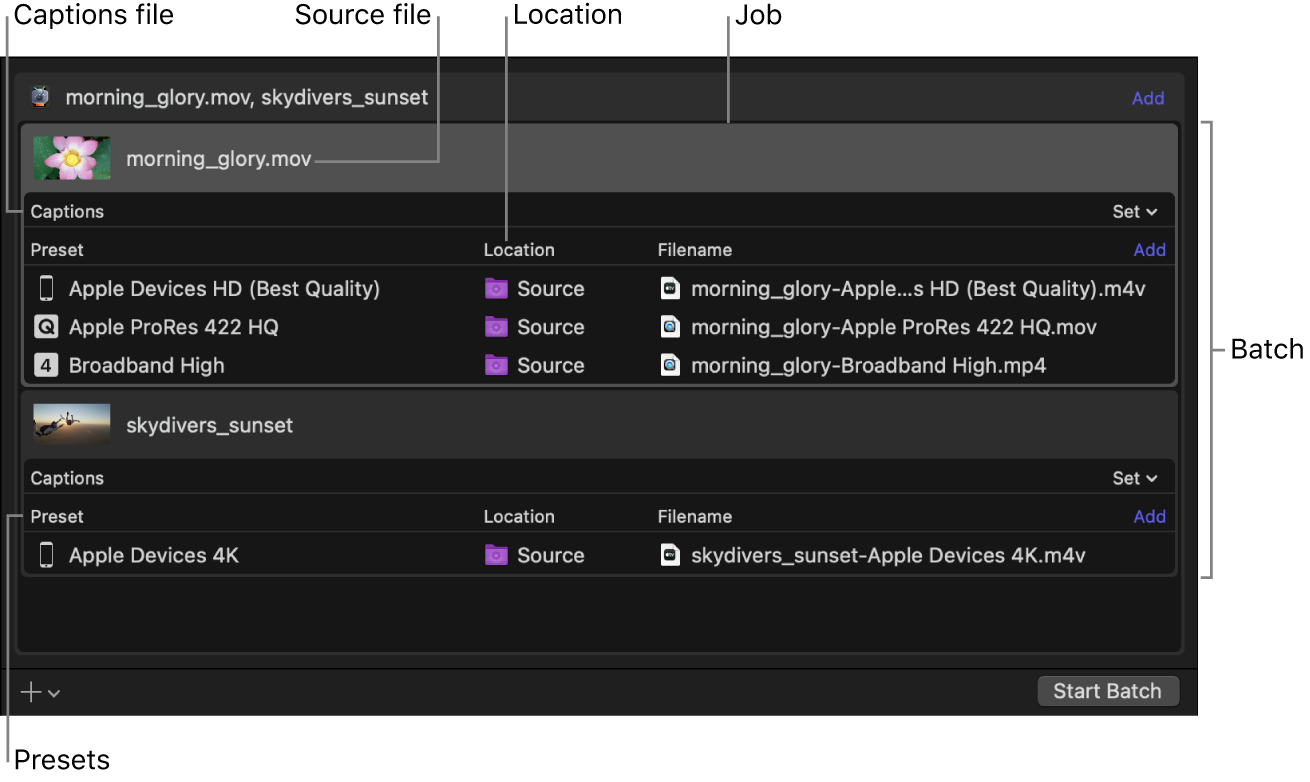
Each job in a Compressor batch has several parts:
Source file: The media file that you want to transcode.
Preset: The transcoding instructions that specify how the file will be processed. Compressor provides a variety of built-in presets that you can use to output files in common media formats. Additionally, Compressor provides a number of preconfigured destinations—one or more presets combined with an automated job action that’s performed after transcoding. For example, if you use the built-in Add to TV Home Videos destination to transcode a source file, the destination outputs a high-quality QuickTime movie file and then applies the destination’s job action to add the file to your Home Videos library on Apple TV.
Location: The place on your computer or a connected device where the transcoded file will be saved. You can use one of the built-in locations, or specify a new location.
Filename: The title of the transcoded file. You can use the default filename (the name of the source file) or type a custom filename.
Job action: A post-transcoding action you can add to a job—such as burning a DVD or copying a file to your Home Videos library on Apple TV. Each of the built-in destinations already contains a job action.
Caption filename: A supplemental text file in the CEA-608 format or iTT format that you can optionally add to a job to create synchronized closed captions or subtitles. See Intro to supporting captions in Compressor.
In the example below, two jobs make up the batch:

The first Compressor job uses the built-in Create DVD destination to output a Dolby Digital audio file and an MPEG-2 video file. Because a CEA-608 closed-caption file has been added to the job, synchronized dialog captions are embedded in the MPEG-2 output file. The transcoded files are saved to the source folder (the folder where the source media is stored), and after the files are transcoded, they’re burned to a DVD (using the Create DVD job action).
The second Compressor job uses two built-in presets (Small and HD 1080p) to create a small QuickTime file and a high-definition (HD) QuickTime file. The output files are saved to the desktop. Because there’s no job action, the user must manually move or otherwise distribute each file.
Download this guide: PDF