MainStage User Guide
- Welcome
-
- Overview of Edit mode
-
- Select patches and sets in the Patch List
- Copy, paste, and delete patches
- Reorder and move patches in the Patch List
- Add patches
- Create a patch from several patches
-
- Overview of the Patch Settings Inspector
- Select patch settings in the Patch Library
- Set the time signature for patches
- Change the tempo when you select a patch
- Set program change and bank numbers
- Defer patch changes
- Instantly silence the previous patch
- Change patch icons
- Transpose the pitch of incoming notes for a patch
- Change the tuning for a patch
- Add text notes to a patch
-
- Overview of channel strips
- Add a channel strip
- Change a channel strip setting
- Configure channel strip components
- Show signal flow channel strips
- Hide the metronome channel strip
- Create an alias of a channel strip
- Add a patch bus
- Set channel strip pan or balance positions
- Set channel strip volume levels
- Mute and solo channel strips
- Use multiple instrument outputs
- Use external MIDI instruments
- Reorganize channel strips
- Delete channel strips
-
- Overview of the Channel Strip Inspector
- Choose channel strip settings
- Rename channel strips
- Change channel strip colors
- Change channel strip icons
- Use feedback protection with channel strips
- Set keyboard input for a software instrument channel strip
- Transpose individual software instruments
- Filter MIDI messages
- Scale channel strip velocity
- Set channel strips to ignore Hermode tuning
- Override concert- and set-level key ranges
- Add text notes to a channel strip in the Channel Strip Inspector
- Route audio via send effects
-
- Screen Control Inspector overview
- Replace parameter labels
- Choose custom colors for screen controls
- Change background or grouped screen control appearance
- Set screen controls to show the hardware value
- Set parameter change behavior for screen controls
- Set hardware matching behavior for screen controls
- Reset and compare changes to a patch
- Override concert- and set-level mappings
-
- Overview of mapping screen controls
- Map to channel strip and plug-in parameters
- Map screen controls to actions
- Map a screen control to multiple parameters
- Use screen controls to display PDF document pages
- Edit the saved value for a mapped parameter
- Set drum pads or buttons to use note velocity
- Map screen controls to all channel strips in a patch
- Undo screen control parameter mappings
- Remove screen control mappings
- Work with graphs
- Create controller transforms
- Share patches and sets between concerts
- Record the audio output of a concert
-
- Overview of concerts
- Create a concert
- Open and close concerts
- Save concerts
- How saving affects parameter values
- Clean up concerts
- Consolidate assets in a concert
- Rename the current concert
-
- Overview of the Concert Settings Inspector
- Set MIDI Routing to channel strips
- Transpose incoming note pitch for a concert
- Define the program change message source
- Send unused program changes to channel strips
- Set the time signature for a concert
- Change the tuning for a concert
- Set the pan law for a concert
- Add text notes to a concert
- Control the metronome
- Silence MIDI notes
- Mute audio output
-
- Layout mode overview
-
- Screen control parameter editing overview
- Lift and stamp screen control parameters
- Reset screen control parameters
- Common screen control parameters
- Keyboard screen control parameters
- MIDI activity screen control parameters
- Drum pad screen control parameters
- Waveform screen control parameters
- Selector screen control parameters
- Text screen control parameters
- Background screen control parameters
- How MainStage passes through MIDI messages
- Export and import layouts
- Change the aspect ratio of a layout
-
- Before performing live
- Use Perform mode
- Screen controls in performance
- Tempo changes during performance
- Tips for performing with keyboard controllers
- Tips for performing with guitars and other instruments
- Tune guitars and other instruments with the Tuner
- The Playback plug-in in performance
- Record your performances
- After the performance
- Tips for complex hardware setups
-
- Overview of keyboard shortcuts and command sets
-
- Concerts and layouts keyboard shortcuts
- Patches and sets (Edit mode) keyboard shortcuts
- Editing keyboard shortcuts
- Actions keyboard shortcuts
- Parameter mapping (Edit mode) keyboard shortcuts
- Channel strips (Edit mode) keyboard shortcuts
- Screen controls (Layout mode) keyboard shortcuts
- Perform in Full Screen keyboard shortcuts
- Window and view keyboard shortcuts
- Help and support keyboard shortcuts
-
- Learn about Effects
-
- Learn about Amps and Pedals
-
- Bass Amp Designer overview
- Bass amplifier models
- Bass cabinet models
- Build a custom combo
- Amplifier signal flow
- Pre-amp signal flow
- Use the D.I. box
- Amplifier controls
- Bass Amp Designer effects overview
- Bass Amp Designer EQ
- Bass Amp Designer compressor
- Bass Amp Designer Graphic EQ
- Bass Amp Designer Parametric EQ
- Bass Amp Designer microphone controls
-
- Learn about Delay effects
- Echo controls
-
- MainStage Loopback overview
- Add a Loopback instance in MainStage
- MainStage Loopback interface
- MainStage Loopback waveform display
- MainStage Loopback transport and function controls
- MainStage Loopback information display
- MainStage Loopback Sync, Snap To, and Play From parameters
- Use the MainStage Loopback group functions
- MainStage Loopback Action menu
- Sample Delay controls
- Stereo Delay controls
- Tape Delay controls
-
- Use MIDI plug-ins
-
- Arpeggiator overview
- Arpeggiator control parameters
- Note order parameters overview
- Note order variations
- Note order inversions
- Arpeggiator pattern parameters overview
- Use Live mode
- Use Grid mode
- Arpeggiator options parameters
- Arpeggiator keyboard parameters
- Use keyboard parameters
- Assign controller parameters
- Modifier MIDI plug-in controls
- Note Repeater MIDI plug-in controls
- Randomizer MIDI plug-in controls
-
- Use the Scripter MIDI plug-in
- Use the Script Editor
- Scripter API overview
- MIDI processing functions overview
- HandleMIDI function
- ProcessMIDI function
- GetParameter function
- SetParameter function
- ParameterChanged function
- Reset function
- JavaScript objects overview
- Use the JavaScript Event object
- Use the JavaScript TimingInfo object
- Use the Trace object
- Use the MIDI event beatPos property
- Use the JavaScript MIDI object
- Create Scripter controls
- Transposer MIDI plug-in controls
-
- Learn about included Instruments
-
- Alchemy overview
- Name bar
-
- Alchemy source overview
- Source master controls
- Import browser
- Source subpage controls
- Source filter controls
- Source filter use tips
- Source elements overview
- Additive element controls
- Additive element effects
- Spectral element controls
- Spectral element effects
- Pitch correction controls
- Formant filter controls
- Granular element controls
- Sampler element controls
- VA element controls
- Source modulations
- Morph controls
- Master voice section
- Alchemy extended parameters
-
- MainStage Quick Sampler overview
- Add content to MainStage Quick Sampler
- MainStage Quick Sampler waveform display
- Use Flex in MainStage Quick Sampler
- MainStage Quick Sampler Pitch controls
- MainStage Quick Sampler Filter controls
- Quick Sampler filter types
- MainStage Quick Sampler Amp controls
- MainStage Quick Sampler extended parameters
-
- MainStage Playback plug-in overview
- Add a MainStage Playback plug-in
- MainStage Playback interface
- Use the MainStage Playback waveform display
- MainStage Playback transport and function buttons
- MainStage Playback information display
- MainStage Playback Sync, Snap To, and Play From parameters
- Use the MainStage Playback group functions
- Use the MainStage Playback Action menu and File field
- Use markers with the MainStage Playback plug-in
-
- Sculpture overview
- Sculpture interface
- Global parameters
- Amplitude envelope parameters
- Use the Waveshaper
- Filter parameters
- Output parameters
- Assign MIDI controllers
- Extended parameters
-

Create instruments with menu commands
You can manually create a zone and can add an audio file by using menu options. You can also choose whether the new zone maps your samples chromatically or based on analysis of the audio material.
Create a new, empty instrument
In MainStage, insert Sampler into an instrument channel.
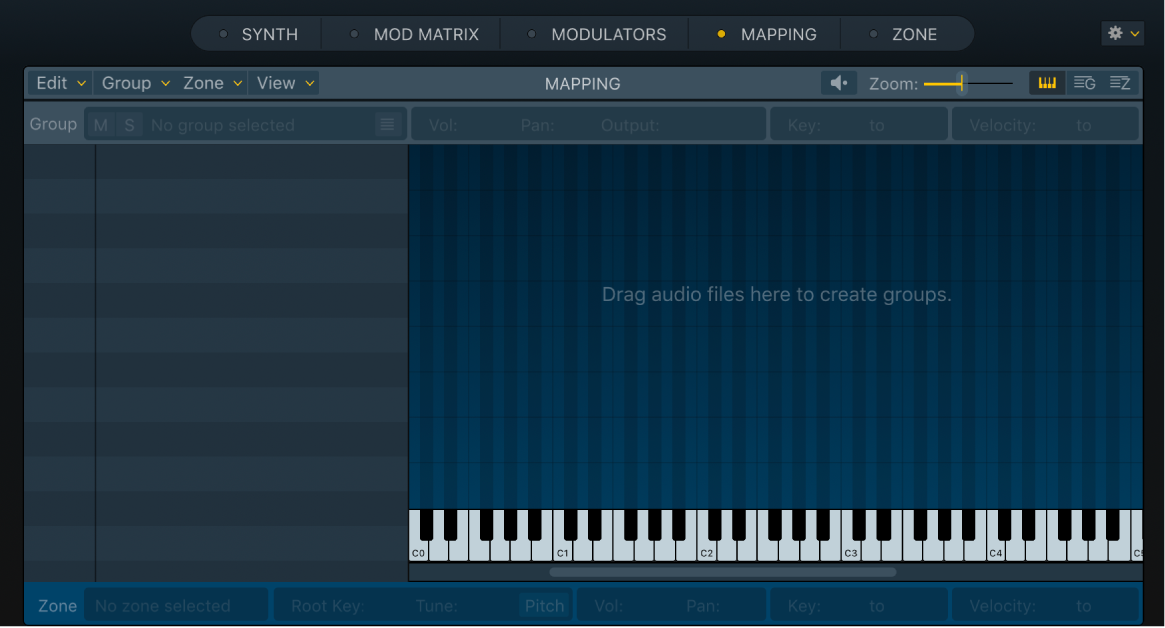
Click the Mapping button in the Navigation bar to view the Mapping pane.
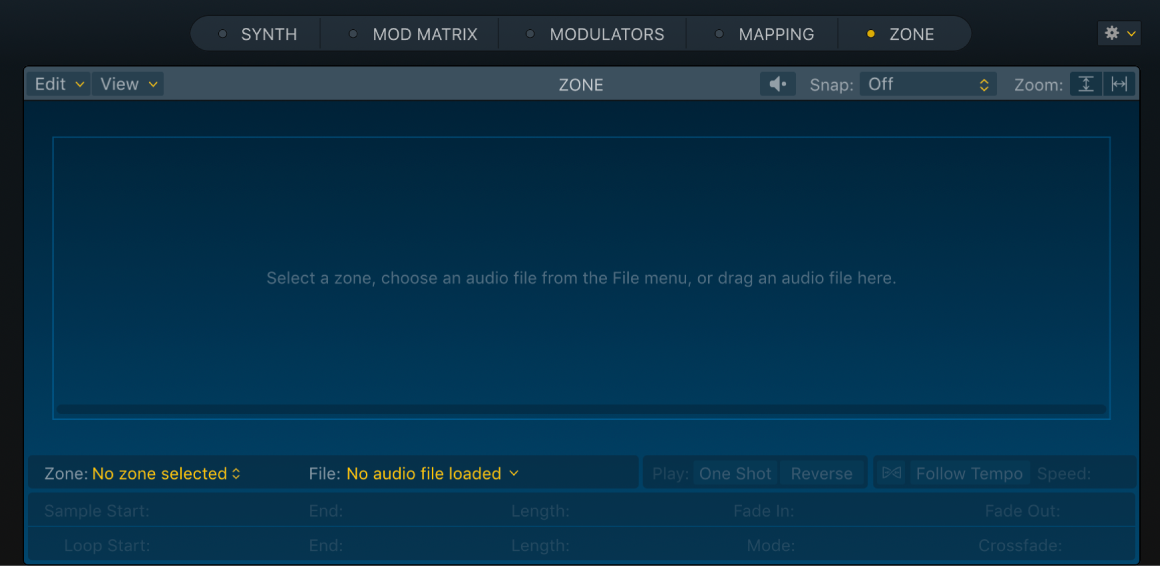
You can also click the Zone button if you want to view the Zone pane.

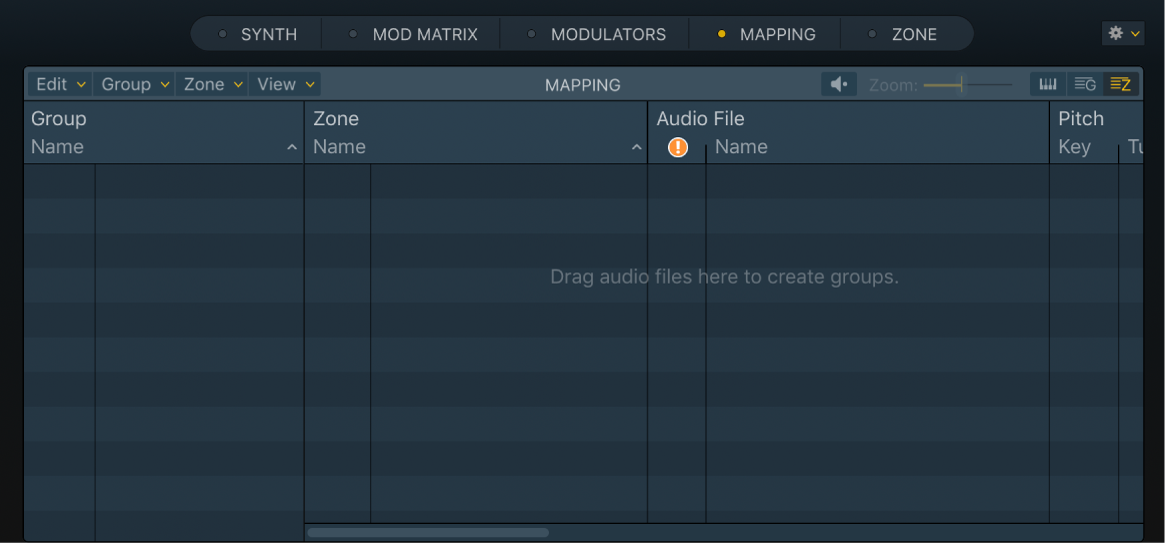
The empty Mapping pane is ready for you to add audio material. You have a choice of adding audio files in either the Key Mapping Editor or Zone view. You can also add files by dragging them to the Navigation bar, Group view, or Zone pane.
Click the Key Mapping Editor button to add audio files in the Key Mapping Editor.

Click the Zone view button to add audio files in this view.

Create an empty zone, and assign a sample to it
In MainStage Sampler, do one of the following:
In Zone view, choose Zone > New to create a new, empty zone.
In the Key Mapping Editor, press and hold Command-Shift, then drag the pointer to create a new, empty zone.
A new group is shown in the Mapping pane and a zone is automatically added to the group.

Do one of the following:
In Zone view, click the empty Name field for the zone in the Audio File column, then choose Load Audio File from the pop-up menu.
In Zone view, drag an audio file from the Finder, Loop Browser, or File Browser into the empty Name field of the zone in the Audio File column.
In the Key Mapping Editor, click a zone, then choose Zone > Load Audio Files (or use the Load Audio Files key command: Control-F).
This method associates the audio file with the selected zone.
In the Key Mapping Editor, drag an audio file from the Finder, Loop Browser, or File Browser directly onto the zone.

In the Zone pane, if open, drag an audio file into the waveform display area.

Create an assigned zone with menu commands
In MainStage Sampler, do one of the following:
In Zone view, Choose Zone > Load Audio Files (or use the Load Audio Files key command: Control-F).
This method creates a new zone with the selected audio file.
In the Key Mapping Editor, click a zone, then choose Zone > Load Audio Files (or use the Load Audio Files key command: Control-F).
This method associates the audio file with the selected zone.
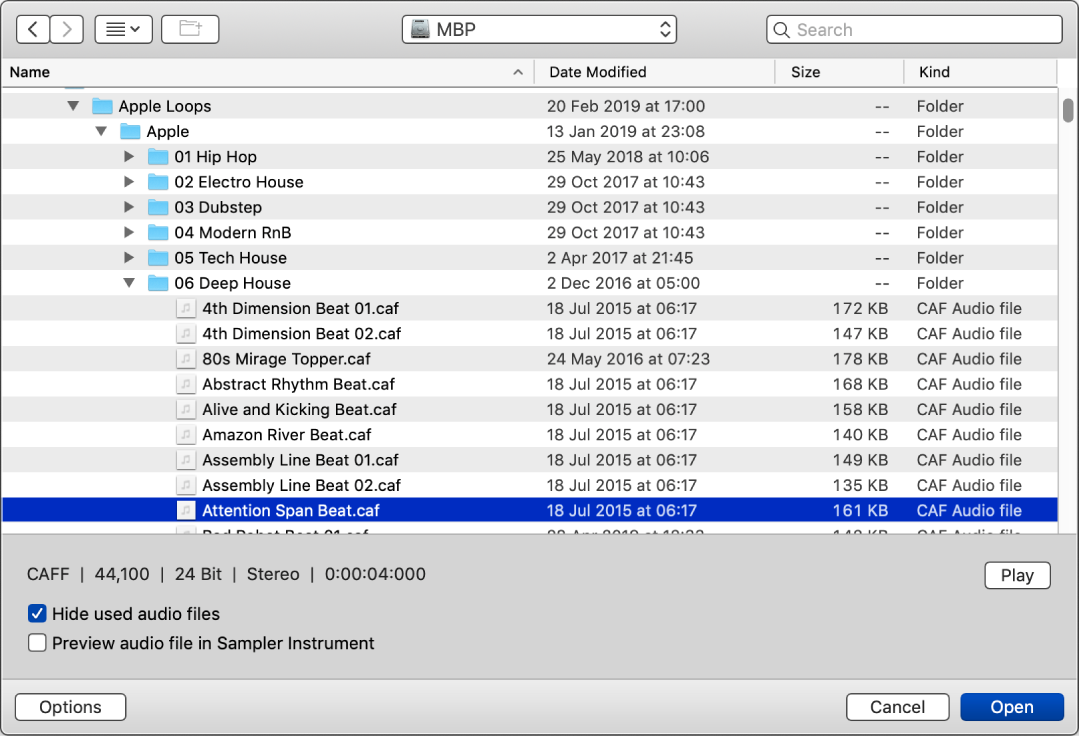
Locate the audio file you want and select it in the File Selector window.

Click the Options button at the lower left of the File Selector window to show or hide the checkboxes and Play button.
Select “Hide used audio files” to dim the names of files used in the currently loaded sampler instrument.
Select “Preview audio file in Sampler Instrument” to temporarily replace the sample files in the currently selected zone. The zone is not directly triggered by selecting this option, but it can be triggered by playing MIDI notes while the File Selector window is open—and different files are chosen. The selected sample can be heard as part of the zone, inclusive of all synthesizer processing (filters, modulation, and so on).
To preview looped playback of the currently selected audio file, click the Play button at the lower right of the File Selector window. The Play button label changes to Stop during playback.
You can step through files by using the Down Arrow key, or by clicking them, to audition each file in turn.
Click the Stop button to stop playback.
When you find an audio file you want to use, click the Open button to add it to the zone.
When the audio file is loaded, the sample name is displayed in the Name field for the zone in the Audio File column in Zone view.