MainStage User Guide
- Welcome
-
- Overview of Edit mode
-
- Select patches and sets in the Patch List
- Copy, paste, and delete patches
- Reorder and move patches in the Patch List
- Add and rename patches
- Create a patch from several patches
-
- Overview of the Patch Settings Inspector
- Select patch settings in the Patch Library
- Set the time signature for patches
- Change the tempo when you select a patch
- Set program change and bank numbers
- Defer patch changes
- Instantly silence the previous patch
- Change patch icons
- Transpose the pitch of incoming notes for a patch
- Change the tuning for a patch
- Add text notes to a patch
-
- Overview of channel strips
- Add a channel strip
- Change a channel strip setting
- Configure channel strip components
- Show signal flow channel strips
- Hide the metronome channel strip
- Create an alias of a channel strip
- Add a patch bus
- Set channel strip pan or balance positions
- Set channel strip volume levels
- Mute and solo channel strips
- Use multiple instrument outputs
- Use external MIDI instruments
- Reorganize channel strips
- Delete channel strips
-
- Overview of the Channel Strip Inspector
- Choose channel strip settings
- Rename channel strips
- Change channel strip colors
- Change channel strip icons
- Use feedback protection with channel strips
- Set keyboard input for a software instrument channel strip
- Transpose individual software instruments
- Filter MIDI messages
- Scale channel strip velocity
- Set channel strips to ignore Hermode tuning
- Override concert- and set-level key ranges
- Add text notes to a channel strip in the Channel Strip Inspector
- Route audio via send effects
-
- Screen Control Inspector overview
- Replace parameter labels
- Choose custom colors for screen controls
- Change background or grouped screen control appearance
- Set screen controls to show the hardware value
- Set parameter change behavior for screen controls
- Set hardware matching behavior for screen controls
- Reset and compare changes to a patch
- Override concert- and set-level mappings
-
- Overview of mapping screen controls
- Map to channel strip and plug-in parameters
- Map screen controls to actions
- Map a screen control to multiple parameters
- Use screen controls to display PDF document pages
- Edit the saved value for a mapped parameter
- Set drum pads or buttons to use note velocity
- Map screen controls to all channel strips in a patch
- Undo screen control parameter mappings
- Remove screen control mappings
- Work with graphs
- Create controller transforms
- Share patches and sets between concerts
- Record the audio output of a concert
-
- Overview of concerts
- Create a concert
- Open and close concerts
- Save concerts
- How saving affects parameter values
- Clean up concerts
- Consolidate assets in a concert
- Rename the current concert
-
- Overview of the Concert Settings Inspector
- Set MIDI Routing to channel strips
- Transpose incoming note pitch for a concert
- Define the program change message source
- Send unused program changes to channel strips
- Set the time signature for a concert
- Change the tuning for a concert
- Set the pan law for a concert
- Add text notes to a concert
- Control the metronome
- Silence MIDI notes
- Mute audio output
-
- Layout mode overview
-
- Screen control parameter editing overview
- Lift and stamp screen control parameters
- Reset screen control parameters
- Common screen control parameters
- Keyboard screen control parameters
- MIDI activity screen control parameters
- Drum pad screen control parameters
- Waveform screen control parameters
- Selector screen control parameters
- Text screen control parameters
- Background screen control parameters
- How MainStage passes through MIDI messages
- Export and import layouts
- Change the aspect ratio of a layout
-
- Before performing live
- Use Perform mode
- Screen controls in performance
- Tempo changes during performance
- Tips for performing with keyboard controllers
- Tips for performing with guitars and other instruments
- Tune guitars and other instruments with the Tuner
- The Playback plug-in in performance
- Record your performances
- After the performance
- Tips for complex hardware setups
-
- Overview of keyboard shortcuts and command sets
-
- Concerts and layouts keyboard shortcuts
- Patches and sets (Edit mode) keyboard shortcuts
- Editing keyboard shortcuts
- Actions keyboard shortcuts
- Parameter mapping (Edit mode) keyboard shortcuts
- Channel strips (Edit mode) keyboard shortcuts
- Screen controls (Layout mode) keyboard shortcuts
- Perform in Full Screen keyboard shortcuts
- Window and view keyboard shortcuts
- Help and support keyboard shortcuts
-
-
- Use MIDI plug-ins
-
- Arpeggiator overview
- Arpeggiator control parameters
- Note order parameters overview
- Note order variations
- Note order inversions
- Arpeggiator pattern parameters overview
- Use Live mode
- Use Grid mode
- Arpeggiator options parameters
- Arpeggiator keyboard parameters
- Use keyboard parameters
- Assign controllers
- Modifier controls
- Note Repeater controls
- Randomizer controls
-
- Use Scripter
- Use the Script Editor
- Scripter API overview
- MIDI processing functions overview
- HandleMIDI function
- ProcessMIDI function
- GetParameter function
- SetParameter function
- ParameterChanged function
- Reset function
- JavaScript objects overview
- Use the JavaScript Event object
- Use the JavaScript TimingInfo object
- Use the Trace object
- Use the MIDI event beatPos property
- Use the JavaScript MIDI object
- Create Scripter controls
- Transposer controls
-
-
- Alchemy overview
- Alchemy interface overview
- Alchemy Name bar
- Alchemy file locations
-
- Alchemy source overview
- Source master controls
- Import browser
- Source subpage controls
- Source filter controls
- Source filter use tips
- Source elements overview
- Additive element controls
- Additive element effects
- Spectral element controls
- Spectral element effects
- Pitch correction controls
- Formant filter controls
- Granular element controls
- Sampler element controls
- VA element controls
- Source modulations
- Morph controls
- Alchemy master voice section
- Alchemy Extended parameters
-
- Playback plug-in overview
- Add a Playback plug-in
- Playback interface
- Use the Playback waveform display
- Playback transport and function buttons
- Playback information display
- Playback Sync, Snap To, and Play From parameters
- Use the Playback group functions
- Use the Playback Action menu and File field
- Use markers with the Playback plug-in
-
- Sample Alchemy overview
- Interface overview
- Add source material
- Edit mode
- Play modes
- Source overview
- Synthesis modes
- Granular controls
- Additive effects
- Additive effect controls
- Spectral effect
- Spectral effect controls
- Filter module
- Low and highpass filter
- Comb PM filter
- Downsampler filter
- FM filter
- Envelope generators
- Mod Matrix
- Modulation routing
- Motion mode
- Trim mode
- More menu
-
- Sculpture overview
- Sculpture interface
- Global parameters
- Amplitude envelope parameters
- Use the Waveshaper
- Filter parameters
- Output parameters
- Define MIDI controllers
- Extended parameters
-
- Copyright

Edit in the MainStage Delay Designer Tap display
You can graphically edit any tap parameter that is represented as a vertical line in the Tap display. The Tap display is ideal if you want to edit the parameters of one tap relative to other taps or when you need to edit or align multiple taps simultaneously.
Edit a tap parameter in the Tap display
In MainStage, click the view button of the parameter you want to edit.
Vertically drag the bright line of the tap you want to edit (or one of the selected taps, if multiple taps are selected).
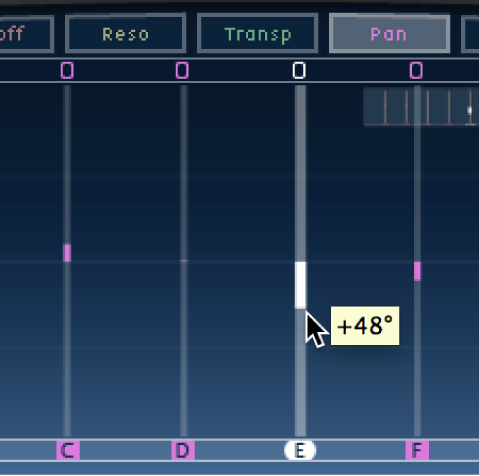
If you selected multiple taps, the values of all selected taps are changed relative to each other.
Note: The method outlined above is slightly different for the Filter Cutoff and Pan parameters. See the tasks below.
Set the values of multiple taps
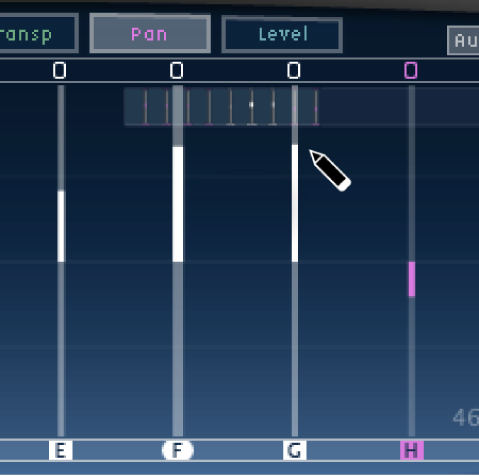
In MainStage, Command-drag over multiple taps to change their value.
Parameter values change to match the pointer position as you drag across the taps. Command-dragging across several taps lets you draw value curves, much like using a pencil to create a curved line on a piece of paper.
Align the values of several taps
In MainStage, Command-click in the Tap display, and drag while holding down the Command key.
A line trails behind the pointer as you drag.
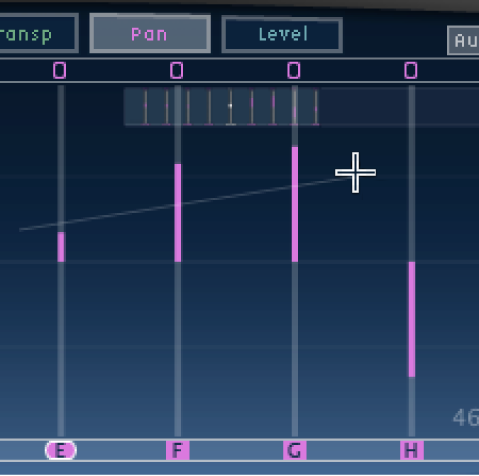
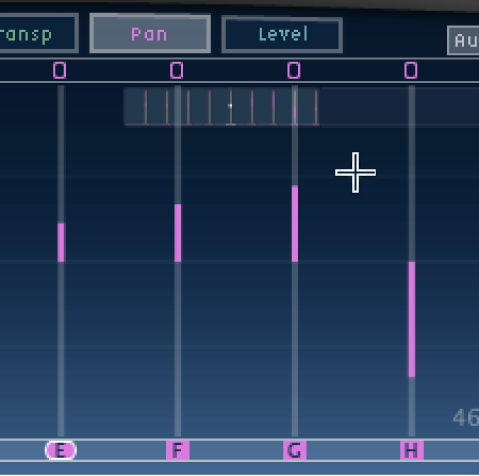
Click the appropriate position to mark the end point of the line.
The values of taps that fall between the start and end points are aligned along the line.
Reset the value of a tap
In MainStage, you can use the Tap display or Tap parameter bar to reset tap parameters to their default values.
To reset a parameter to its default setting in the Tap display: Option-click a tap to reset the selected parameter to its default setting.
If multiple taps are selected, Option-clicking any tap resets the chosen parameter to its default value for all selected taps.
To reset a parameter to its default setting in the Tap parameter bar: Option-click a parameter value to reset it to the default setting.
If multiple taps are selected, Option-clicking a parameter of any tap resets all selected taps to the default value for that parameter.
Edit filter cutoff in the Tap display
In Cutoff view, each tap actually shows two parameters: highpass and lowpass filter cutoff frequency.
In MainStage, drag the cutoff frequency line—the upper line is lowpass and the lower line is highpass—to independently adjust filter cutoff values. Both cutoff frequencies can be adjusted simultaneously by dragging in the area between them.
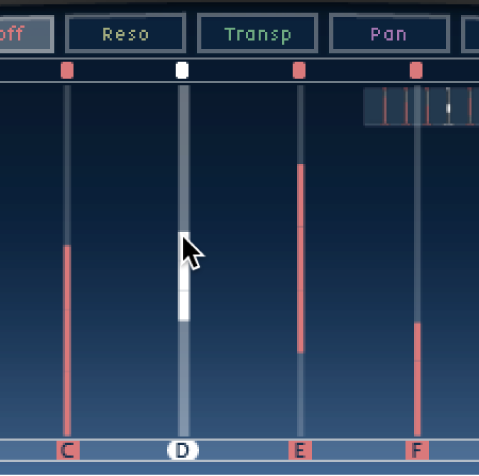
When the highpass filter cutoff frequency value is lower than that of the lowpass cutoff frequency, only one line is shown. This line represents the frequency band that passes through the filters—in other words, the filters act as a bandpass filter. In this configuration, the two filters operate in series which means the tap passes through one filter first, then the other.
If the highpass filter cutoff frequency value is above that of the lowpass filter cutoff frequency, the filter switches from serial operation to parallel operation, which means the tap passes through both filters simultaneously. In this case, the space between the two cutoff frequencies represents the frequency band being rejected—in other words, the filters act as a band-rejection filter.
Edit pan in the Tap display
In MainStage, the way the Pan parameter is represented in the Pan view is entirely dependent on the input channel configuration—mono to stereo, stereo to stereo, or surround.
In mono input/stereo output configurations, all taps are initially panned to the center.
In stereo input/stereo output configurations, the Pan parameter adjusts the stereo balance, not the position of the tap in the stereo field.
Note: Pan is not available in mono configurations.
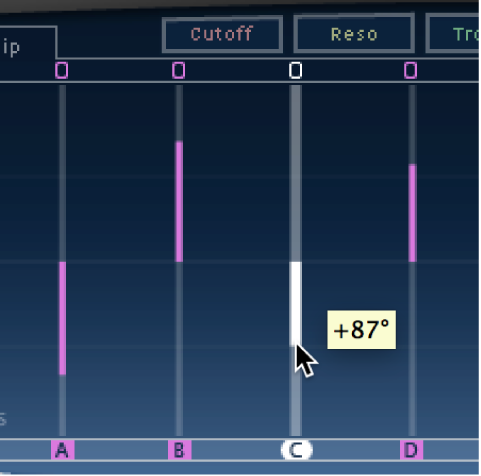
To edit the pan position in mono input/stereo output configurations: Drag vertically from the center of the tap in the direction you want to pan the tap or taps.
A white line extends outward from the center in the direction you have dragged, reflecting the pan position of the tap or taps.
Lines above the center position indicate pans to the left, and lines below the center position denote pans to the right. Left (blue) and right (green) channels are easily identified.
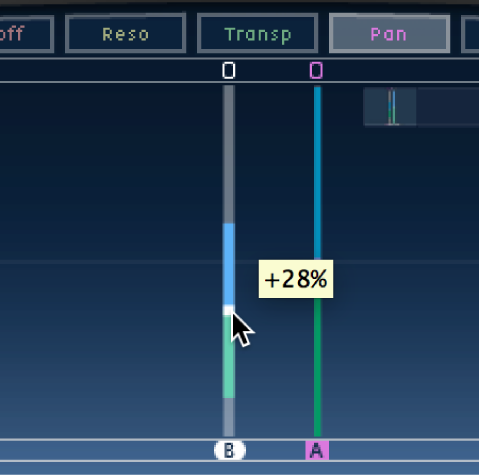
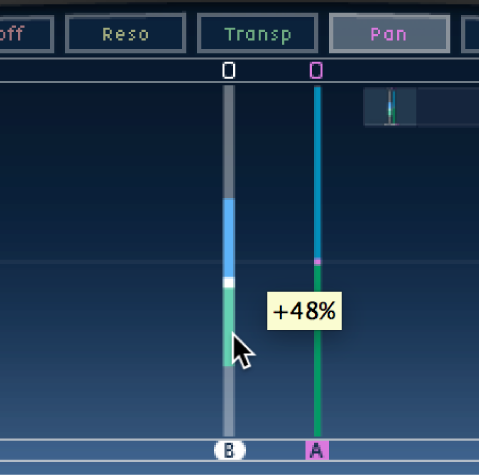
To adjust the stereo balance in stereo input/stereo output configurations: Drag the Pan parameter—which appears as a dot on the tap—up or down the tap to adjust the stereo balance.
By default, stereo spread is set to 100%. To adjust the spread width, drag either side of the dot. As you do so, the width of the line extending outward from the dot changes. Keep an eye on the Spread parameter in the Tap parameter bar while you are adjusting.
Edit taps with shortcut menu commands
In MainStage, Control-click (or right-click) a tap in the Tap display, then choose one of the following commands from the shortcut menu:
Copy sound parameters: Copies all parameters (except the delay time) of the selected tap or taps to the Clipboard.
Paste sound parameters: Pastes the tap parameters from the Clipboard into the selected tap or taps. If there are more taps in the Clipboard than are selected in the Tap display, the extra taps in the Clipboard are ignored.
Reset sound parameters to default values: Resets all parameters of all selected taps (except the delay time) to the default values.
2 x delay time: Doubles the delay time of all selected taps. For example, the delay times of three taps are set as follows: Tap A = 250 ms, Tap B = 500 ms, and Tap C = 750 ms. If you select these three taps and choose “2 x delay time,” the taps are changed as follows: Tap A = 500 ms, Tap B = 1000 ms, and Tap C = 1500 ms. In other words, a rhythmic delay pattern unfolds half as fast. (In musical terms, it is played in half time.)
1/2 x delay time: Halves the delay time of all selected taps. Using the example above, choosing “1/2 x delay time” changes the taps as follows: Tap A = 125 ms, Tap B = 250 ms, and Tap C = 375 ms. In other words, a rhythmic delay pattern unfolds twice as fast. (In musical terms, it is played in double time.)
Delete tap(s): Deletes all selected taps.