Motion User Guide
- Welcome
-
- Intro to basic compositing
-
- Intro to transforming layers
-
- Intro to transforming layers in the canvas
- Transform layer properties in the canvas
- Transform tools
- Change layer position, scale, or rotation
- Move a layer’s anchor point
- Add a drop shadow to a layer
- Distort or shear a layer
- Crop a layer
- Modify shape or mask points
- Transform text glyphs and other object attributes
- Align layers in the canvas
- Transform layers in the HUD
- Transform 2D layers in 3D space
-
- Intro to behaviors
- Behaviors versus keyframes
-
- Intro to behavior types
-
- Intro to Parameter behaviors
- Audio behavior
- Average behavior
- Clamp behavior
- Custom behavior
- Add a Custom behavior
- Exponential behavior
- Link behavior
- Logarithmic behavior
- MIDI behavior
- Add a MIDI behavior
- Negate behavior
- Oscillate behavior
- Create a decaying oscillation
- Overshoot behavior
- Quantize behavior
- Ramp behavior
- Randomize behavior
- Rate behavior
- Reverse behavior
- Stop behavior
- Track behavior
- Wriggle behavior
-
- Intro to Simulation behaviors
- Align to Motion behavior
- Attracted To behavior
- Attractor behavior
- Drag behavior
- Drift Attracted To behavior
- Drift Attractor behavior
- Edge Collision behavior
- Gravity behavior
- Orbit Around behavior
- Random Motion behavior
- Repel behavior
- Repel From behavior
- Rotational Drag behavior
- Spring behavior
- Vortex behavior
- Wind behavior
- Additional behaviors
-
- Intro to using generators
- Add a generator
-
- Intro to image generators
- Caustics generator
- Cellular generator
- Checkerboard generator
- Clouds generator
- Color Solid generator
- Concentric Polka Dots generator
- Concentric Shapes generator
- Gradient generator
- Grid generator
- Japanese Pattern generator
- Lens Flare generator
- Manga Lines generator
- Membrane generator
- Noise generator
- One Color Ray generator
- Op Art 1 generator
- Op Art 2 generator
- Op Art 3 generator
- Overlapping Circles generator
- Radial Bars generator
- Soft Gradient generator
- Spirals generator
- Spiral Drawing generator
- Use Spiral Drawing onscreen controls
- Star generator
- Stripes generator
- Sunburst generator
- Truchet Tiles generator
- Two Color Ray generator
- Save a modified generator
-
- Intro to filters
- Browse and preview filters
- Apply or remove filters
-
- Intro to filter types
-
- Intro to Color filters
- Brightness filter
- Channel Mixer filter
- Color Adjustments filter
- Color Balance filter
- Example: Color-balance two layers
- Color Curves filter
- Use the Color Curves filter
- Color Reduce filter
- Color Wheels filter
- Use the Color Wheels filter
- Colorize filter
- Contrast filter
- Custom LUT filter
- Use the Custom LUT filter
- Gamma filter
- Gradient Colorize filter
- HDR Tools filter
- Hue/Saturation filter
- Hue/Saturation Curves filter
- Use the Hue/Saturation Curves filter
- Levels filter
- Negative filter
- OpenEXR Tone Map filter
- Sepia filter
- Threshold filter
- Tint filter
-
- Intro to Distortion filters
- Black Hole filter
- Bulge filter
- Bump Map filter
- Disc Warp filter
- Droplet filter
- Earthquake filter
- Fisheye filter
- Flop filter
- Fun House filter
- Glass Block filter
- Glass Distortion
- Insect Eye filter
- Mirror filter
- Page Curl filter
- Poke filter
- Polar filter
- Refraction filter
- Ring Lens filter
- Ripple filter
- Scrape filter
- Sliced Scale filter
- Use the Sliced Scale filter
- Sphere filter
- Starburst filter
- Stripes filter
- Target filter
- Tiny Planet filter
- Twirl filter
- Underwater filter
- Wave filter
-
- Intro to Stylize filters
- Add Noise filter
- Bad Film filter
- Bad TV filter
- Circle Screen filter
- Circles filter
- Color Emboss filter
- Comic filter
- Crystallize filter
- Edges filter
- Extrude filter
- Fill filter
- Halftone filter
- Hatched Screen filter
- Highpass filter
- Indent filter
- Line Art filter
- Line Screen filter
- MinMax filter
- Noise Dissolve filter
- Pixellate filter
- Posterize filter
- Relief filter
- Slit Scan filter
- Slit Tunnel filter
- Texture Screen filter
- Vignette filter
- Wavy Screen filter
- About filters and color processing
- Publish filter controls to Final Cut Pro
- Using filters on alpha channels
- Filter performance
- Save custom filters
-
- Intro to 3D objects
- Add a 3D object
- Move and rotate a 3D object
- Reposition a 3D object’s anchor point
- Exchange a 3D object file
- 3D object intersection and layer order
- Using cameras and lights with 3D objects
- Save custom 3D objects
- Guidelines for working with 3D objects
- Working with imported 3D objects
-
- Intro to 360-degree video
- 360-degree projects
- Create 360-degree projects
- Add 360-degree video to a project
- Create a tiny planet effect
- Reorient 360-degree media
- Creating 360-degree templates for Final Cut Pro
- 360-degree-aware filters and generators
- Export and share 360-degree projects
- Guidelines for better 360-degree projects
-
- Intro to settings and shortcuts
-
- Intro to Keyboard shortcuts
- Use function keys
- General keyboard shortcuts
- Audio list keyboard shortcuts
-
- Tools keyboard shortcuts
- Transform tool keyboard shortcuts
- Select/Transform tool keyboard shortcuts
- Crop tool keyboard shortcuts
- Edit Points tool keyboard shortcuts
- Edit shape tools keyboard shortcuts
- Pan and Zoom tools keyboard shortcuts
- Shape tools keyboard shortcuts
- Bezier tool keyboard shortcuts
- B-Spline tool keyboard shortcuts
- Paint Stroke tool keyboard shortcuts
- Text tool keyboard shortcuts
- Shape mask tools keyboard shortcuts
- Bezier Mask tool keyboard shortcuts
- B-Spline Mask tool keyboard shortcuts
- Transport control keyboard shortcuts
- View option keyboard shortcuts
- HUD keyboard shortcuts
- Inspector keyboard shortcuts
- Keyframe Editor keyboard shortcuts
- Layers keyboard shortcuts
- Library keyboard shortcuts
- Media list keyboard shortcuts
- Timeline keyboard shortcuts
- Keyframing keyboard shortcuts
- Shape and Mask keyboard shortcuts
- 3D keyboard shortcuts
- Miscellaneous keyboard shortcuts
- Touch Bar shortcuts
- Move assets to another computer
- Work with GPUs
- Glossary
- Copyright

Create a paint stroke in Motion
Create paint strokes and preview the stroke attributes using controls in the HUD.
Draw a freehand paint stroke
In the canvas toolbar in Motion, click the Paint Stroke tool (or press P).

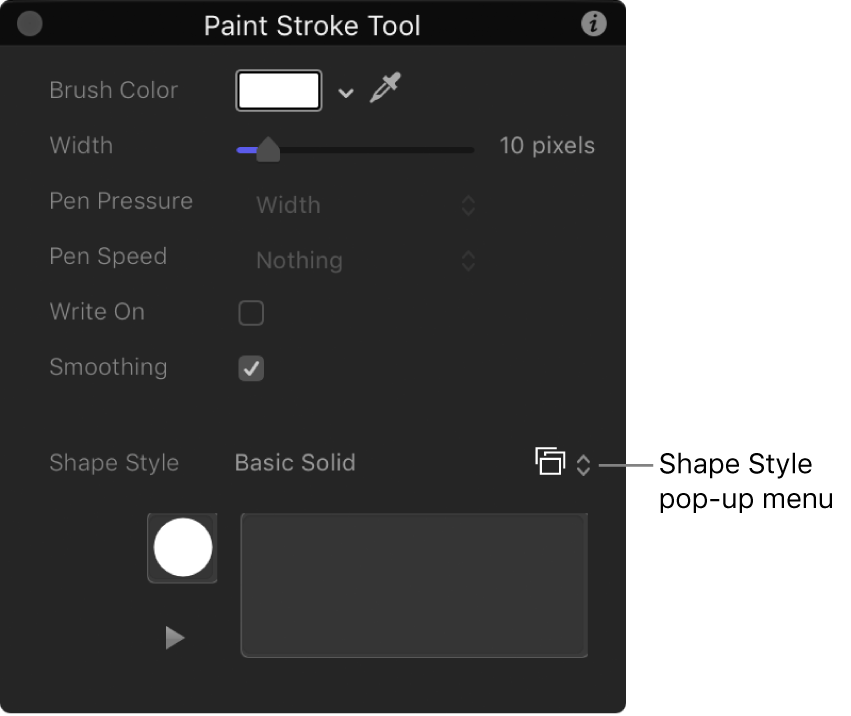
The Paint Stroke Tool HUD appears. (If it doesn’t appear, press F7.)
Important: Like the other drawing tool HUDs, the Paint Stroke Tool HUD is available only after you select the Paint Stroke tool, and before you create your stroke in the canvas. The Paint Stroke Tool HUD lets you set the properties derived from the pressure and speed of the stylus before you draw the stroke.

The default brush type (in the Shape Style parameter) is Basic Solid. You can change the brush type by defining a paint stroke style.
Define a paint stroke style in the HUD:
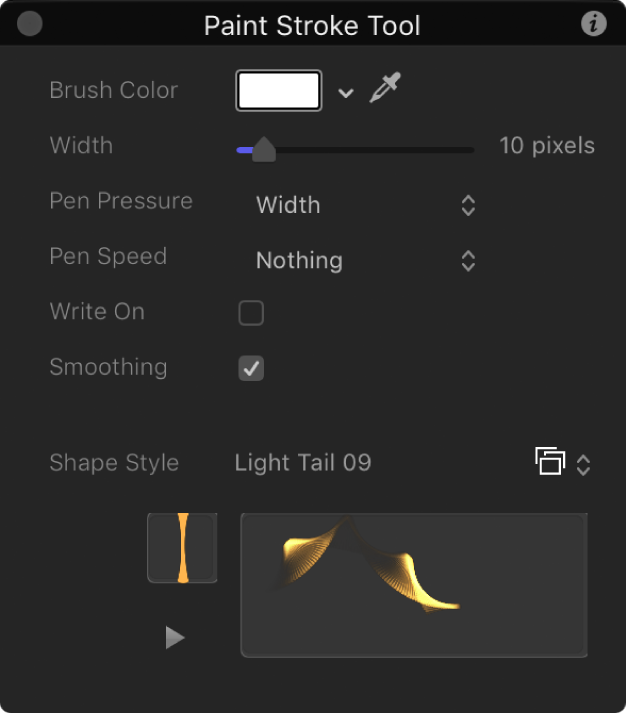
Click the Shape Style preset pop-up menu, then choose an option.
Modify the Brush Color and Width settings.
If a preset is not used, a Basic Solid stroke is created. You can still apply a preset to the stroke using the Inspector after the stroke is drawn. Presets do not override the width or color of the stroke set in the HUD.
Note: The Pen Pressure and Pen Speed parameters are not available in the HUD when Shape Style is set to Solid Brush.
If you want to create a stroke that’s drawn over time, select the Write On checkbox.
Selecting the Write On checkbox applies a Write On behavior the stroke. As with any other behavior, you can modify its parameters in the HUD or Inspector. For more information on using the Write On behavior, see Write On behavior in Motion.
Draw your stroke in the canvas, then press S or Esc to activate the Select/Transform tool.
The Paint Stroke Tool HUD is replaced with the Shape HUD, which contains basic parameters identical to those in all other shape HUDs. Consequently, after a stroke is drawn, you must use the Inspector to modify parameters unique to the paint brush and its dabs.
Preview the paint stroke in the Paint Stroke Tool HUD
The lower portion of the Paint Stroke Tool HUD contains a sketch area that displays a preview of a paint stroke effect. After you select a style for your paint stroke, that style remains selected for subsequent paint strokes until you choose another shape style. You can select another style before you create a paint stroke in the HUD, or after you create a paint stroke in the Inspector.
In the canvas toolbar in Motion, click the Paint Stroke tool.
Do one of the following:
Choose a brush from the Shape Style pop-up menu in the Paint Stroke Tool HUD, then draw a stroke in the sketch area (of the HUD) to see a preview of the paint stroke.
Select the Write On checkbox, draw a stroke in the sketch area, then click the Play button to see a preview of the write-on stroke.
Apply a preset from the Shape Style pop-up menu to an existing stroke in the sketch area of the HUD.

If the preset is an animated stroke, the stroke is automatically drawn in the sketch area. Press the Play button to see the stroke animation again.
Change the style of an existing paint stroke
In Motion, select an existing paint stroke in the Layers list or Timeline.
In the Shape HUD or the Style pane of the Shape Inspector, click the Shape Style pop-up menu, then choose a different option.
“Particle-ize” a paint stroke
You can animate the individual dabs in a paint stroke to create an exploding particle effect.
In Motion, select an existing paint stroke in the Layers list or Timeline.
In the Style pane of the Shape Inspector, choose Airbrush from the Brush Type pop-up menu (if it’s not already chosen).
In the Advanced pane, select the Dynamics checkbox, then play the project (press the Space bar).
The dabs spread out in the canvas.
To further refine the dab animation, adjust the Dynamics controls.
Paint a stroke over time
In the canvas toolbar in Motion, click the Paint Stroke tool (or press P).
The Paint Stroke Tool HUD appears. If the HUD does not appear, press F7 or D.
In the HUD, select the Write On checkbox and any other desired stroke settings.
In the canvas, create your stroke.
When you complete stroke, press Esc to exit the paint mode.
The Paint Stroke Tool HUD is replaced with the Shape HUD. In the Layers list, a Write On Shape behavior is applied to the stroke. To modify the Write On parameters, select the behavior and use the HUD or the Behaviors Inspector.
The faster you draw a stroke, the shorter the duration of the Write On behavior.
Note: If the Create Layers At option in the Project pane of Motion Settings is set to Current Frame, the paint stroke is created at the current playhead position. If set to Start of Project, the stroke is created at frame 1. For more information about the Create Layers At option, see If it’s your first import in Motion.
Press the Space Bar to play back your project.
The stroke is “painted on” as the project plays.
To modify the speed at which the stroke is painted, adjust the duration of the behavior bar in the Timeline or mini-Timeline.
Create a write-on stroke using an existing shape
You can apply the Write On behavior to an existing shape to draw its outline over time. Because the Write On behavior only affects outlines, the Outline checkbox must be selected in the Style pane of the Shape Inspector.

Note: When you add a Write On behavior to an existing shape, the behavior spans the duration of the shape (the length of its bar in the Timeline).
In Motion, select the shape you want to use and select its Outline checkbox in the HUD or Style pane of the Shape Inspector.
Note: You can leave the Fill checkbox selected, but only the outline is affected by the Write On behavior.
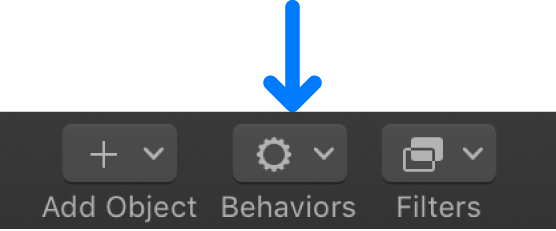
In the toolbar, click Behaviors, then choose Shape > Write On.

The Write On behavior appears in the Layers list. If the playhead is located at the start of the shape, the visual shape disappears and only the path is visible.
Play the project (press the Space bar).
The outline is drawn over the length of the behavior.
To adjust the speed at which the stroke is painted, adjust the duration of the behavior bar in the Timeline or mini-Timeline.
To adjust the properties of the stroke, use the Shape Inspector.
Download this guide: Apple Books | PDF