Motion User Guide
- Welcome
-
- Intro to basic compositing
-
- Intro to transforming layers
-
- Intro to transforming layers in the canvas
- Transform layer properties in the canvas
- Transform tools
- Change layer position, scale, or rotation
- Move a layer’s anchor point
- Add a drop shadow to a layer
- Distort or shear a layer
- Crop a layer
- Modify shape or mask points
- Transform text glyphs and other object attributes
- Align layers in the canvas
- Transform layers in the HUD
- Transform 2D layers in 3D space
-
- Intro to behaviors
- Behaviors versus keyframes
-
- Intro to behavior types
-
- Intro to Parameter behaviors
- Audio behavior
- Average behavior
- Clamp behavior
- Custom behavior
- Add a Custom behavior
- Exponential behavior
- Link behavior
- Logarithmic behavior
- MIDI behavior
- Add a MIDI behavior
- Negate behavior
- Oscillate behavior
- Create a decaying oscillation
- Overshoot behavior
- Quantize behavior
- Ramp behavior
- Randomize behavior
- Rate behavior
- Reverse behavior
- Stop behavior
- Track behavior
- Wriggle behavior
-
- Intro to Simulation behaviors
- Align to Motion behavior
- Attracted To behavior
- Attractor behavior
- Drag behavior
- Drift Attracted To behavior
- Drift Attractor behavior
- Edge Collision behavior
- Gravity behavior
- Orbit Around behavior
- Random Motion behavior
- Repel behavior
- Repel From behavior
- Rotational Drag behavior
- Spring behavior
- Vortex behavior
- Wind behavior
- Additional behaviors
-
- Intro to using generators
- Add a generator
-
- Intro to image generators
- Caustics generator
- Cellular generator
- Checkerboard generator
- Clouds generator
- Color Solid generator
- Concentric Polka Dots generator
- Concentric Shapes generator
- Gradient generator
- Grid generator
- Japanese Pattern generator
- Lens Flare generator
- Manga Lines generator
- Membrane generator
- Noise generator
- One Color Ray generator
- Op Art 1 generator
- Op Art 2 generator
- Op Art 3 generator
- Overlapping Circles generator
- Radial Bars generator
- Soft Gradient generator
- Spirals generator
- Spiral Drawing generator
- Use Spiral Drawing onscreen controls
- Star generator
- Stripes generator
- Sunburst generator
- Truchet Tiles generator
- Two Color Ray generator
- Save a modified generator
-
- Intro to filters
- Browse and preview filters
- Apply or remove filters
-
- Intro to filter types
-
- Intro to Color filters
- Brightness filter
- Channel Mixer filter
- Color Balance filter
- Example: Color-balance two layers
- Color Curves filter
- Use the Color Curves filter
- Color Reduce filter
- Color Wheels filter
- Use the Color Wheels filter
- Colorize filter
- Contrast filter
- Custom LUT filter
- Use the Custom LUT filter
- Gamma filter
- Gradient Colorize filter
- HDR Tools filter
- Hue/Saturation filter
- Hue/Saturation Curves filter
- Use the Hue/Saturation Curves filter
- Levels filter
- Negative filter
- OpenEXR Tone Map filter
- Sepia filter
- Threshold filter
- Tint filter
-
- Intro to Distortion filters
- Black Hole filter
- Bulge filter
- Bump Map filter
- Disc Warp filter
- Droplet filter
- Earthquake filter
- Fisheye filter
- Flop filter
- Fun House filter
- Glass Block filter
- Glass Distortion
- Insect Eye filter
- Mirror filter
- Page Curl filter
- Poke filter
- Polar filter
- Refraction filter
- Ring Lens filter
- Ripple filter
- Scrape filter
- Sliced Scale filter
- Use the Sliced Scale filter
- Sphere filter
- Starburst filter
- Stripes filter
- Target filter
- Tiny Planet filter
- Twirl filter
- Underwater filter
- Wave filter
-
- Intro to Stylize filters
- Add Noise filter
- Bad Film filter
- Bad TV filter
- Circle Screen filter
- Circles filter
- Color Emboss filter
- Comic filter
- Crystallize filter
- Edges filter
- Extrude filter
- Fill filter
- Halftone filter
- Hatched Screen filter
- Highpass filter
- Indent filter
- Line Art filter
- Line Screen filter
- MinMax filter
- Noise Dissolve filter
- Pixellate filter
- Posterize filter
- Relief filter
- Slit Scan filter
- Slit Tunnel filter
- Texture Screen filter
- Vignette filter
- Wavy Screen filter
- Publish filter parameters to Final Cut Pro
- Using filters on alpha channels
- Filter performance
- Save custom filters
-
- Intro to 3D objects
- Add a 3D object
- Move and rotate a 3D object
- Reposition a 3D object’s anchor point
- Exchange a 3D object file
- 3D object intersection and layer order
- Using cameras and lights with 3D objects
- Save custom 3D objects
- Guidelines for working with 3D objects
- Working with imported 3D objects
-
- Intro to 360-degree video
- 360-degree projects
- Create 360-degree projects
- Add 360-degree video to a project
- Create a tiny planet effect
- Reorient 360-degree media
- Creating 360-degree templates for Final Cut Pro
- 360-degree-aware filters and generators
- Export and share 360-degree projects
- Guidelines for better 360-degree projects
-
-
- Intro to preferences and shortcuts
-
- Intro to Keyboard shortcuts
- Use function keys
- General keyboard shortcuts
- Audio list keyboard shortcuts
-
- Tools keyboard shortcuts
- Transform tool keyboard shortcuts
- Select/Transform tool keyboard shortcuts
- Crop tool keyboard shortcuts
- Edit Points tool keyboard shortcuts
- Edit shape tools keyboard shortcuts
- Pan and Zoom tools keyboard shortcuts
- Shape tools keyboard shortcuts
- Bezier tool keyboard shortcuts
- B-Spline tool keyboard shortcuts
- Paint Stroke tool keyboard shortcuts
- Text tool keyboard shortcuts
- Shape mask tools keyboard shortcuts
- Bezier Mask tool keyboard shortcuts
- B-Spline Mask tool keyboard shortcuts
- Transport control keyboard shortcuts
- View option keyboard shortcuts
- HUD keyboard shortcuts
- Inspector keyboard shortcuts
- Keyframe Editor keyboard shortcuts
- Layers keyboard shortcuts
- Library keyboard shortcuts
- Media list keyboard shortcuts
- Timeline keyboard shortcuts
- Keyframing keyboard shortcuts
- Shape and Mask keyboard shortcuts
- 3D keyboard shortcuts
- Miscellaneous keyboard shortcuts
- Touch Bar shortcuts
- Move assets to another computer
- Work with GPUs
- Glossary
- Copyright

Particle cell controls in Motion
Think of the particle cell as the “mold” for the particles generated in the canvas by the emitter. The parameters in the Cell Controls group determine how particles behave after they are released from the emitter. Cell controls appear at the bottom of the Emitter Inspector when a particle system is selected, and in the Particle Cell Inspector when a particle cell is selected.
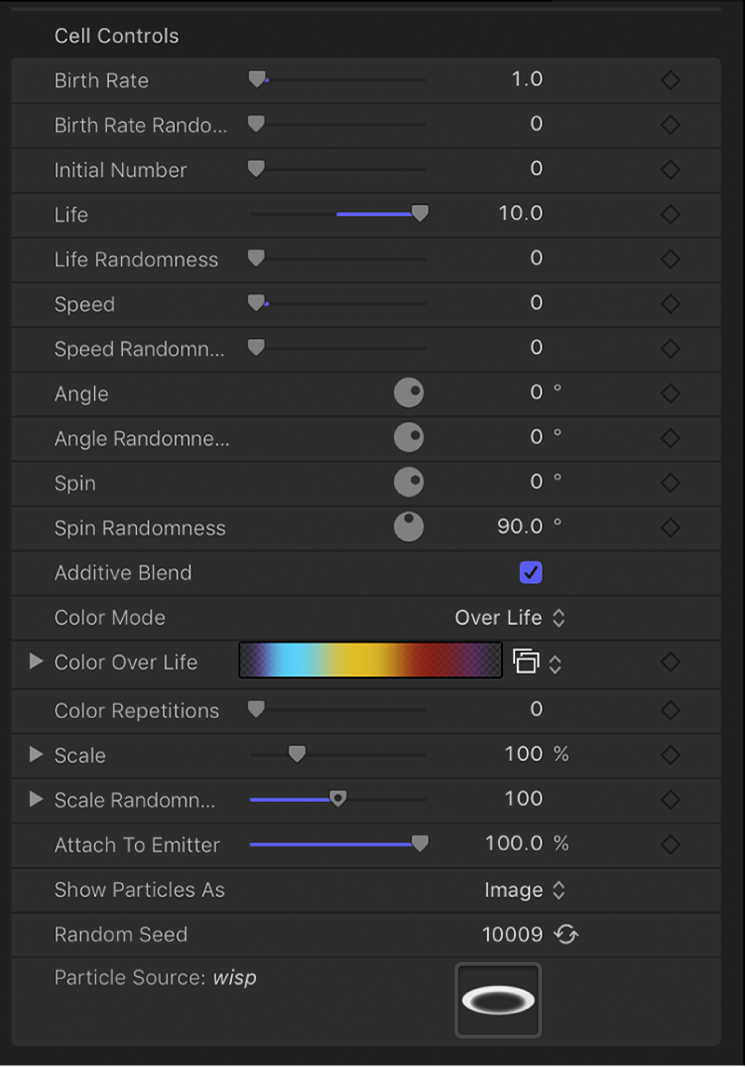
Adjust an emitter’s cells using the Cell Controls:
Birth Rate: A slider that defines the birth rate of the cell—that is, how many particles of this cell emerge from the emitter every second. Higher values create denser particle effects.
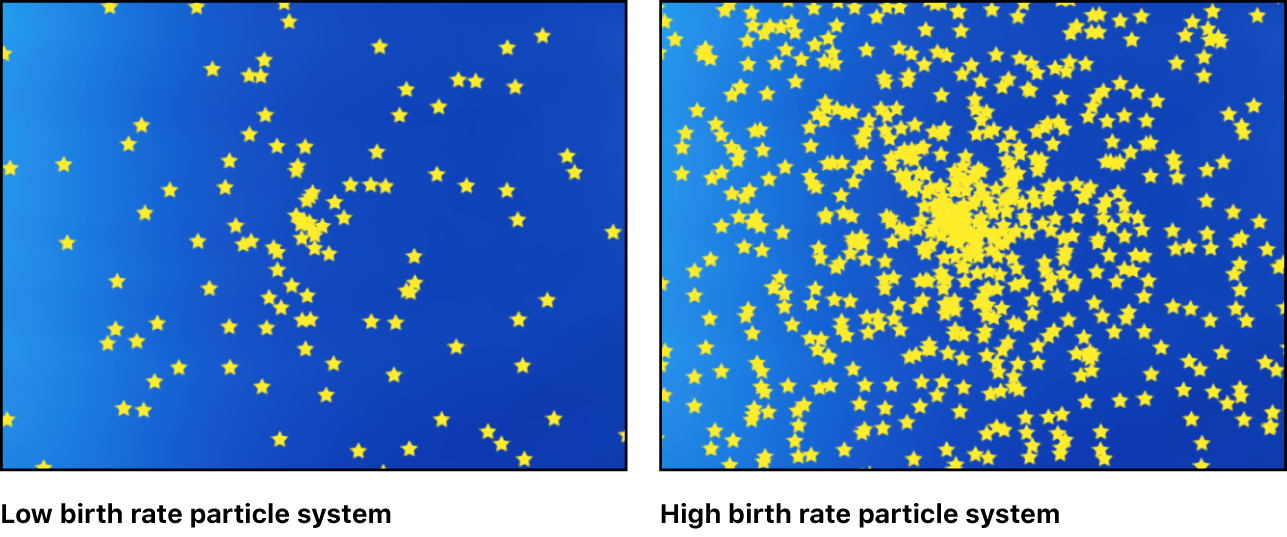
Birth Rate Randomness: A slider that defines an amount of variance in the Birth Rate of generated particles. A value of 0 results in no variance (particles emerge from the emitter at the same rate). A value greater than 0 introduces a range of random variance to the Birth Rate value.
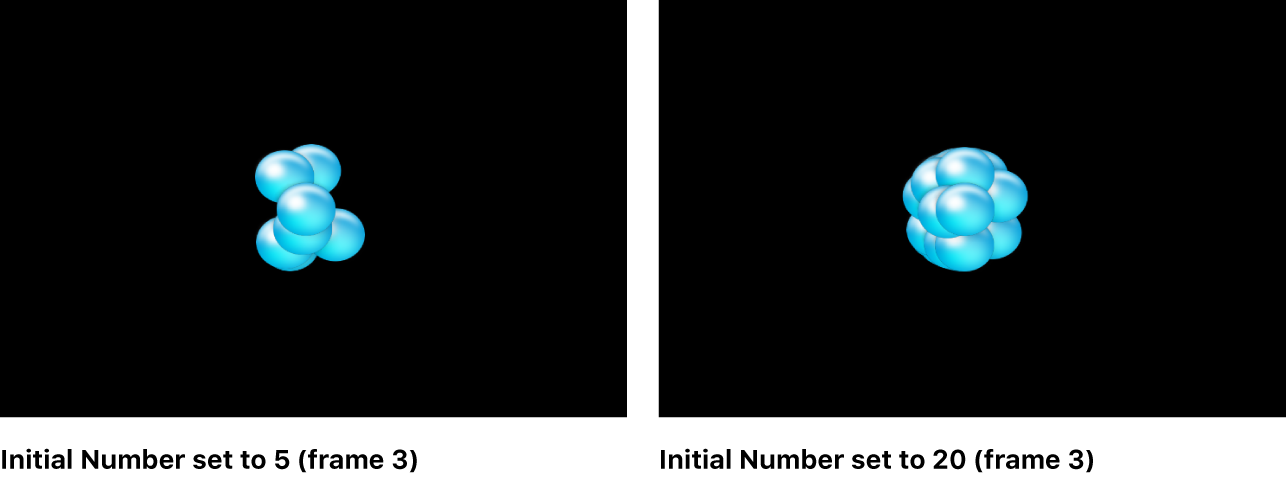
Initial Number: A slider that defines the initial number of particles. This control determines how many particles of this cell appear at the first frame of a particle effect. The result is an initial burst of particles that eventually evens out according to the Birth Rate setting.
Life: A slider that defines the duration of every particle, in seconds—that is, how long each particle lasts before vanishing from existence. This effect is similar to how sparks disappear after flying away from a sparkler. Unless the Color Over Life setting or Opacity Over Life setting (both described below) is used to fade each particle out over its life, particles immediately vanish at the end of their lifetimes.
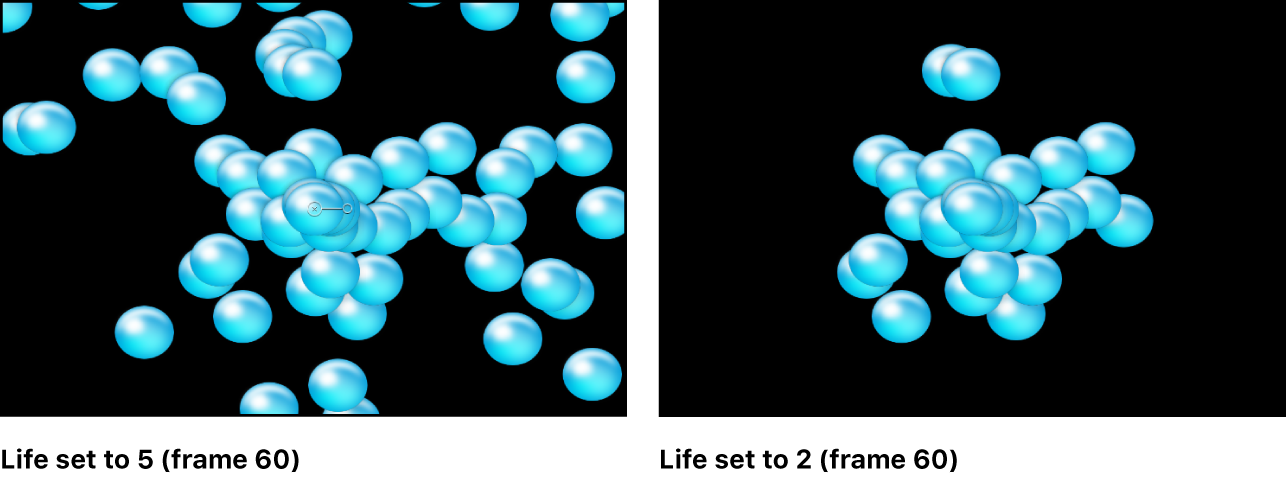
Life Randomness: A slider that defines an amount of variance in the life of generated particles. A value of 0 results in no variance—all particles from the selected cell emerge with the same lifetime. A value greater than 0 introduces a range of random variance to the Life value.
Speed: A slider that defines initial speed—that is, how quickly each particle flies away from the emitter. This, in conjunction with the Life and Birth Rate settings, determines how many particles appear in the canvas at a given frame. This parameter is equivalent to one of the functions of the graphical emission control in the HUD.
Speed Randomness: A slider that defines an amount of variance in the speed of generated particles. A value of 0 results in no variance—all particles from the selected cell emerge with the same speed. A value greater than 0 introduces a range of random variance to the Speed setting.
Align Angle: When this checkbox is selected, particles rotate to match the shape on which they are positioned. This parameter is available in all cases but the following: when the Shape setting (in the Emitter Inspector) is Rectangle, Circle, Image, Box, and Sphere and the Arrangement setting is Tile Fill or Random Fill; or when the Shape setting is Point.
Angle: A dial that sets the angle of rotation, in degrees, at which new particles are created.
Angle Randomness: A dial that sets an amount of variance in the angle of generated particles.
Spin: A dial that animates particles in a system by initially spinning each particle around its center. Adjustments to this control are in degrees per second.
Spin Randomness: A dial that sets an amount of variance in the spin of generated particles. A value of 0 results in no variance—all particles from the selected cell spin at the same rate. A value greater than 0 introduces a range of random variance to the Spin setting.
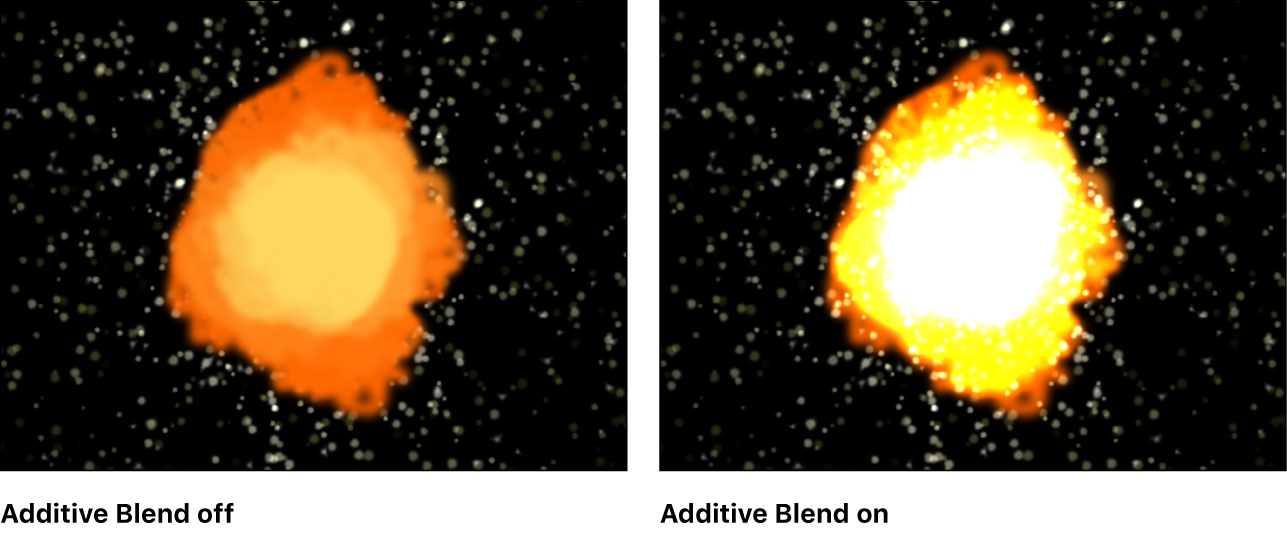
Additive Blend: By default, particles are composited together using the Normal blend mode. Select this checkbox to composite all overlapping generated particles together using the Additive blend mode, which intensifies the brightness of overlapping objects. This blending occurs in addition to the compositing method set in the Blend Mode parameter of the Properties Inspector.
Color Mode: A pop-up menu that sets how particles are tinted. There are five options:
Original: Particles are generated using the original colors from the source layer. When this setting is selected, the Opacity Over Life gradient editor becomes available (described below).
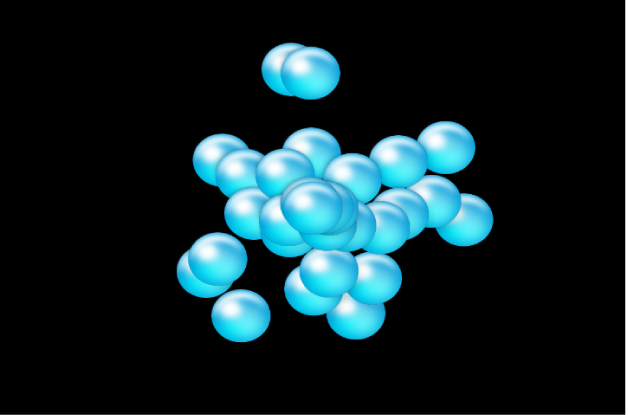
Colorize: Particles are tinted using the color specified in the Color parameter. When this setting is selected, additional Color and Opacity Over Life controls appear (described below).
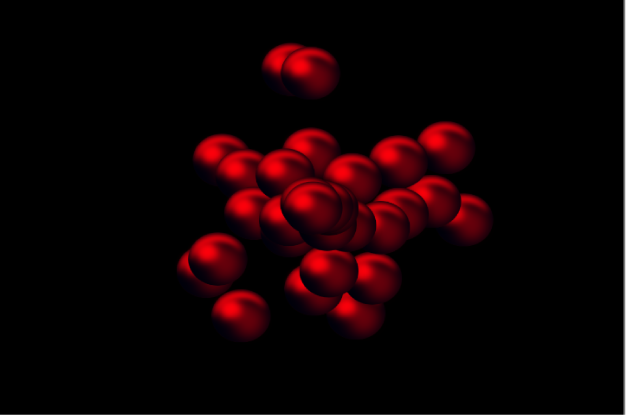
Over Life: Particles are tinted based on their age, with the range of possible colors defined by the Color Over Life gradient editor (described below).

Pick From Color Range: Particles are tinted at random, with the range of possible colors defined by the Color Range gradient editor (described below). A point on the gradient is randomly chosen, so the relative sizes of each color region determine the frequency of the color being used.

Take Image Color: Each new particle’s color is based on the color of the image at the position where the particle was generated. This menu item is available only when the Shape pop-up menu in the Emitter Inspector is set to Image.
Opacity Over Life: A gradient editor (available when the Color Mode is set to Original or Colorize) that animates changes to the opacity of particles over their lifetime. For more information on using gradient controls, see Change gradient color and opacity in Motion.
Color: Color controls (available when the Color Mode pop-up menu is set to Colorize) to set the color of particles. You can also modify the alpha channel of each particle, altering its opacity. This parameter is unique to the cell object. You can click the color well to choose a color, use the eye dropper, or open the disclosure triangle and adjust the Red, Green, Blue, and Opacity channel sliders. See Use basic color controls in Motion.
Color Over Life: A gradient editor (available when the Color Mode is set to Over Life) that sets the range of color that each particle assumes as it ages, beginning with the leftmost color in the gradient, and progressing through the range of colors until finally reaching the rightmost color at the end of its life. For more information on using gradient controls, see Change gradient color and opacity in Motion.
Color Repetitions: A slider (available when Color Mode is set to Over Life) that sets the number of times the gradient color pattern is repeated over the life of the particle.
Color Range: A gradient editor (available when Color Mode is set to Pick From Color Range) that sets a range of colors used to randomly tint new particles. The direction of the gradient colors is not relevant. Color Range has the same controls as the Color Over Life gradient editor.
Scale: A slider that defines the scale of every particle of a cell. Click the disclosure triangle next to the Scale parameter to reveal separate X, Y, and Z scaling subparameters. Use X and Y to resize the width and height of generated particles; use Z to change the depth of 3D text particles. This control affects the initial scale of the particle (compared to the Scale Over Life behavior in the Particles behavior category).
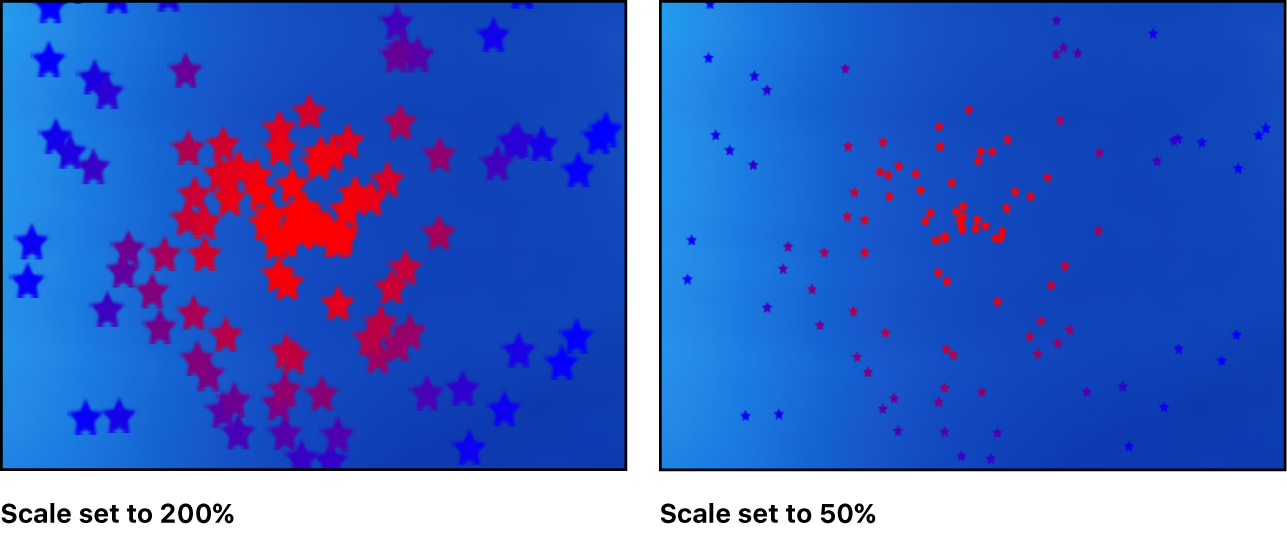
Note: When you use an image as a particle cell source and set a low Scale value, set the render quality in the Render pop-up menu (above the canvas) or the View menu to Best (choose View > Quality > Best).
Scale Randomness: A slider that defines an amount of variance in the scale of generated particles. A value of 0 results in no variance—all particles from the selected cell emerge with the same size. A value greater than 0 introduces a variance defined by the Scale parameter, plus or minus a random value falling within the Scale Randomness setting. Click the disclosure triangle next to the Scale parameter to reveal separate X, Y, and Z scaling subparameters. Use X and Y to vary the width and height of generated particles; use Z to vary the depth of 3D text particles.
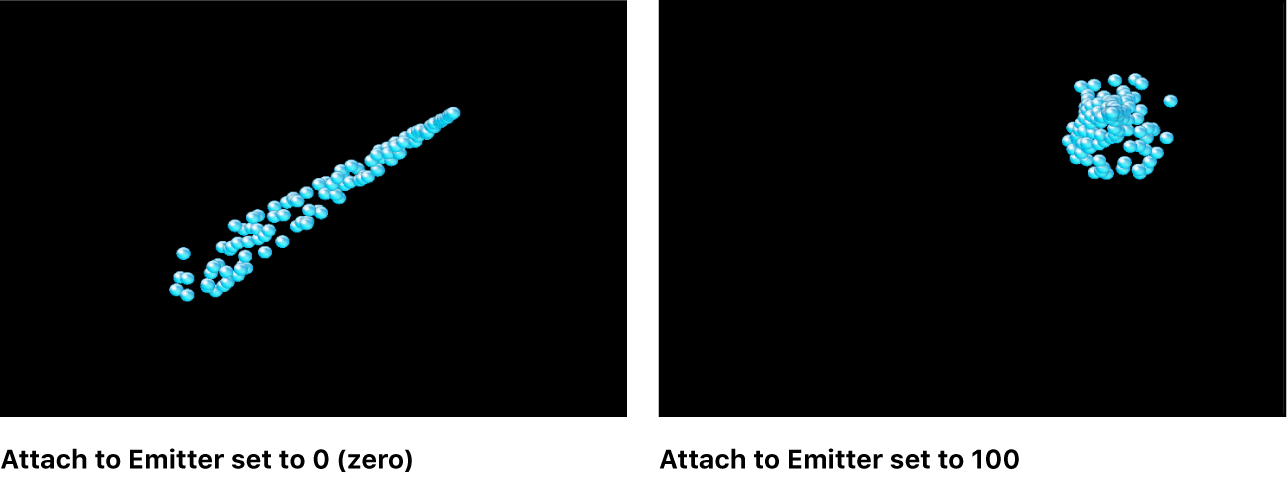
Attach To Emitter: A slider that sets how closely particles follow the position of a moving emitter. If set to zero, particles follow their own path after being emitted, trailing along the motion path the emitter is following. If this parameter is set to 100, in the absence of other behaviors, all generated particles follow the emitter, surrounding it in a moving cloud of particles.
Play Frames: A checkbox (available if the particle system was created from a QuickTime movie) that controls playback. If selected, the animation or video clip used to generate each particle loops. If deselected, particles are generated using the still frame specified by the Random Start Frame parameter or the Source Start Frame parameter (both described below).
Random Start Frame: A checkbox (available if the particle system was created from a QuickTime movie) that introduces variation into animated particles generated from QuickTime objects. If selected, each newly generated particle begins at a different frame of the animation. Stills are chosen randomly if Random Start Frame is deselected.
Source Start Frame: A slider available if the particle system was created from a QuickTime movie and Random Start Frame is deselected. Use this control to set the start frame of the animation (if the Play Frames checkbox is selected) or the still frame to display (if the Play Frames checkbox is deselected).
Hold Frames: A slider (available if the particle system was created from a QuickTime movie) that sets the number of times each frame of the source movie is repeated during playback. The larger the Hold Frames value, the slower your playback.
Hold Frames Randomness: A slider (available if the particle system was created from a QuickTime movie) that varies the number of frames to “hold.”
Show Particles As: A pop-up menu that sets whether particles are displayed in a preview mode or as they actually appear. By default, this parameter is set to Image, which displays each particle as it’s supposed to appear. However, the nonimage preview modes play more efficiently when viewing a complex particle system and also provide other ways of analyzing particle motion. There are four menu items:
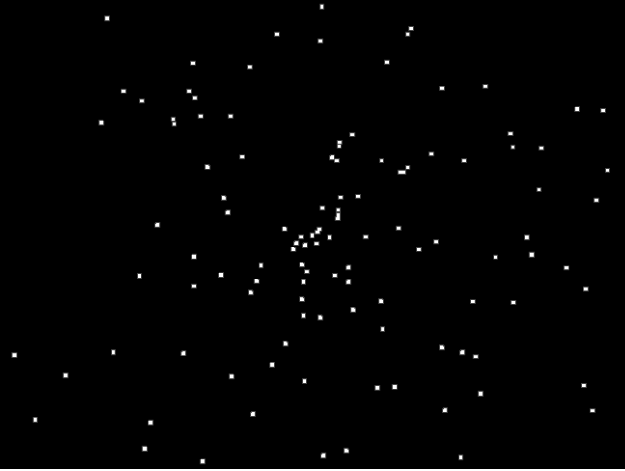
Points: Displays each particle as a single point. This is the fastest preview mode, useful for displaying the type and speed of particle motion in a system.
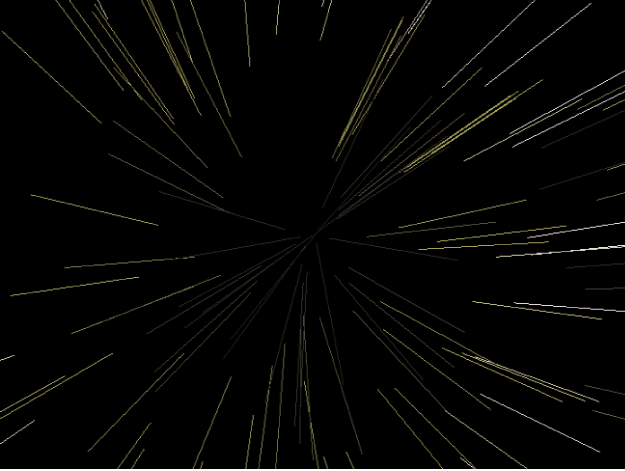
Lines: Displays each particle as a line. This is a good preview mode to use to analyze the vector of each particle’s motion. The length of each line is determined by that particle’s speed, and the angle of each line equals each particle’s direction.
Wireframe: Displays each particle as a bounding box. Because the bounding boxes are good indicators of each particle’s orientation in the system, this preview mode is useful for evaluating the movements of individual particles. For example, it’s easy to see the angle of rotation for particles spinning or following a complex motion path.
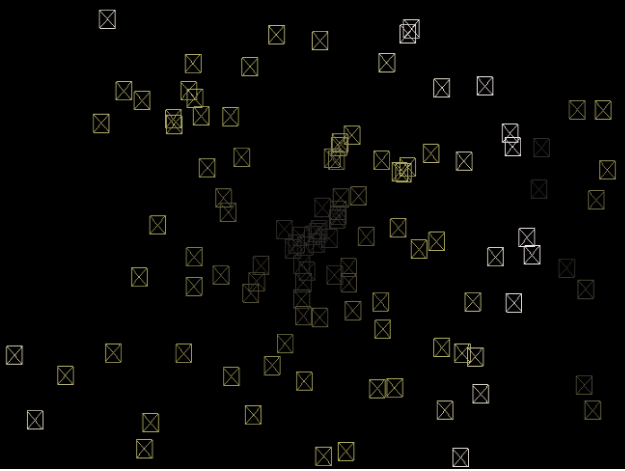
Image: The default setting, displays the full particle system effect.
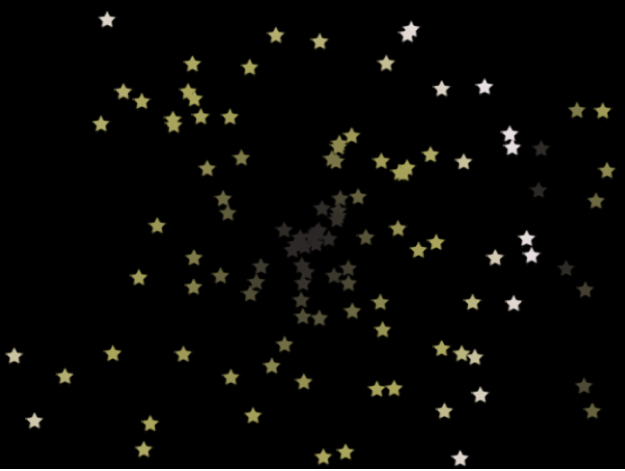
Note: The option chosen in the Show Particles As pop-up menu appears in your final render. Used deliberately, this can result in some interesting effects.
Point Size: A slider (available when Show Particles As is set to Points) that sets the largeness of the points.
Random Seed: Although particle systems seem random, they’re deterministic. This means that the variation in each particle system is created based on the number shown in the Random Seed field. Unless this seed number is changed, a particle system with the same Random Seed value always plays back with the same motion. If you don’t like the current random motion or distribution of the particle system, you can change the seed value by typing a new number or clicking Generate. This changes the random calculations performed for that system for all randomness parameters.
Particle Source: In particle systems with more than one cell, an image well representing each cell appears at the bottom of the Emitter Inspector. Each Particle Source well has a checkbox you can use to enable or disable that cell.
Download this guide: Apple Books | PDF