Motion User Guide
- Welcome
-
- Intro to basic compositing
-
- Intro to transforming layers
-
- Intro to transforming layers in the canvas
- Transform layer properties in the canvas
- Transform tools
- Change layer position, scale, or rotation
- Move a layer’s anchor point
- Add a drop shadow to a layer
- Distort or shear a layer
- Crop a layer
- Modify shape or mask points
- Transform text glyphs and other object attributes
- Align layers in the canvas
- Transform layers in the HUD
- Transform 2D layers in 3D space
-
- Intro to behaviors
- Behaviors versus keyframes
-
- Intro to behavior types
-
- Intro to Parameter behaviors
- Audio behavior
- Average behavior
- Clamp behavior
- Custom behavior
- Add a Custom behavior
- Exponential behavior
- Link behavior
- Logarithmic behavior
- MIDI behavior
- Add a MIDI behavior
- Negate behavior
- Oscillate behavior
- Create a decaying oscillation
- Overshoot behavior
- Quantize behavior
- Ramp behavior
- Randomize behavior
- Rate behavior
- Reverse behavior
- Stop behavior
- Track behavior
- Wriggle behavior
-
- Intro to Simulation behaviors
- Align to Motion behavior
- Attracted To behavior
- Attractor behavior
- Drag behavior
- Drift Attracted To behavior
- Drift Attractor behavior
- Edge Collision behavior
- Gravity behavior
- Orbit Around behavior
- Random Motion behavior
- Repel behavior
- Repel From behavior
- Rotational Drag behavior
- Spring behavior
- Vortex behavior
- Wind behavior
- Additional behaviors
-
- Intro to using generators
- Add a generator
-
- Intro to image generators
- Caustics generator
- Cellular generator
- Checkerboard generator
- Clouds generator
- Color Solid generator
- Concentric Polka Dots generator
- Concentric Shapes generator
- Gradient generator
- Grid generator
- Japanese Pattern generator
- Lens Flare generator
- Manga Lines generator
- Membrane generator
- Noise generator
- One Color Ray generator
- Op Art 1 generator
- Op Art 2 generator
- Op Art 3 generator
- Overlapping Circles generator
- Radial Bars generator
- Soft Gradient generator
- Spirals generator
- Spiral Drawing generator
- Use Spiral Drawing onscreen controls
- Star generator
- Stripes generator
- Sunburst generator
- Truchet Tiles generator
- Two Color Ray generator
- Save a modified generator
-
- Intro to filters
- Browse and preview filters
- Apply or remove filters
-
- Intro to filter types
-
- Intro to Color filters
- Brightness filter
- Channel Mixer filter
- Color Balance filter
- Example: Color-balance two layers
- Color Curves filter
- Use the Color Curves filter
- Color Reduce filter
- Color Wheels filter
- Use the Color Wheels filter
- Colorize filter
- Contrast filter
- Custom LUT filter
- Use the Custom LUT filter
- Gamma filter
- Gradient Colorize filter
- HDR Tools filter
- Hue/Saturation filter
- Hue/Saturation Curves filter
- Use the Hue/Saturation Curves filter
- Levels filter
- Negative filter
- OpenEXR Tone Map filter
- Sepia filter
- Threshold filter
- Tint filter
-
- Intro to Distortion filters
- Black Hole filter
- Bulge filter
- Bump Map filter
- Disc Warp filter
- Droplet filter
- Earthquake filter
- Fisheye filter
- Flop filter
- Fun House filter
- Glass Block filter
- Glass Distortion
- Insect Eye filter
- Mirror filter
- Page Curl filter
- Poke filter
- Polar filter
- Refraction filter
- Ring Lens filter
- Ripple filter
- Scrape filter
- Sliced Scale filter
- Use the Sliced Scale filter
- Sphere filter
- Starburst filter
- Stripes filter
- Target filter
- Tiny Planet filter
- Twirl filter
- Underwater filter
- Wave filter
-
- Intro to Stylize filters
- Add Noise filter
- Bad Film filter
- Bad TV filter
- Circle Screen filter
- Circles filter
- Color Emboss filter
- Comic filter
- Crystallize filter
- Edges filter
- Extrude filter
- Fill filter
- Halftone filter
- Hatched Screen filter
- Highpass filter
- Indent filter
- Line Art filter
- Line Screen filter
- MinMax filter
- Noise Dissolve filter
- Pixellate filter
- Posterize filter
- Relief filter
- Slit Scan filter
- Slit Tunnel filter
- Texture Screen filter
- Vignette filter
- Wavy Screen filter
- Publish filter parameters to Final Cut Pro
- Using filters on alpha channels
- Filter performance
- Save custom filters
-
- Intro to 3D objects
- Add a 3D object
- Move and rotate a 3D object
- Reposition a 3D object’s anchor point
- Exchange a 3D object file
- 3D object intersection and layer order
- Using cameras and lights with 3D objects
- Save custom 3D objects
- Guidelines for working with 3D objects
- Working with imported 3D objects
-
- Intro to 360-degree video
- 360-degree projects
- Create 360-degree projects
- Add 360-degree video to a project
- Create a tiny planet effect
- Reorient 360-degree media
- Creating 360-degree templates for Final Cut Pro
- 360-degree-aware filters and generators
- Export and share 360-degree projects
- Guidelines for better 360-degree projects
-
-
- Intro to preferences and shortcuts
-
- Intro to Keyboard shortcuts
- Use function keys
- General keyboard shortcuts
- Audio list keyboard shortcuts
-
- Tools keyboard shortcuts
- Transform tool keyboard shortcuts
- Select/Transform tool keyboard shortcuts
- Crop tool keyboard shortcuts
- Edit Points tool keyboard shortcuts
- Edit shape tools keyboard shortcuts
- Pan and Zoom tools keyboard shortcuts
- Shape tools keyboard shortcuts
- Bezier tool keyboard shortcuts
- B-Spline tool keyboard shortcuts
- Paint Stroke tool keyboard shortcuts
- Text tool keyboard shortcuts
- Shape mask tools keyboard shortcuts
- Bezier Mask tool keyboard shortcuts
- B-Spline Mask tool keyboard shortcuts
- Transport control keyboard shortcuts
- View option keyboard shortcuts
- HUD keyboard shortcuts
- Inspector keyboard shortcuts
- Keyframe Editor keyboard shortcuts
- Layers keyboard shortcuts
- Library keyboard shortcuts
- Media list keyboard shortcuts
- Timeline keyboard shortcuts
- Keyframing keyboard shortcuts
- Shape and Mask keyboard shortcuts
- 3D keyboard shortcuts
- Miscellaneous keyboard shortcuts
- Touch Bar shortcuts
- Move assets to another computer
- Work with GPUs
- Glossary
- Copyright

Draw complex shapes and masks in Motion
Complex masks use spline shapes that you can customize to create complex contours.
Draw a Bezier shape or mask
In Motion, select the Bezier tool in the canvas toolbar (or press B).

Note: The Bezier Mask tool is located in the mask tools pop-up menu in the canvas toolbar.
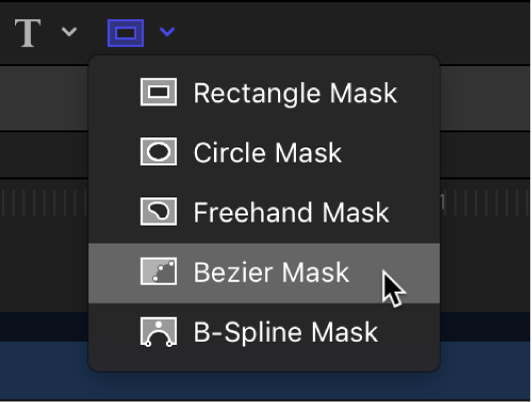
The Bezier Tool HUD (or Bezier Mask Tool HUD) appears. (If it doesn’t appear, press F7.) To change the parameters of the shape (or mask) before you draw it, adjust the controls in this HUD.
Note: You can also edit the shape parameters after you draw the mask.
Click in the canvas to draw the first point.
To add points to further define the shape, do one of the following:
Click in the canvas to make a linear corner point.
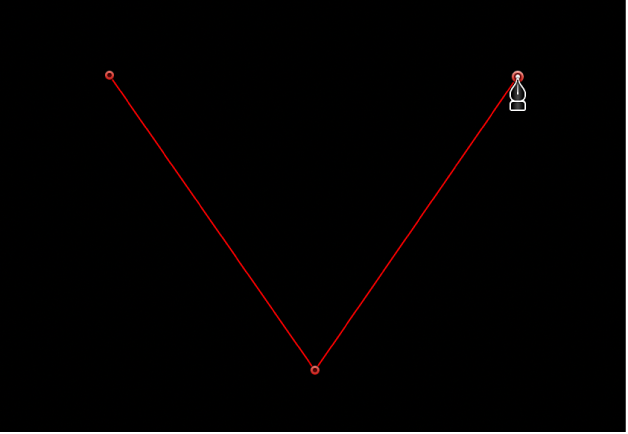
Drag in the canvas to make a curved Bezier point, adjusting it to the shape you want.
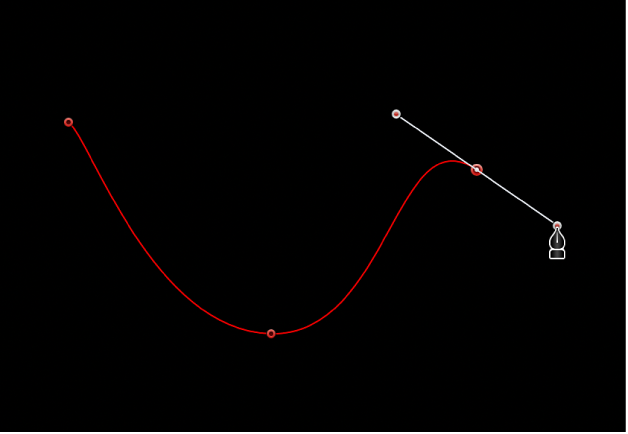
Press and hold the Shift key while making a curved point to constrain its tangents to 45-degree angles. Press and hold Command–Equal Sign (=) to zoom in for a closer look and Command-Hyphen (–) to zoom out. You can scroll around by pressing the Space bar as you drag in the canvas. If you have a trackpad, it’s even easier: pinch open or closed to zoom in or out, and use a two-finger swipe to scroll around.
To finish the shape, do one of the following:
Click the first point you drew to create a closed shape.
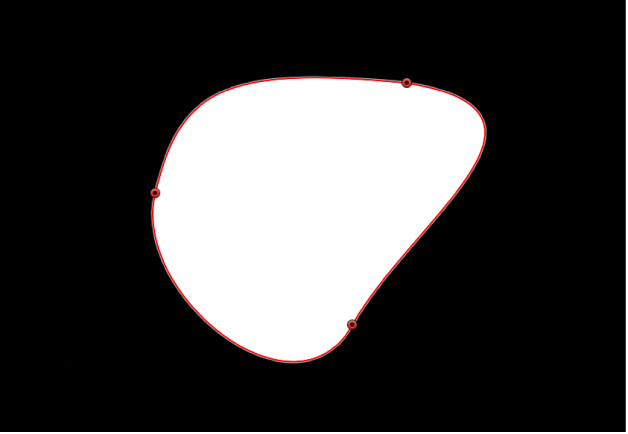
Press C to close the shape, joining the first point you created to the last.
Double-click anywhere in the canvas to create the last point of an open shape.
Press Return to create the last point of an open shape.
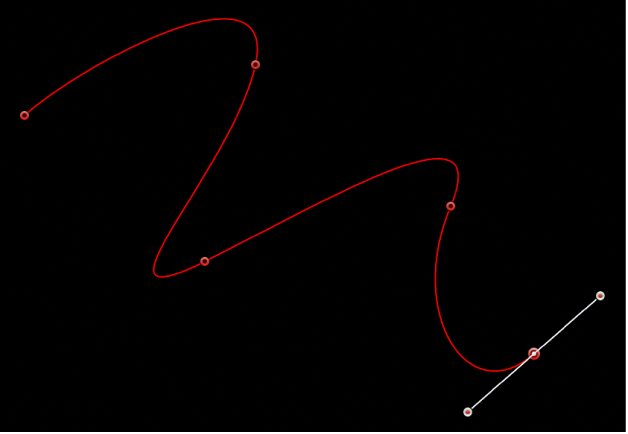
Note: Before a shape is closed, you can press Esc to cancel the entire operation, deleting the shape.
Immediately after finishing a shape, the Shape HUD appears and the Edit Points tool is selected, which lets you edit the shape you’ve just created.
Draw a B-Spline shape or mask
In the canvas toolbar in Motion, click and hold the path shape tools pop-up menu, then choose B-Spline.
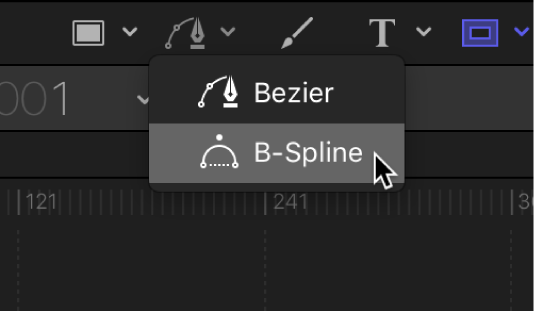
Note: If the Bezier tool is selected, pressing B once selects the B-Spline tool. If another tool is selected, such as the Text tool, pressing B twice selects the B-Spline tool. The B-Spline Mask tool is located in the mask tools pop-up menu in the canvas toolbar.
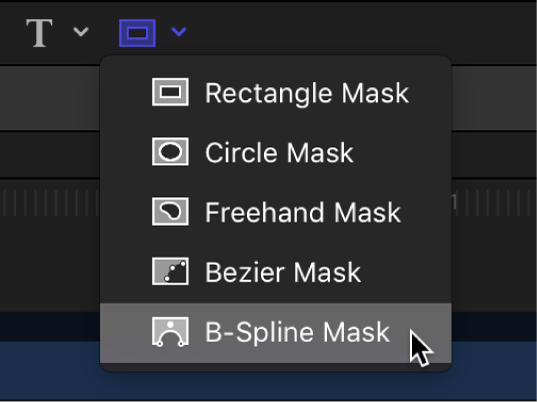
The B-Spline Tool HUD (or B-Spline Mask Tool HUD) appears. (If it doesn’t appear, press F7.) To change the parameters of the shape (or mask) before it is drawn, adjust the controls in this HUD.
Click in the canvas to draw the first point.
Continue clicking in the canvas to draw additional points to define the shape you need.
Tip: While drawing a shape, you can move and adjust the control points you’ve created before finishing the shape. You can adjust any control point except the first one you created, because clicking the first point closes the shape. Press and hold the Shift key while making a curved point to constrain its tangents to 45-degree angles.
As you create new B-Spline control points, keep the following in mind:
The control points you draw influence the shape of the curve from a distance. They do not lie directly on the surface of the curve.
To create more detailed curves, create more points. However, it’s best to use the fewest number of points necessary to create the amount of detail you need. Shapes with an excessive number of points can be difficult to edit later on.
In many instances, it’s easier to create a loose group of control points first and then adjust them afterwards to create the precise curve you need in a later step.
When you’re ready to finish your shape, do one of the following:
Click the first point you drew to create a closed shape.
Press C to close the shape, joining the first point you created to the last.
Press Return to finish an open shape at the last point you made.
Double-click anywhere in the canvas to define the last point of an open shape.
Note: You can press Esc to cancel the entire operation and delete the shape.
Immediately after finishing a shape, the Shape HUD appears and the Edit Points tool is selected, which lets you edit the shape you’ve just created.
Draw a freehand mask
Freehand masks create a mask shape in one movement, rather than in a point-by-point fashion (like a Bezier or B-Spline shape). For best results, use a stylus and tablet when drawing freehand masks.
In the Layers list in Motion, select the layer to mask; then in the canvas toolbar, click and hold the mask tools pop-up menu and choose Freehand Mask.
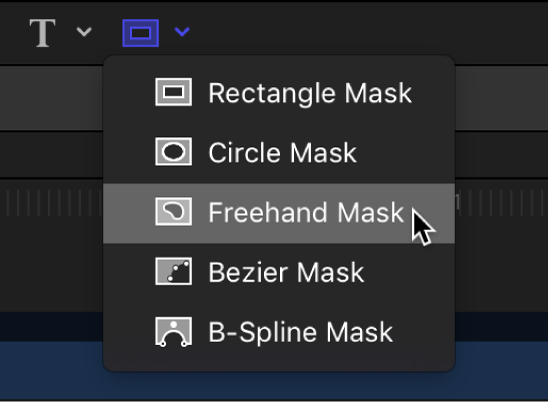
The Freehand Mask Tool HUD appears. To change the parameters of the mask before you draw it, adjust the controls in this HUD.
Do any of the following:
Using a mouse: Drag in the canvas to draw a shape, finishing the mask at the starting point.
Using a tablet: With a stylus, draw on the tablet, finishing the mask at the starting point.
A small circle appears when the pointer is over the starting point.
Note: If you don’t close the mask at its starting point, the mask is closed when you release the mouse button or lift the stylus.
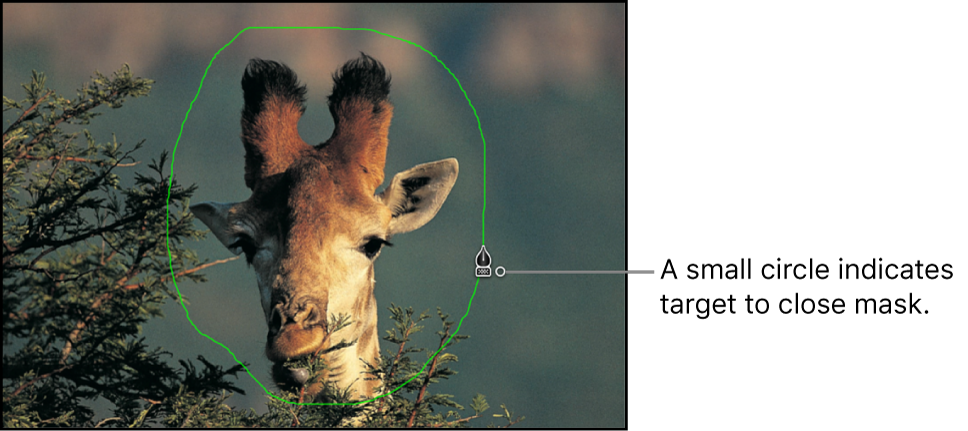
The mask is completed.
Edit your control points to fine-tune the mask.
Download this guide: Apple Books | PDF