Motion User Guide
- Welcome
- What’s new in Motion
-
- Intro to basic compositing
-
- Intro to transforming layers
-
- Intro to transforming layers in the canvas
- Transform layer properties in the canvas
- Transform tools
- Change layer position, scale, or rotation
- Move a layer’s anchor point
- Add a drop shadow to a layer
- Distort or shear a layer
- Crop a layer
- Modify shape or mask points
- Transform text glyphs and other object attributes
- Align layers in the canvas
- Transform layers in the HUD
- Transform 2D layers in 3D space
-
- Intro to behaviors
- Behaviors versus keyframes
-
- Intro to behavior types
-
- Intro to Parameter behaviors
- Audio behavior
- Average behavior
- Clamp behavior
- Custom behavior
- Add a Custom behavior
- Exponential behavior
- Link behavior
- Logarithmic behavior
- MIDI behavior
- Add a MIDI behavior
- Negate behavior
- Oscillate behavior
- Create a decaying oscillation
- Overshoot behavior
- Quantize behavior
- Ramp behavior
- Randomize behavior
- Rate behavior
- Reverse behavior
- Stop behavior
- Track behavior
- Wriggle behavior
-
- Intro to Simulation behaviors
- Align to Motion behavior
- Attracted To behavior
- Attractor behavior
- Drag behavior
- Drift Attracted To behavior
- Drift Attractor behavior
- Edge Collision behavior
- Gravity behavior
- Orbit Around behavior
- Random Motion behavior
- Repel behavior
- Repel From behavior
- Rotational Drag behavior
- Spring behavior
- Vortex behavior
- Wind behavior
- Additional behaviors
-
- Intro to using generators
- Add a generator
-
- Intro to image generators
- Caustics generator
- Cellular generator
- Checkerboard generator
- Clouds generator
- Color Solid generator
- Concentric Polka Dots generator
- Concentric Shapes generator
- Gradient generator
- Grid generator
- Japanese Pattern generator
- Lens Flare generator
- Manga Lines generator
- Membrane generator
- Noise generator
- One Color Ray generator
- Op Art 1 generator
- Op Art 2 generator
- Op Art 3 generator
- Overlapping Circles generator
- Radial Bars generator
- Soft Gradient generator
- Spirals generator
- Spiral Drawing generator
- Use Spiral Drawing onscreen controls
- Star generator
- Stripes generator
- Sunburst generator
- Truchet Tiles generator
- Two Color Ray generator
- Save a modified generator
-
- Intro to filters
- Browse and preview filters
- Apply or remove filters
-
- Intro to filter types
-
- Intro to Color filters
- Brightness filter
- Channel Mixer filter
- Color Adjustments filter
- Color Balance filter
- Example: Color-balance two layers
- Color Curves filter
- Use the Color Curves filter
- Color Reduce filter
- Color Wheels filter
- Use the Color Wheels filter
- Colorize filter
- Contrast filter
- Custom LUT filter
- Use the Custom LUT filter
- Gamma filter
- Gradient Colorize filter
- HDR Tools filter
- Hue/Saturation filter
- Hue/Saturation Curves filter
- Use the Hue/Saturation Curves filter
- Levels filter
- Negative filter
- OpenEXR Tone Map filter
- Sepia filter
- Threshold filter
- Tint filter
-
- Intro to Distortion filters
- Black Hole filter
- Bulge filter
- Bump Map filter
- Disc Warp filter
- Droplet filter
- Earthquake filter
- Fisheye filter
- Flop filter
- Fun House filter
- Glass Block filter
- Glass Distortion
- Insect Eye filter
- Mirror filter
- Page Curl filter
- Poke filter
- Polar filter
- Refraction filter
- Ring Lens filter
- Ripple filter
- Scrape filter
- Sliced Scale filter
- Use the Sliced Scale filter
- Sphere filter
- Starburst filter
- Stripes filter
- Target filter
- Tiny Planet filter
- Twirl filter
- Underwater filter
- Wave filter
-
- Intro to Stylize filters
- Add Noise filter
- Bad Film filter
- Bad TV filter
- Circle Screen filter
- Circles filter
- Color Emboss filter
- Comic filter
- Crystallize filter
- Edges filter
- Extrude filter
- Fill filter
- Halftone filter
- Hatched Screen filter
- Highpass filter
- Indent filter
- Line Art filter
- Line Screen filter
- MinMax filter
- Noise Dissolve filter
- Pixellate filter
- Posterize filter
- Relief filter
- Slit Scan filter
- Slit Tunnel filter
- Texture Screen filter
- Vignette filter
- Wavy Screen filter
- About filters and color processing
- Publish filter controls to Final Cut Pro
- Using filters on alpha channels
- Filter performance
- Save custom filters
-
- Intro to 3D objects
- Add a 3D object
- Move and rotate a 3D object
- Reposition a 3D object’s anchor point
- Exchange a 3D object file
- 3D object intersection and layer order
- Using cameras and lights with 3D objects
- Save custom 3D objects
- Guidelines for working with 3D objects
- Working with imported 3D objects
-
- Intro to 360-degree video
- 360-degree projects
- Create 360-degree projects
- Add 360-degree video to a project
- Create a tiny planet effect
- Reorient 360-degree media
- Creating 360-degree templates for Final Cut Pro
- 360-degree-aware filters and generators
- Export and share 360-degree projects
- Guidelines for better 360-degree projects
-
- Intro to settings and shortcuts
-
- Intro to Keyboard shortcuts
- Use function keys
- General keyboard shortcuts
- Audio list keyboard shortcuts
-
- Tools keyboard shortcuts
- Transform tool keyboard shortcuts
- Select/Transform tool keyboard shortcuts
- Crop tool keyboard shortcuts
- Edit Points tool keyboard shortcuts
- Edit shape tools keyboard shortcuts
- Pan and Zoom tools keyboard shortcuts
- Shape tools keyboard shortcuts
- Bezier tool keyboard shortcuts
- B-Spline tool keyboard shortcuts
- Paint Stroke tool keyboard shortcuts
- Text tool keyboard shortcuts
- Shape mask tools keyboard shortcuts
- Bezier Mask tool keyboard shortcuts
- B-Spline Mask tool keyboard shortcuts
- Transport control keyboard shortcuts
- View option keyboard shortcuts
- HUD keyboard shortcuts
- Inspector keyboard shortcuts
- Keyframe Editor keyboard shortcuts
- Layers keyboard shortcuts
- Library keyboard shortcuts
- Media list keyboard shortcuts
- Timeline keyboard shortcuts
- Keyframing keyboard shortcuts
- Shape and Mask keyboard shortcuts
- 3D keyboard shortcuts
- Miscellaneous keyboard shortcuts
- Touch Bar shortcuts
- Move assets to another computer
- Work with GPUs
- Glossary
- Copyright

Orbit Around behavior in Motion
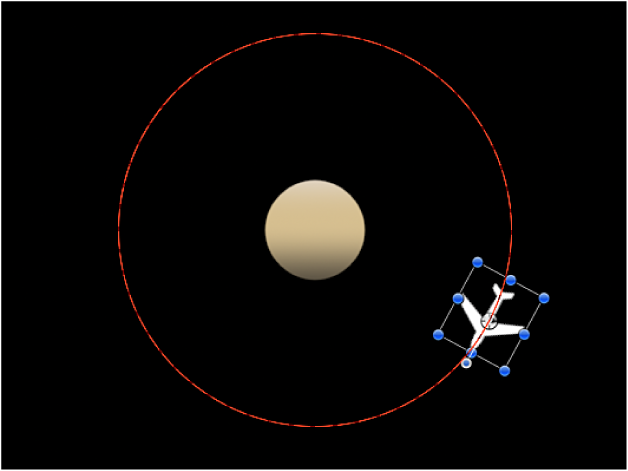
Similar to the Attracted To behavior, the Orbit Around behavior’s default parameter settings give the object sufficient initial velocity to orbit around another object in a perfect circle.

Note: Behaviors such as Attractor and Repel applied to nearby objects may disrupt an object with the Orbit Around behavior applied to it.
Adjust this behavior using the controls in the Behaviors Inspector:
Affect Subobjects: A checkbox, available when this behavior is applied to an object that contains multiple objects, such as a group, a particle emitter, a replicator, or a text layer. When this checkbox is selected, all objects enclosed in the parent object are affected individually. When this checkbox is deselected, all objects enclosed in the parent object are affected by the behavior together.
Object: An object well that defines the object to orbit around. To set the defined target object, drag the object from the Layers list to the Object well in the Orbit Around HUD or Inspector. In the Layers list, you can also drag the target object onto the Orbit Around behavior.
Strength: A slider that sets the speed of the object.
Falloff Type: A pop-up menu that determines whether the distance defined by the Influence parameter falls off linearly or exponentially. The default is Linear.
Linear: Object attraction falls off in proportion to the object’s distance.
Exponential: The closer an object is within the area of influence, the more strongly it is attracted, and the faster it moves toward the object of attraction.
Falloff Rate: A slider that sets how quickly the force of attraction between objects affected by this behavior falls off. A low Falloff Rate value results in objects quickly getting up to speed as they move toward the object of attraction. A high Falloff Rate causes objects to accelerate much more slowly. When set to Exponential, the attraction falls off more quickly than when set to Linear.
Influence: A slider that defines the radius of the circle of influence in pixels. Objects that fall within the area of influence move toward the object of attraction. Objects outside the area of influence remain in place.
Drag: A slider that causes the orbit to decay. The default value for Orbit Around is 0, which results in a stable orbit. Any other value causes the orbit to decay and the object to spiral into the object of attraction.
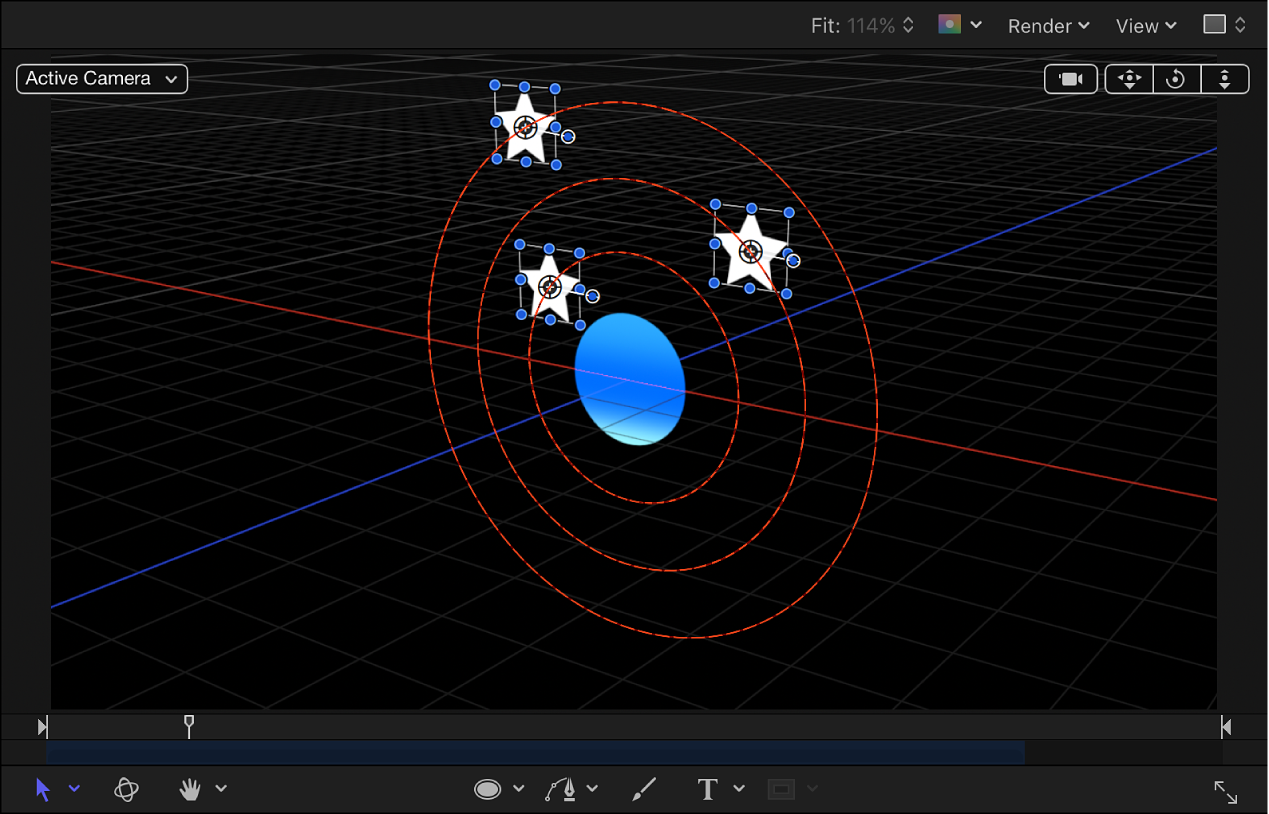
Include X, Y, and Z: Buttons that specify the space in which the orbit occurs. For example, when X and Y are enabled, the object orbits in the XY plane. In the illustration below, X and Y are selected in the Include parameter. The red motion paths represent the motion of the white stars around the target object (the blue circle). The light gray box represents the boundary of the group.

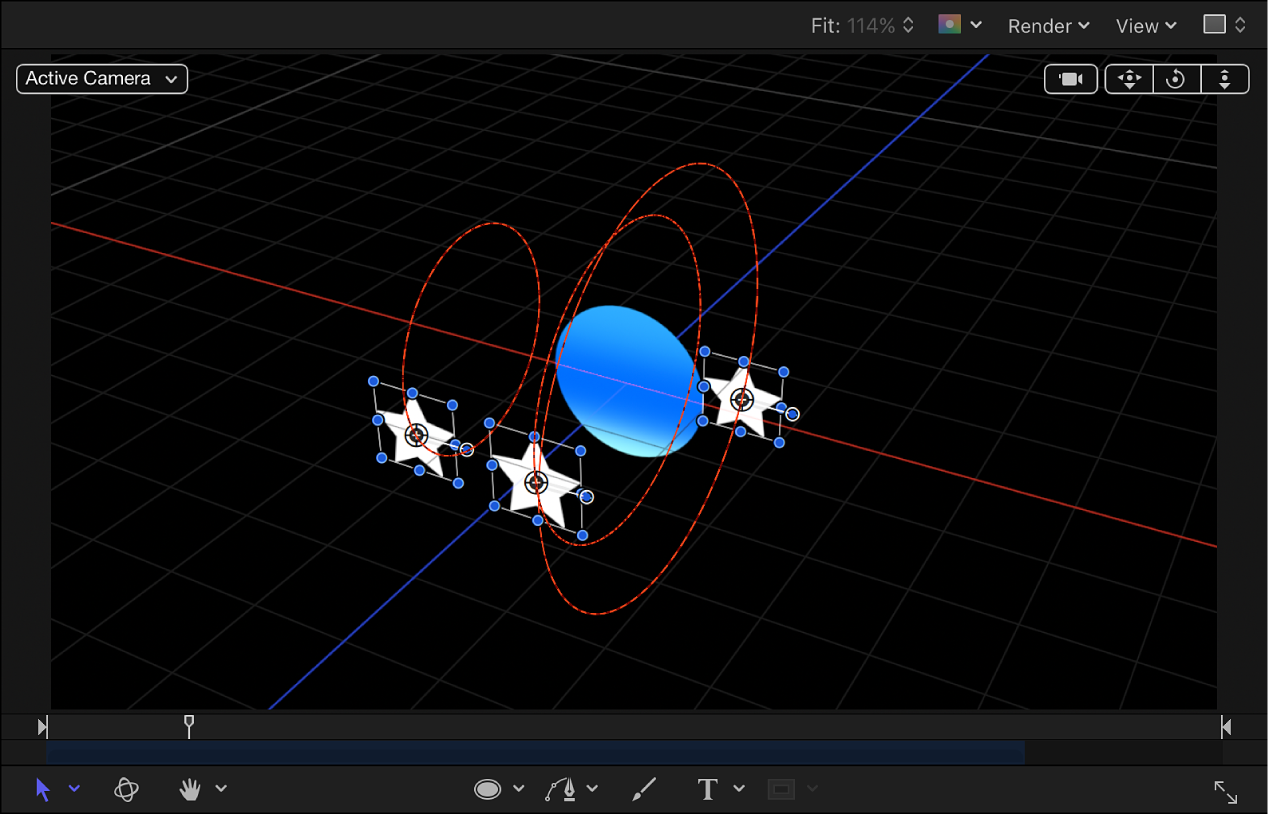
In the illustration below, Y and Z are turned on in the Include parameter. The stars move around the target object in the YZ plane.

Pole Axis: A pop-up menu that becomes available when the X, Y, and Z axes are enabled in the Include parameter. Because all points are at a fixed distance from the target or attractor object (the Pole Axis), the object can be visualized on a sphere of all possible orbits, with the target object at the center of the sphere. The Pole Axis defines the two points on the sphere that the orbit must pass through. There are four menu items:
X: Aligns the Pole Axis set to the X plane.
Y: Aligns the Pole Axis to the Y plane.
Z: Aligns the Pole Axis to the Z plane.
Random: When Random is selected, the axes shift to a different random position.
Direction: A pop-up menu that sets whether objects move in a clockwise or counterclockwise direction.
Download this guide: PDF