Logic Pro User Guide for iPad
-
- What is Logic Pro?
- Working areas
- Work with function buttons
- Work with numeric values
-
- Intro to tracks
- Create tracks
- Create tracks using drag and drop
- Choose the default region type for a software instrument track
- Select tracks
- Duplicate tracks
- Reorder tracks
- Rename tracks
- Change track icons
- Change track colors
- Use the tuner on an audio track
- Show the output track in the Tracks area
- Delete tracks
- Edit track parameters
- Start a Logic Pro subscription
- How to get help
-
- Intro to recording
-
- Before recording software instruments
- Record software instruments
- Record additional software instrument takes
- Record to multiple software instrument tracks
- Record multiple MIDI devices to multiple tracks
- Record software instruments and audio simultaneously
- Merge software instrument recordings
- Spot erase software instrument recordings
- Replace software instrument recordings
- Capture your most recent MIDI performance
- Use the metronome
- Use the count-in
-
- Intro to arranging
-
- Intro to regions
- Select regions
- Cut, copy, and paste regions
- Move regions
- Remove gaps between regions
- Delay region playback
- Trim regions
- Loop regions
- Repeat regions
- Mute regions
- Split and join regions
- Stretch regions
- Separate a MIDI region by note pitch
- Bounce regions in place
- Change the gain of audio regions
- Create regions in the Tracks area
- Convert a MIDI region to a Drummer region or a pattern region
- Rename regions
- Change the color of regions
- Delete regions
- Create fades on audio regions
- Access mixing functions using the Fader
-
- Intro to Step Sequencer
- Use Step Sequencer with Drum Machine Designer
- Record Step Sequencer patterns live
- Step record Step Sequencer patterns
- Load and save patterns
- Modify pattern playback
- Edit steps
- Edit rows
- Edit Step Sequencer pattern, row, and step settings in the inspector
- Customize Step Sequencer
-
- Effect plug-ins overview
-
- Instrument plug-ins overview
-
- ES2 overview
- Interface overview
-
- Modulation overview
-
- Vector Envelope overview
- Use Vector Envelope points
- Use Vector Envelope solo and sustain points
- Set Vector Envelope segment times
- Vector Envelope XY pad controls
- Vector Envelope Actions menu
- Vector Envelope loop controls
- Vector Envelope release phase behavior
- Vector Envelope point transition shapes
- Use Vector Envelope time scaling
- Use the Mod Pad
- Modulation source reference
- Via modulation source reference
-
- Sample Alchemy overview
- Interface overview
- Add source material
- Save a preset
- Edit mode
- Play modes
- Source overview
- Synthesis modes
- Granular controls
- Additive effects
- Additive effect controls
- Spectral effect
- Spectral effect controls
- Filter module
- Low and Highpass filter
- Comb PM filter
- Downsampler filter
- FM filter
- Envelope generators
- Mod Matrix
- Modulation routing
- Motion mode
- Trim mode
- More menu
- Sampler
- Copyright
Sculpture Morph Envelope sustain and loop in Logic Pro for iPad
The Sustain Mode pop-up menu lets you choose one of the following modes: Sustain, Finish, Loop Forward, Loop Backward, Loop Alternate, and Scan via CtrlB.
When in any of the loop modes, the loop cycles between the Loop and Sustain points that you set with the Sustain Point and Loop Point controls. The Morph Envelope can, like any envelope, run in one-shot mode—it runs normally, for as long as the note is sustained. It can also run several times, or in an infinite cycle, much like an LFO. You can achieve the latter through the use of loops.

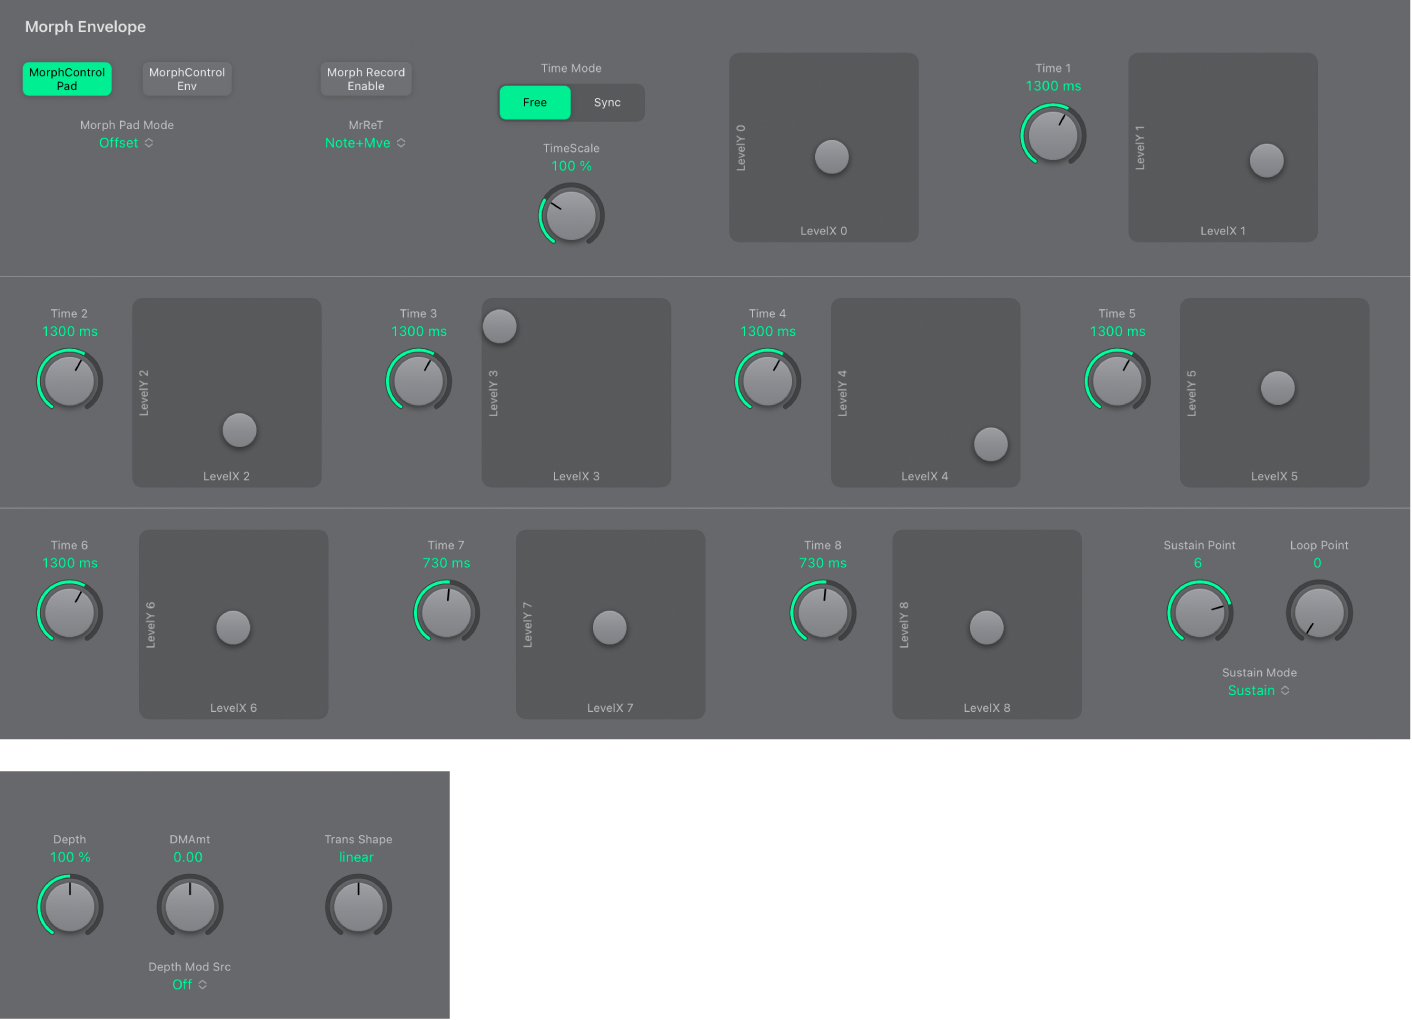
Morph Envelope Sustain and Loop parameters
Sustain Point knob: Set one of the morph envelope control points (gray dot positions in Morph Envelope XY pads 0-8) as the Sustain point.
Loop Point knob: Set one of the morph envelope control points (gray dot positions in Morph Envelope XY pads 0-8) as the Loop point.
Sustain Mode pop-up menu: Choose the behavior of the Morph Envelope while a note is held. See Morph Envelope Sustain and loop.
Finish: The Morph Envelope runs in one-shot mode from its beginning to its end—even if the note is released before the envelope has completed. The other loop parameters are disabled.
Loop Forward: The Morph Envelope runs to the Sustain point (set with the Sustain Point knob) and begins to repeat the section between the Loop point (set with the Loop Point knob) and Sustain point periodically—always in a forward direction.
Loop Backward: The Morph Envelope runs to the Sustain point and begins to repeat the section between the Sustain point and Loop point periodically—always in a backward direction.
Loop Alternate: The Morph Envelope runs to the Sustain point and returns to the Loop point and back to the Sustain point periodically, alternating in both a backward and forward direction.
Scan via CtrlB: The timeline position within the Morph Envelope is disconnected from normal, real-time operation, enabling you to manually scan the overall time range with the MIDI controller assigned to Ctrl B (in the MIDI controllers section).
Note: If one of the three loop modes is selected, and the Loop point is positioned before the Sustain point, the loop remains active until the key is released. Following key release, the envelope then continues beyond the Sustain point, as usual. If the Loop point is positioned after the Sustain point, the loop begins as soon as the key is released, and cycles continuously until the complete voice has finished the amplitude envelope release phase.
Download this guide: PDF