Logic Pro User Guide for iPad
-
- What is Logic Pro?
- Working areas
- Work with function buttons
- Work with numeric values
-
- Intro to tracks
- Create tracks
- Create tracks using drag and drop
- Choose the default region type for a software instrument track
- Select tracks
- Duplicate tracks
- Reorder tracks
- Rename tracks
- Change track icons
- Change track colors
- Use the tuner on an audio track
- Show the output track in the Tracks area
- Delete tracks
- Edit track parameters
- Start a Logic Pro subscription
- How to get help
-
- Intro to recording
-
- Before recording software instruments
- Record software instruments
- Record additional software instrument takes
- Record to multiple software instrument tracks
- Record multiple MIDI devices to multiple tracks
- Record software instruments and audio simultaneously
- Merge software instrument recordings
- Spot erase software instrument recordings
- Replace software instrument recordings
- Capture your most recent MIDI performance
- Use the metronome
- Use the count-in
-
- Intro to arranging
-
- Intro to regions
- Select regions
- Cut, copy, and paste regions
- Move regions
- Remove gaps between regions
- Delay region playback
- Trim regions
- Loop regions
- Repeat regions
- Mute regions
- Split and join regions
- Stretch regions
- Separate a MIDI region by note pitch
- Bounce regions in place
- Change the gain of audio regions
- Create regions in the Tracks area
- Convert a MIDI region to a Drummer region or a pattern region
- Rename regions
- Change the color of regions
- Delete regions
- Create fades on audio regions
- Access mixing functions using the Fader
-
- Intro to Step Sequencer
- Use Step Sequencer with Drum Machine Designer
- Record Step Sequencer patterns live
- Step record Step Sequencer patterns
- Load and save patterns
- Modify pattern playback
- Edit steps
- Edit rows
- Edit Step Sequencer pattern, row, and step settings in the inspector
- Customize Step Sequencer
-
- Effect plug-ins overview
-
- Instrument plug-ins overview
-
- ES2 overview
- Interface overview
-
- Modulation overview
-
- Vector Envelope overview
- Use Vector Envelope points
- Use Vector Envelope solo and sustain points
- Set Vector Envelope segment times
- Vector Envelope XY pad controls
- Vector Envelope Actions menu
- Vector Envelope loop controls
- Vector Envelope release phase behavior
- Vector Envelope point transition shapes
- Use Vector Envelope time scaling
- Use the Mod Pad
- Modulation source reference
- Via modulation source reference
-
- Sample Alchemy overview
- Interface overview
- Add source material
- Save a preset
- Edit mode
- Play modes
- Source overview
- Synthesis modes
- Granular controls
- Additive effects
- Additive effect controls
- Spectral effect
- Spectral effect controls
- Filter module
- Low and Highpass filter
- Comb PM filter
- Downsampler filter
- FM filter
- Envelope generators
- Mod Matrix
- Modulation routing
- Motion mode
- Trim mode
- More menu
- Sampler
- Copyright
Channel EQ in Logic Pro for iPad
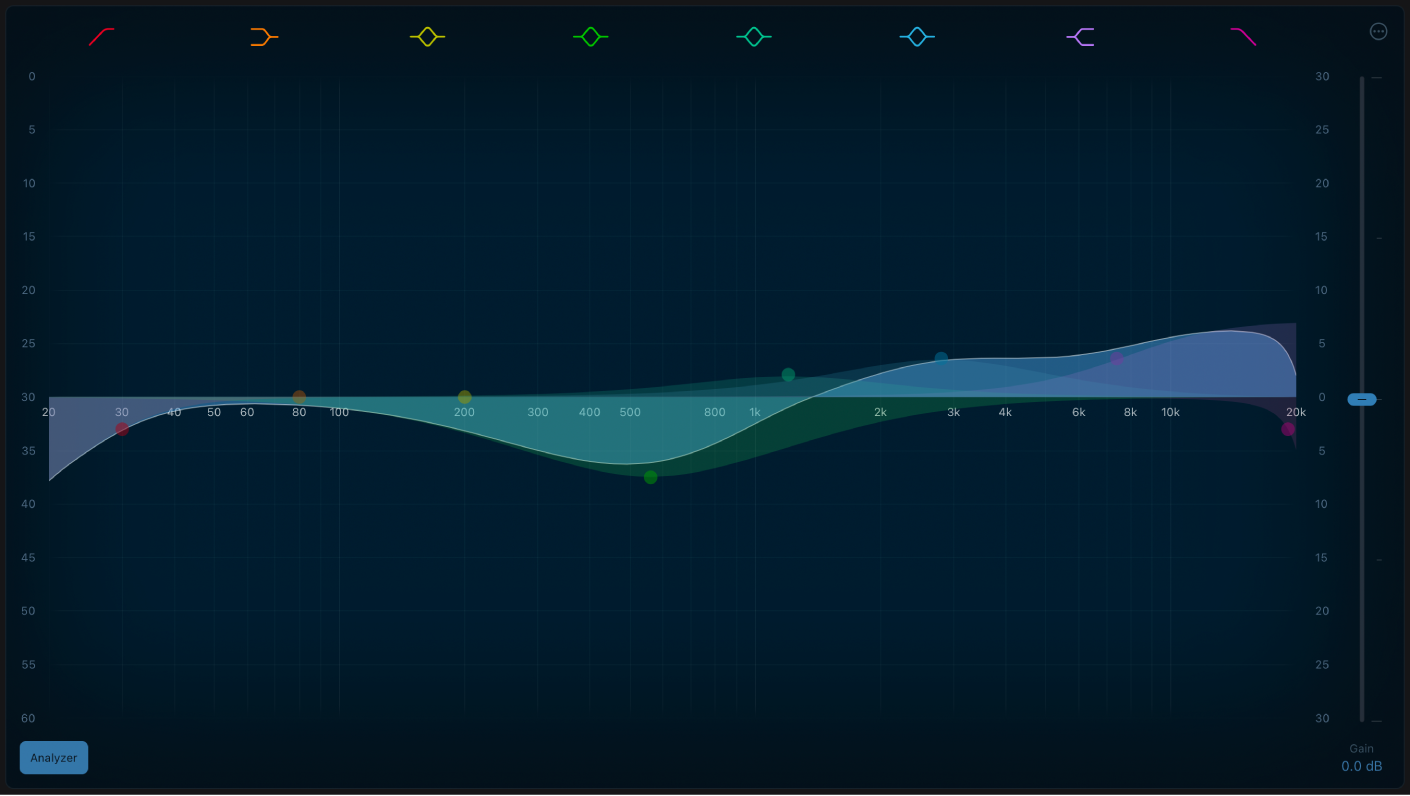
Channel EQ is a versatile multiband EQ. It provides eight color-coded frequency bands, including lowpass and highpass filters, low and high shelving filters, and four flexible parametric bands. It also features a Fast Fourier Transform (FFT) Analyzer that shows real time changes to the frequency curve, allowing you to see which parts of the frequency spectrum may need adjustment. See Channel EQ parameters.
You can use Channel EQ to shape the sound of individual tracks or audio files or for tone-shaping on an overall project mix. The Analyzer and graphic controls make it easy to view and change the audio signal in real time.
Tip: The parameters of Channel EQ and Linear Phase EQ are identical, enabling you to freely copy settings between them. If you replace a Channel EQ with a Linear Phase EQ (or vice versa) in the same effect slot, the current settings are automatically transferred to the new EQ.
To add Channel EQ to your project, choose Equalizers > Channel EQ in a channel strip Audio Effect plug-in menu or the Plug-ins area. See Intro to plug-ins. Also see Add, replace, reorder, and remove plug-ins in the Plug-ins area and Work with plug-ins in the Mixer.

Use the Channel EQ graphic display
The graphic display shows the current curve of each EQ band. The scale is shown in decibels. The color of each band matches the corresponding button above the display. Each band (and corresponding Frequency, Gain, and Q field) is highlighted when selected.
Tap a curve line segment, the (center frequency) control point, or anywhere in the space between the zero line and EQ curve to adjust a band.
Tap the control point to select a band for editing. Once a band is selected, no other band control point that falls within the active (highlighted) area of the selected band can be selected.
Tap the graphic display background (outside a highlighted band) to deselect the selected band.
Drag anywhere in a selected band to adjust both gain and the center frequency.
Drag the vertical lines that encompass the selected band to adjust the Q (bandwidth) only.
Drag the horizontal line in the selected band to adjust the gain only. If Q-Coupling is enabled, both the gain and bandwidth are adjusted.
Drag the intersection of vertical and horizontal lines in the selected band to adjust the gain and Q simultaneously.
Drag vertically in the Frequency field of the selected band to adjust the frequency only.
Drag vertically in the Gain field of the selected band (2 to 6) to adjust the gain only.
Drag vertically in the Order field of bands 1 or 8 to adjust the filter slope only.
Drag vertically in the Q field to set the bandwidth of the selected band.
Download this guide: PDF