Logic Pro User Guide for iPad
- What’s new in Logic Pro 1.1
-
- What is Logic Pro?
- Working areas
- Work with function buttons
- Work with numeric values
-
- Intro to tracks
- Create tracks
- Create tracks using drag and drop
- Choose the default region type for a software instrument track
- Select tracks
- Duplicate tracks
- Reorder tracks
- Rename tracks
- Change track icons
- Change track colors
- Use the tuner on an audio track
- Show the output track in the Tracks area
- Delete tracks
- Edit track parameters
- Start a Logic Pro subscription
- How to get help
-
- Intro to recording
-
- Before recording software instruments
- Record software instruments
- Record additional software instrument takes
- Record to multiple software instrument tracks
- Record multiple MIDI devices to multiple tracks
- Record software instruments and audio simultaneously
- Merge software instrument recordings
- Spot erase software instrument recordings
- Replace software instrument recordings
- Capture your most recent MIDI performance
- Use the metronome
- Use the count-in
-
- Intro to arranging
-
- Intro to regions
- Select regions
- Cut, copy, and paste regions
- Move regions
- Remove gaps between regions
- Delay region playback
- Trim regions
- Loop regions
- Repeat regions
- Mute regions
- Split and join regions
- Stretch regions
- Separate a MIDI region by note pitch
- Bounce regions in place
- Change the gain of audio regions
- Create regions in the Tracks area
- Convert a MIDI region to a Drummer region or a pattern region
- Rename regions
- Change the color of regions
- Delete regions
- Create fades on audio regions
- Access mixing functions using the Fader
-
- Intro to Step Sequencer
- Use Step Sequencer with Drum Machine Designer
- Record Step Sequencer patterns live
- Step record Step Sequencer patterns
- Load and save patterns
- Modify pattern playback
- Edit steps
- Edit rows
- Edit Step Sequencer pattern, row, and step settings in the inspector
- Customize Step Sequencer
-
- Effect plug-ins overview
-
- Instrument plug-ins overview
-
- ES2 overview
- Interface overview
-
- Modulation overview
-
- Vector Envelope overview
- Use Vector Envelope points
- Use Vector Envelope solo and sustain points
- Set Vector Envelope segment times
- Vector Envelope XY pad controls
- Vector Envelope Actions menu
- Vector Envelope loop controls
- Vector Envelope release phase behavior
- Vector Envelope point transition shapes
- Use Vector Envelope time scaling
- Use the Mod Pad
- Modulation source reference
- Via modulation source reference
-
- Sample Alchemy overview
- Interface overview
- Add source material
- Save a preset
- Edit mode
- Play modes
- Source overview
- Synthesis modes
- Granular controls
- Additive effects
- Additive effect controls
- Spectral effect
- Spectral effect controls
- Filter module
- Low and highpass filter
- Comb PM filter
- Downsampler filter
- FM filter
- Envelope generators
- Mod Matrix
- Modulation routing
- Motion mode
- Trim mode
- More menu
- Sampler
- Copyright
Use Flex in Quick Sampler in Logic Pro for iPad
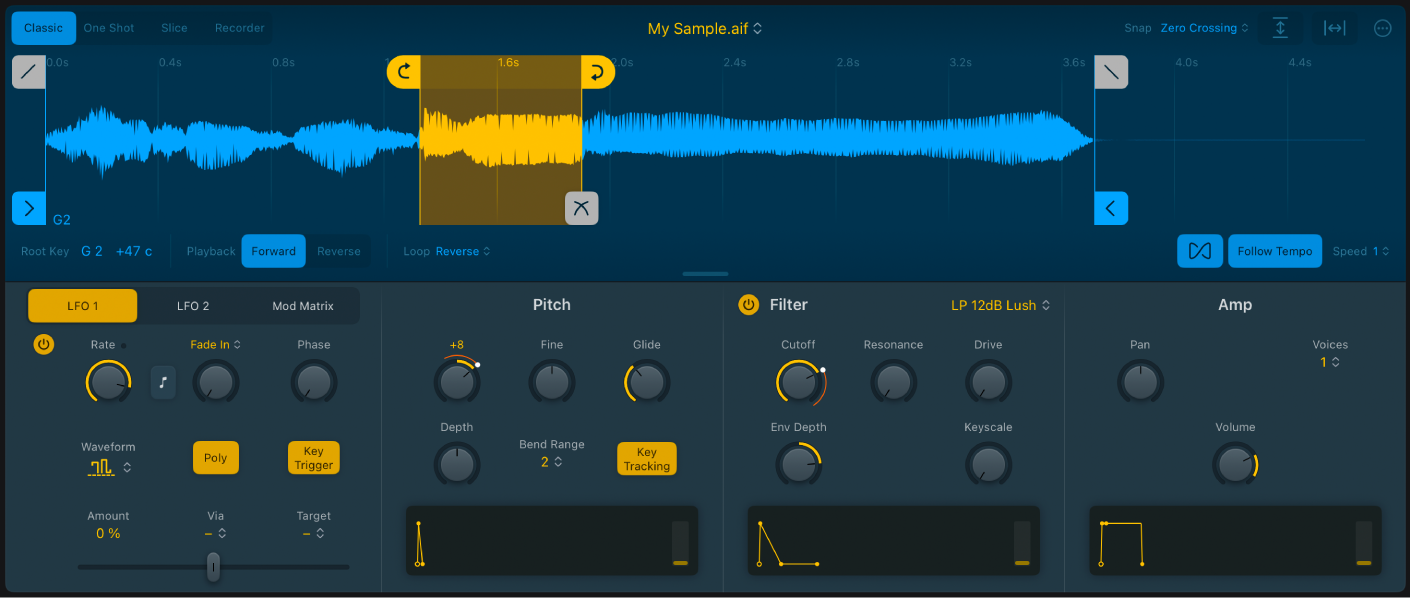
The Quick Sampler Flex parameters are used to synchronize the audio playback tempo. This is ideal for synchronously playing a melodic Apple Loop in a key that matches the key of other tracks in Logic Pro, for example.

The Flex parameters are found at the lower right of the Quick Sampler waveform display in Classic, One Shot, and Slice modes. Flex works for files with tempo information, including:
Apple Loops
Bounced audio files
Use Flex to synchronize an Apple Loop in Quick Sampler
Follow these steps to use Flex to play an Apple Loop synchronously with other tracks in your project.
Load a project with at least a few tracks.
Open the Browser.
Drag a melodic Apple Loop, such as a rhythmic acoustic or electric guitar part, into the Quick Sampler waveform display. Drop it on the Original dropzone.
Play some notes on your keyboard over a few octaves. You will hear that the pitch of the loop changes, along with the playback speed.
Tap
 below the waveform display and play some notes on your keyboard over a few octaves.
You will hear that the pitch of the loop changes, but the playback speed doesn’t.
Start playback of your project and play a few notes on your keyboard.
You will hear that the pitch of the loop changes, but the playback speed isn’t synchronized with the project tempo.
While the project is playing, tap the Follow Tempo button below the waveform display and play some notes on your keyboard.
You will hear that the pitch of the loop changes, and the playback speed is perfectly synchronized with the project tempo.
Tip: The Derive Tempo from Loop Length command in the More menu calculates a tempo for the audio file based on the Loop Length. If using the Follow Tempo button does not yield the desired results, you can choose this option to calculate a revised tempo at which the loop is aligned to the beat.
As an option, you can choose a value in the Speed pop-up menu to divide or multiply the synchronized playback speed of the Apple Loop. Try this while the project is playing.
Tip: Flex Speed is also available as a modulation target.
Download this guide: PDF