Logic Pro User Guide for iPad
-
- What is Logic Pro?
- Working areas
- Work with function buttons
- Work with numeric values
-
- Intro to tracks
- Create tracks
- Create tracks using drag and drop
- Choose the default region type for a software instrument track
- Select tracks
- Duplicate tracks
- Reorder tracks
- Rename tracks
- Change track icons
- Change track colors
- Use the tuner on an audio track
- Show the output track in the Tracks area
- Delete tracks
- Edit track parameters
- Start a Logic Pro subscription
- How to get help
-
- Intro to recording
-
- Before recording software instruments
- Record software instruments
- Record additional software instrument takes
- Record to multiple software instrument tracks
- Record multiple MIDI devices to multiple tracks
- Record software instruments and audio simultaneously
- Merge software instrument recordings
- Spot erase software instrument recordings
- Replace software instrument recordings
- Capture your most recent MIDI performance
- Route MIDI internally to software instrument tracks
- Record with Low Latency Monitoring mode
- Use the metronome
- Use the count-in
-
- Intro to arranging
-
- Intro to regions
- Select regions
- Cut, copy, and paste regions
- Move regions
- Remove gaps between regions
- Delay region playback
- Trim regions
- Loop regions
- Repeat regions
- Mute regions
- Split and join regions
- Stretch regions
- Separate a MIDI region by note pitch
- Bounce regions in place
- Change the gain of audio regions
- Create regions in the Tracks area
- Convert a MIDI region to a Session Player region or a pattern region
- Rename regions
- Change the color of regions
- Delete regions
-
- Intro to chords
- Add and delete chords
- Select chords
- Cut, copy, and paste chords
- Move and resize chords
- Loop chords on the Chord track
- Edit chords
- Work with chord groups
- Use chord progressions
- Change the chord rhythm
- Choose which chords a Session Player region follows
- Analyze the key signature of a range of chords
- Create fades on audio regions
- Extract vocal and instrumental stems with Stem Splitter
- Access mixing functions using the Fader
-
- Intro to Step Sequencer
- Use Step Sequencer with Drum Machine Designer
- Record Step Sequencer patterns live
- Step record Step Sequencer patterns
- Load and save patterns
- Modify pattern playback
- Edit steps
- Edit rows
- Edit Step Sequencer pattern, row, and step settings in the inspector
- Customize Step Sequencer
-
- Effect plug-ins overview
-
- Instrument plug-ins overview
-
- ES2 overview
- Interface overview
-
- Modulation overview
- Use the Mod Pad
-
- Vector Envelope overview
- Use Vector Envelope points
- Use Vector Envelope solo and sustain points
- Set Vector Envelope segment times
- Vector Envelope XY pad controls
- Vector Envelope Actions menu
- Vector Envelope loop controls
- Vector Envelope point transition shapes
- Vector Envelope release phase behavior
- Use Vector Envelope time scaling
- Modulation source reference
- Via modulation source reference
-
- Sample Alchemy overview
- Interface overview
- Add source material
- Save a preset
- Edit mode
- Play modes
- Source overview
- Synthesis modes
- Granular controls
- Additive effects
- Additive effect controls
- Spectral effect
- Spectral effect controls
- Filter module
- Low, bandpass, and highpass filters
- Comb PM filter
- Downsampler filter
- FM filter
- Envelope generators
- Mod Matrix
- Modulation routing
- Motion mode
- Trim mode
- More menu
- Sampler
- Studio Piano
- Copyright
Set Flex & Follow for audio regions in Logic Pro for iPad
Use the Flex & Follow setting in the Region inspector to turn on Flex Time for an audio region on a flex-enabled track. The audio region can then follow the project tempo and use Smart Tempo beat markers for quantize commands. See Smart Tempo.

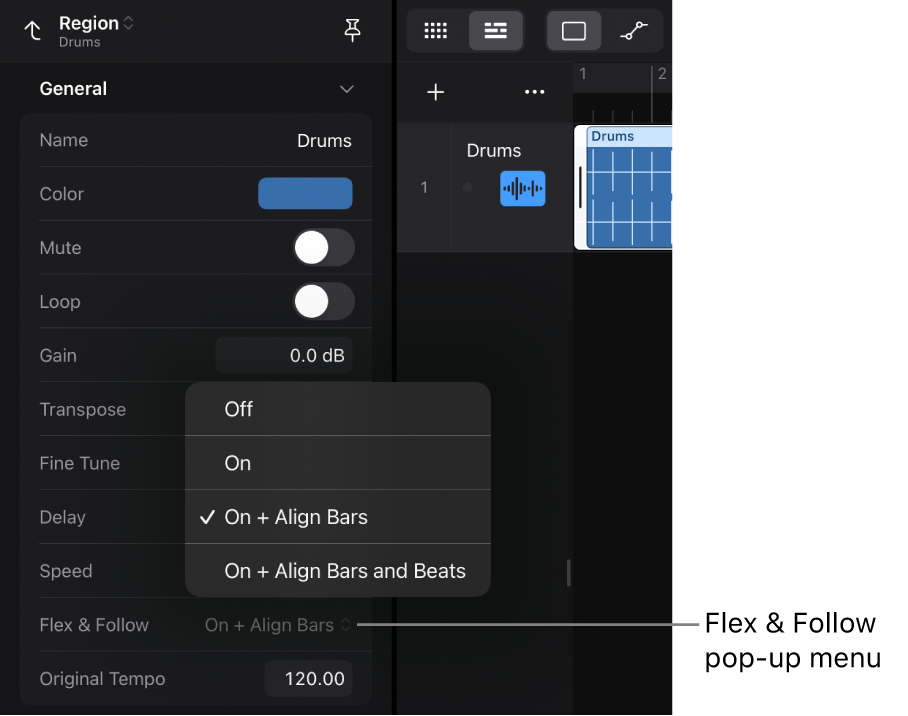
Flex & Follow is a region parameter, which means you can set each audio region individually. You can choose from four options that determine how Flex Time shifts the audio material to a time grid.
Off: The region isn’t flex enabled and doesn’t follow changes to the project tempo.
On: The region is flex enabled, so it follows any manual flex edits. It also follows any changes to the project tempo.
Note: Audio regions in imported projects that have been created in Logic Pro for Mac can contain manual flex edits, but these edits are not visible in Logic Pro for iPad.
On + Align Bars: The region is flex enabled, and Smart Tempo beat markers are used to conform the region to the project tempo at every downbeat (bar).
On + Align Bars and Beats: The region is flex enabled, and Smart Tempo beat markers are used to conform the region to the project tempo at every beat.
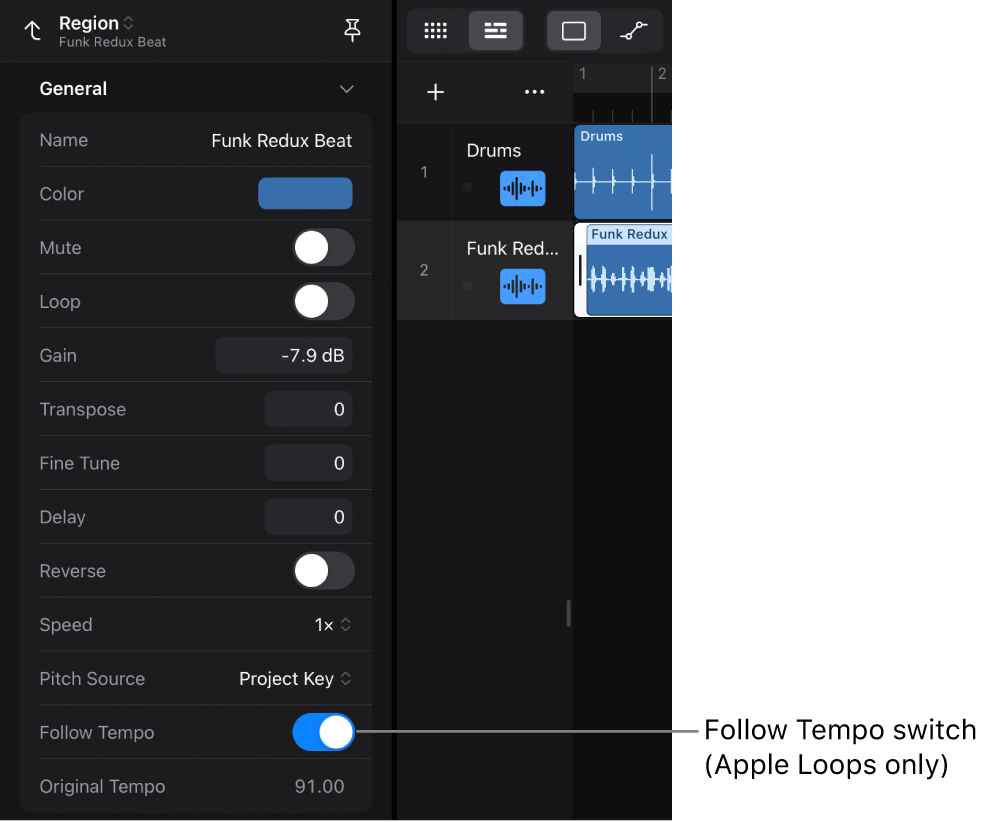
Important: For a selected audio Apple Loop, the Region inspector shows the Follow Tempo switch instead of the Flex & Follow pop-up menu if the corresponding track has flex turned off in the Track inspector.

Choose a Flex & Follow option for an audio region
Tap an audio region to select it, or select multiple audio regions.
Tap the Inspector button
 in the view control bar or press I on your external keyboard to open the Region inspector.
Tap the General disclosure arrow to show those parameters.
Tap the Flex & Follow pop-up menu and select one of the four options.
Download this guide: PDF