Crop or pad the video frame in Compressor
There are multiple ways you can customize the frame size of a source clip during transcoding. The cropping and padding controls allow you a great degree of flexibility and versatility.
Remove part of the source image
To remove part of the original source image, use the cropping controls in the Video inspector. Depending on the “Frame size” setting (in the Video Properties section of the Video inspector), cropping may or may not reveal black borders around the edges of your clips.
In Compressor, do one of the following:
In the batch area, click an output row to select a setting that’s been applied to a job. With this method, the modifications you make will be used for outputting only that job.
In the Settings pane, select a custom setting from the Custom group. (If the Settings pane is hidden, press Shift-Command-1.) With this method, the modifications you make will be saved to the custom setting for future use.
In the inspector pane, click Video to open the Video inspector.
If the inspector pane is not visible, click the Inspector button
 in the upper-right corner of the Compressor window.
 In the Cropping & Padding section of the Video inspector, do one of the following:
In the Cropping property, manually type a number in the Top, Bottom, Left, and Right fields to crop the source image by that many pixels.
Click the Cropping pop-up menu, then choose a preset aspect ratio.
Note: If the aspect ratio you choose doesn’t match the aspect ratio selected in the “Frame size” pop-up menu (in the Video Properties section), you may see black bars around the edges of your picture after the file is transcoded.
Click the Cropping pop-up menu, then choose Letterbox Area of Source. This instructs Compressor to detect the black edges around the image in your source file and automatically enter crop values to match them. This option is useful if you want to remove the letterbox area (the black bars above and below a widescreen image) of a source media file.
In the preview area, click the Comparison button
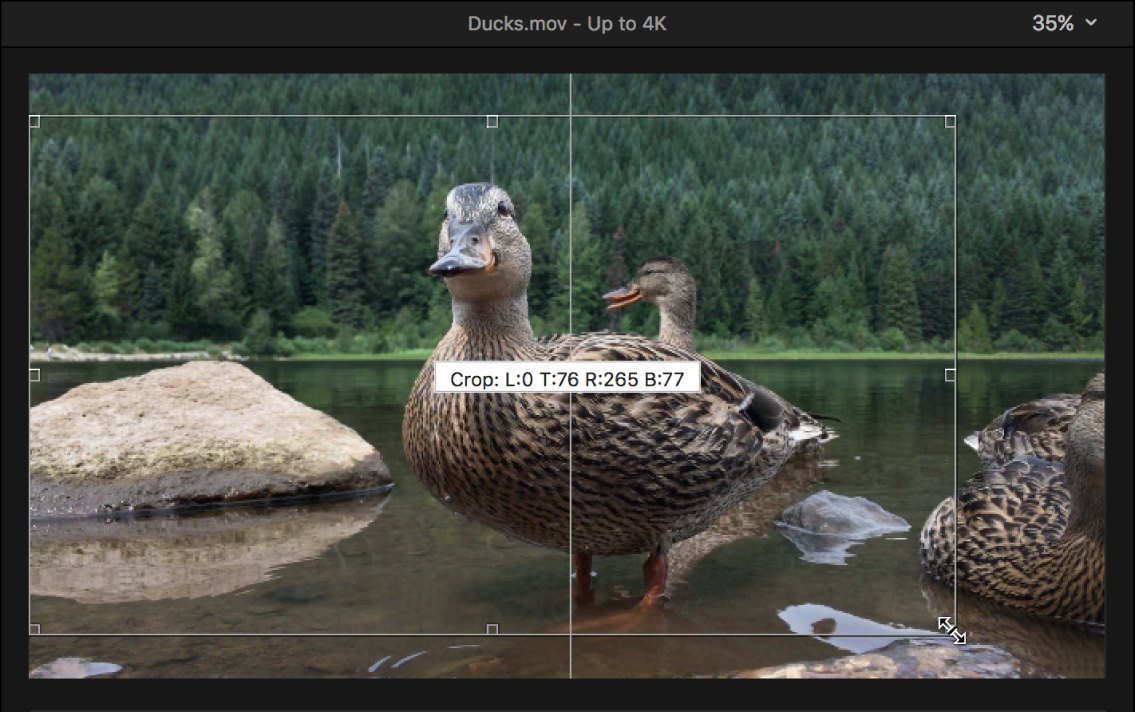
 and position the pointer over the edges of the frame until the pointer changes to a Crop pointer, then drag inward from the edge to crop the image.
Note: Cropped edges are visible only on the output side of the preview area (the right side); the source media side of the preview area (the left side) doesn’t display the crop effect.
Force the source image to a different aspect ratio
In Compressor, do one of the following:
In the batch area, click an output row to select a setting that’s been applied to a job. With this method, the modifications you make will be used for outputting only that job.
In the Settings pane, select a custom setting from the Custom group. (If the Settings pane is hidden, press Shift-Command-1.) With this method, the modifications you make will be saved to the custom setting for future use.
In the inspector pane, click Video to open the Video inspector.
If the inspector pane is not visible, click the Inspector button
 in the upper-right corner of the Compressor window.
 In the Cropping & Padding section of the Video inspector, do one of the following:
In the Padding property, manually type a number in the Top, Bottom, Left, and Right fields to pad the source image by that many pixels.
Click the Padding pop-up menu, then choose a preset aspect ratio.
Note: If the aspect ratio you choose doesn’t match the aspect ratio selected in the “Frame size” pop-up menu (in the Video Properties section), the image may appear squished or squeezed after the file is transcoded.
Click the Padding pop-up menu, then choose Preserve Source Aspect Ratio. This ensures that the source clip remains at its native aspect ratio. If the “Frame size” pop-up menu (in the Video Properties section) is set to a different aspect ratio, black borders will be added to the transcoded output file.