
Choose a paper size for your printed document on Mac
You can choose a paper size to match the sheet size in your printer and set a default paper size for routine printing.
Change paper size for printing
You can specify the paper size that you use in your printer.
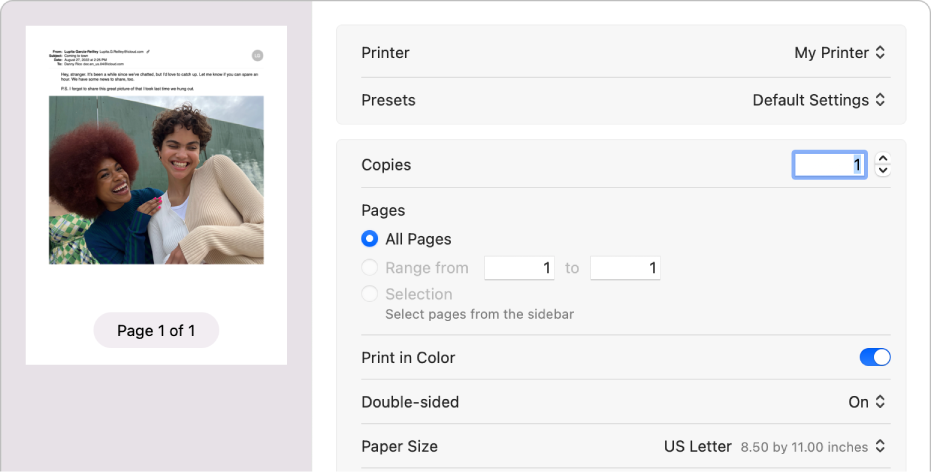
With a document open on your Mac, choose File > Print.
Choose a paper size from the Paper Size pop-up menu.
In apps such as Pages or Microsoft Word, you can also specify a page size for a document as you’re working on it. When you print, the document is already formatted to fit the paper size you selected. However, you can choose to scale the document to fit your printer’s paper. See Reduce or enlarge pages and images to fit on a page.
In most apps, the Paper Size menu has a Manage Custom Sizes option. If you choose this option, see Print on unusual sized paper by creating a custom paper size.
Change the default paper size you routinely use for printing
If you usually print on a particular size of paper, you can set it as the default paper size, so it’s used whenever you print. (You can still change the paper size in the Print dialogue if you need to.)
The default size is also used as the page size whenever you create a new document in an app, such as Pages. Changing the default size affects only new documents; it doesn’t change previously created documents.
On your Mac, choose Apple menu
 in the sidebar. (You may need to scroll down.)
Choose a paper size from the “Default paper size” pop-up menu on the right.

