MainStage User Guide
- Welcome
-
- Overview of Edit mode
-
- Select patches and sets in the Patch List
- Copy, paste, and delete patches
- Reorder and move patches in the Patch List
- Add and rename patches
- Create a patch from several patches
-
- Overview of the Patch Settings Inspector
- Select patch settings in the Patch Library
- Set the time signature for patches
- Change the tempo when you select a patch
- Set program change and bank numbers
- Defer patch changes
- Instantly silence the previous patch
- Change patch icons
- Transpose the pitch of incoming notes for a patch
- Change the tuning for a patch
- Add text notes to a patch
-
- Overview of channel strips
- Add a channel strip
- Change a channel strip setting
- Configure channel strip components
- Show signal flow channel strips
- Hide the metronome channel strip
- Create an alias of a channel strip
- Add a patch bus
- Set channel strip pan or balance positions
- Set channel strip volume levels
- Mute and solo channel strips
- Use multiple instrument outputs
- Use external MIDI instruments
- Reorganize channel strips
- Delete channel strips
-
- Overview of the Channel Strip Inspector
- Choose channel strip settings
- Rename channel strips
- Change channel strip colors
- Change channel strip icons
- Use feedback protection with channel strips
- Set keyboard input for a software instrument channel strip
- Transpose individual software instruments
- Filter MIDI messages
- Scale channel strip velocity
- Set channel strips to ignore Hermode tuning
- Override concert- and set-level key ranges
- Add text notes to a channel strip in the Channel Strip Inspector
- Route audio via send effects
-
- Screen Control Inspector overview
- Replace parameter labels
- Choose custom colors for screen controls
- Change background or grouped screen control appearance
- Set screen controls to show the hardware value
- Set parameter change behavior for screen controls
- Set hardware matching behavior for screen controls
- Reset and compare changes to a patch
- Override concert- and set-level mappings
-
- Overview of mapping screen controls
- Map to channel strip and plug-in parameters
- Map screen controls to actions
- Map a screen control to multiple parameters
- Use screen controls to display PDF document pages
- Edit the saved value for a mapped parameter
- Set drum pads or buttons to use note velocity
- Map screen controls to all channel strips in a patch
- Undo screen control parameter mappings
- Remove screen control mappings
- Work with graphs
- Create controller transforms
- Share patches and sets between concerts
- Record the audio output of a concert
-
- Overview of concerts
- Create a concert
- Open and close concerts
- Save concerts
- How saving affects parameter values
- Clean up concerts
- Consolidate assets in a concert
- Rename the current concert
-
- Overview of the Concert Settings Inspector
- Set MIDI Routing to channel strips
- Transpose incoming note pitch for a concert
- Define the program change message source
- Send unused program changes to channel strips
- Set the time signature for a concert
- Change the tuning for a concert
- Set the pan law for a concert
- Add text notes to a concert
- Control the metronome
- Silence MIDI notes
- Mute audio output
-
- Layout mode overview
-
- Screen control parameter editing overview
- Lift and stamp screen control parameters
- Reset screen control parameters
- Common screen control parameters
- Keyboard screen control parameters
- MIDI activity screen control parameters
- Drum pad screen control parameters
- Waveform screen control parameters
- Selector screen control parameters
- Text screen control parameters
- Background screen control parameters
- How MainStage passes through MIDI messages
- Export and import layouts
- Change the aspect ratio of a layout
-
- Before performing live
- Use Perform mode
- Screen controls in performance
- Tempo changes during performance
- Tips for performing with keyboard controllers
- Tips for performing with guitars and other instruments
- Tune guitars and other instruments with the Tuner
- The Playback plug-in in performance
- Record your performances
- After the performance
- Tips for complex hardware setups
-
- Overview of keyboard shortcuts and command sets
-
- Concerts and layouts keyboard shortcuts
- Patches and sets (Edit mode) keyboard shortcuts
- Editing keyboard shortcuts
- Actions keyboard shortcuts
- Parameter mapping (Edit mode) keyboard shortcuts
- Channel strips (Edit mode) keyboard shortcuts
- Screen controls (Layout mode) keyboard shortcuts
- Perform in Full Screen keyboard shortcuts
- Window and view keyboard shortcuts
- Help and support keyboard shortcuts
-
-
- Use MIDI plug-ins
-
- Arpeggiator overview
- Arpeggiator control parameters
- Note order parameters overview
- Note order variations
- Note order inversions
- Arpeggiator pattern parameters overview
- Use Live mode
- Use Grid mode
- Arpeggiator options parameters
- Arpeggiator keyboard parameters
- Use keyboard parameters
- Assign controllers
- Modifier controls
- Note Repeater controls
- Randomizer controls
-
- Use Scripter
- Use the Script Editor
- Scripter API overview
- MIDI processing functions overview
- HandleMIDI function
- ProcessMIDI function
- GetParameter function
- SetParameter function
- ParameterChanged function
- Reset function
- JavaScript objects overview
- Use the JavaScript Event object
- Use the JavaScript TimingInfo object
- Use the Trace object
- Use the MIDI event beatPos property
- Use the JavaScript MIDI object
- Create Scripter controls
- Transposer controls
-
-
- Alchemy overview
- Alchemy interface overview
- Alchemy Name bar
- Alchemy file locations
-
- Alchemy source overview
- Source master controls
- Import browser
- Source subpage controls
- Source filter controls
- Source filter use tips
- Source elements overview
- Additive element controls
- Additive element effects
- Spectral element controls
- Spectral element effects
- Pitch correction controls
- Formant filter controls
- Granular element controls
- Sampler element controls
- VA element controls
- Wide unison mode
- Source modulations
- Morph controls
- Alchemy master voice section
- Alchemy Extended parameters
-
- Playback plug-in overview
- Add a Playback plug-in
- Playback interface
- Use the Playback waveform display
- Playback transport and function buttons
- Playback information display
- Playback Sync, Snap To, and Play From parameters
- Use the Playback group functions
- Use the Playback Action menu and File field
- Use markers with the Playback plug-in
-
- Sample Alchemy overview
- Interface overview
- Add source material
- Edit mode
- Play modes
- Source overview
- Synthesis modes
- Granular controls
- Additive effects
- Additive effect controls
- Spectral effect
- Spectral effect controls
- Filter module
- Lowpass, bandpass, and highpass filters
- Comb PM filter
- Downsampler filter
- FM filter
- Envelope generators
- Mod Matrix
- Modulation routing
- Motion mode
- Trim mode
- More menu
-
- Sculpture overview
- Sculpture interface
- Global parameters
- Amplitude envelope parameters
- Use the Waveshaper
- Filter parameters
- Output parameters
- Define MIDI controllers
- Extended parameters
-
- Studio Piano
- Copyright

Set up ES2 Vector Envelope loops in MainStage
The Vector Envelope can run in one-shot mode, as long as the note is sustained; it can be set to repeat a specific number of times or it can repeat indefinitely, much like an LFO modulation. You achieve repetitions with the loop functions.
Although the loop parameters seem similar to the loop parameters available for samples, there are significant differences between them. The Vector Envelope only supplies control signals that are used to move the pointer positions of the Triangle and Planar Pad. The audio output of the ES2 is not looped in any way.
Any point can be declared the Loop point. Provided that the note is held for a suitable length of time, portions of the envelope can be repeated, or looped.
The looped area spans the time between the Sustain point and the Loop point. In between these points you can define several points that describe pointer movements in the Triangle and the Planar Pad.
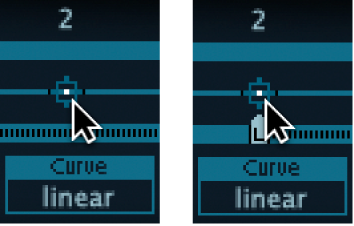
Define a Vector Envelope point as the Loop point
In MainStage, click in the turquoise strip below the chosen point.
A Loop point is indicated by an L in the strip below.

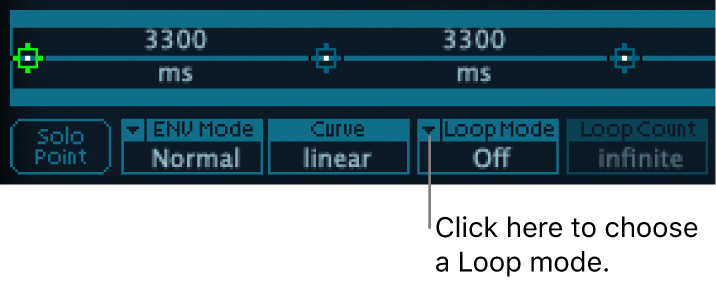
Set a Vector Envelope Loop mode
In MainStage, Choose a Vector Envelope Loop mode.
Off: When Loop mode is set to Off, the Vector Envelope runs in one-shot mode from beginning to end, if the note is held long enough to complete all envelope phases. The other loop parameters are disabled.
Forward: When Loop mode is set to Forward, the Vector Envelope runs from the beginning to the Sustain point, and then begins to periodically repeat the section between the Sustain point and the Loop point in a forward direction.
Backward: When Loop mode is set to Backward, the Vector Envelope runs from the beginning to the Sustain point, and then begins to periodically repeat the section between the Sustain point and the Loop point in a backward direction.
Alternate: When Loop mode is set to Alternate, the Vector Envelope runs from the beginning to the Sustain point and then periodically switches to the Loop point, then back to the Sustain point, alternating between backward and forward directions.

Set the Vector Envelope Loop Rate
In MainStage, do one of the following:
Drag the green indicator in the center of the Loop Rate bar to the left or right.
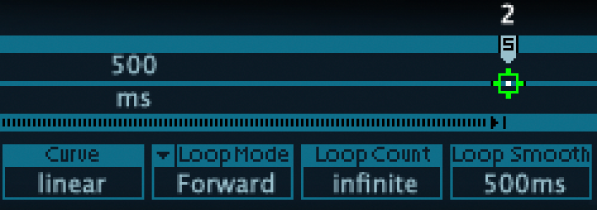
Drag vertically in the value field “as set” (shown in the figure below).
Set a defined speed for the Vector Envelope loop cycle. You can also synchronize the loop speed with the host application tempo.

As set: If you switch the Loop Rate to “as set,” the loop cycle length equals the sum of the times between the sustain and Loop points. Click the field labeled “as set” below the Rate slider to select it.
Rhythmic: If you set the Loop Rate to one of the rhythmic values (sync) by dragging the Loop Rate indicator toward the left half of the slider, the loop rate follows the project tempo. You can choose from 32 bars up to a 64th triplet note value.
Free: You can also set a free Loop Rate by dragging the Loop Rate indicator toward the right half of the slider (free). The value indicates the number of cycles per second.
Note: If Loop Rate is not switched to “as set,” and Loop mode (Forward, Backward, or Alternate) is active, the times of points between the Loop and Sustain points and the Loop Smooth value are shown as a percentage of the loop duration, rather than in milliseconds.
Make smooth Vector Envelope loop transitions
In MainStage, Drag to set a value for Loop Smooth. This evens out the transition from the Sustain point to the Loop point in Forward or Backward loop mode.
If the Loop Rate parameter is set to Sync or Free, the loop-smoothing time is displayed as a percentage of the loop cycle duration.
If the Loop Rate parameter is “as set,” the loop-smoothing time is displayed in milliseconds (ms).
Specify a Vector Envelope loop count
In MainStage, Set the Vector Envelope loop cycle to repeat a specified number of times. Following the defined repetitions, the Vector Envelope runs from the Sustain point onward. Possible values are 1 to 10 and “infinite.”
