


Prep all the elements first:
Add a black and white wire to one side of the momentary switch.
Add two wires to the on/off switch, to the middle leg and one of the side legs. You can cut off the other side leg.
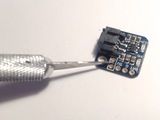
Carefully cut the metal trace between the switch pads on the liPoly backpack charger.
Solder a white wire and a black wire to your LED sequin. This will become the backlight for the button.

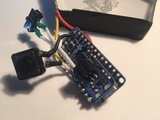
Solder the LiPoly backpack charger to the Pro Trinket using the aligned BAT, G, and 5V pins and the included header.


Lay the Pro Trinket along the top of your acrylic and trim the switch's wires to a good length, so it will just reach the edge of your case. Solder the switch wires into the liPoly charger's switch pads.
It's easiest to tin the wires and give them a 90 degree bend, then slip them in from underneath. Plug in your battery and flip the switch, making sure the Pro Trinket comes on.


Solder the white wire from the button into pin 4 on the Pro Trinket. Solder the black wire to the G pin near the bottom.
Solder the black wire from your neopixel sequin to the leg on your button opposite the black wire (g). Solder the other wire to pin 5.


Solder the data line from the neopixels to pin 3.
Flip the Pro Trinket over and tin the + and - pads on the back. Solder the + and - wires from the neopixel strand to these pads.


Use a dab of hot glue to affix the pro trinket to the top side of the acrylic runes so that the USB port is facing outwards.
I added some black velvet to cut down all reflections inside the case. Clean the acrylic once more and place the runes inside, arranging the button and switch and battery to fit neatly. Glue the button and switch in place.
Page last edited March 11, 2017
Text editor powered by tinymce.


