An all-in-one snapshot testing solution built on Xcode previews. Automatic browsable gallery of previews, and no-code snapshot generation with XCTest. Supports SwiftUI and UIKit previews using PreviewProvider or #Preview and works on all Apple platforms (iOS/macOS/watchOS/tvOS/visionOS).
- 🖼️ Browse previews on device as part of your app using the
PreviewGallery, no Xcode required. - 📸 Snapshot Xcode previews automatically in a XCTest without writing any test code.
- ♿ Run accessibility audits on all your previews in a XCUITest, still without writing any test code.
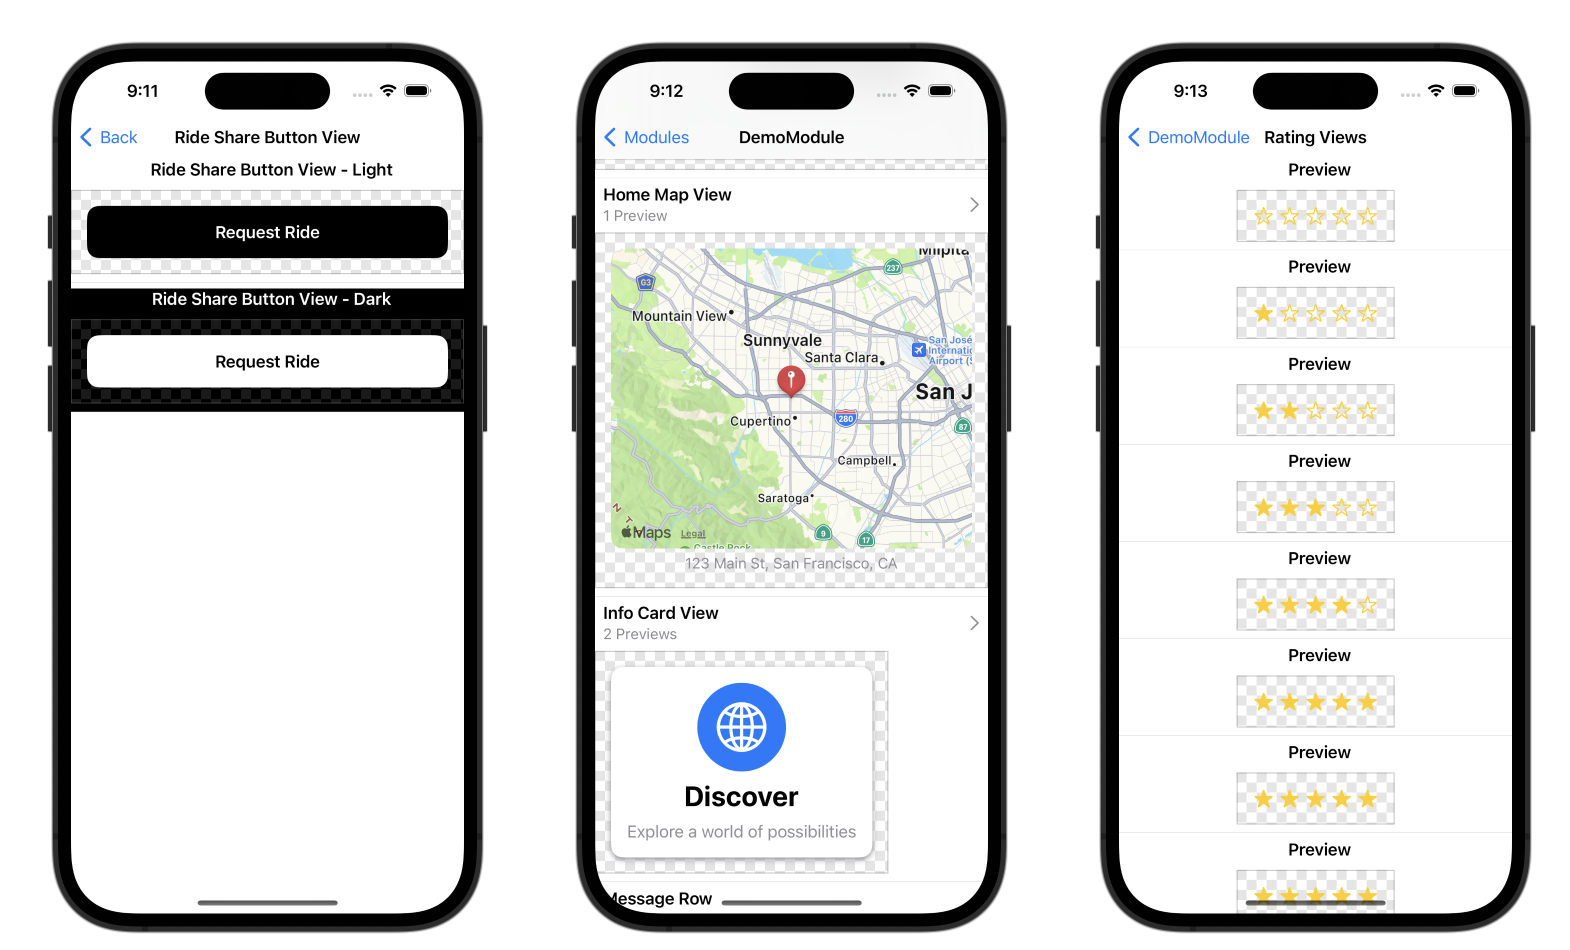
PreviewGallery is an interactive UI built on top of snapshot extraction. It turns your Xcode previews into a gallery of components and features you can access from your application, for example in an internal settings screen. Xcode is not required to view the previews. You can use it to preview individual components (buttons/rows/icons/etc) or even entire interactive features.
The public API of PreviewGallery is a single SwiftUI View named PreviewGallery. Displaying this view gives you access to the full gallery. For example, you could add a button to open the gallery like this:
import SwiftUI
import PreviewGallery

struct InternalSettingsView: View {
  var body: some View {
    NavigationStack {
      Form {
        Section("Previews") {
          NavigationLink("Open Gallery") { PreviewGallery() }
        }
      }
    }
    .navigationTitle("Internal Settings")
  }
}Generate PNGs for each Xcode preview with no code as part of an XCTest. Link your XCTest target to SnapshottingTests and create a test that inherits from SnapshotTest like this:
import SnapshottingTests

class DemoAppPreviewTest: SnapshotTest {

  // Return the type names of previews like "MyApp.MyView._Previews" to selectively render only some previews
  override func snapshotPreviews() -> [String]? {
    return nil
  }

  // Use this to exclude some previews from generating
  override func excludedSnapshotPreviews() -> [String]? {
    return nil
  }
}
Note that there are no test functions; they are automatically added at runtime by SnapshotTest. You can return a list of previews from the snapshotPreviews() function based on what preview you are trying to locally validate. The snapshots will be added as attachments in Xcode’s test results.
Note
When you use Preview macros (#Preview("Display Name")) the name of the snapshot uses the file path and the name, for example: "MyModule/MyFile.swift:Display Name"

The EmergeTools snapshot testing service generates snapshots and diffs them in the cloud to control for sources of flakiness, store images outside of git, and optimize test performance. SnapshotTest is for locally debugging these snapshot tests. You can also use PreviewTest to get code coverage of all previews in your unit test without generating PNGs. This will validate that previews do not crash (such as a missing @EnvironmentObject) but runs faster because it does not render the views to images.
Xcode accessibility audits can also be run locally on any preview. They are run in a UI test (not unit test). To enable these, inherit from AccessibilityPreviewTest. To customize the behavior you can override the following functions in your test:
import SnapshottingTests
import Snapshotting

class DemoAppAccessibilityPreviewTest: AccessibilityPreviewTest {

  override func auditType() -> XCUIAccessibilityAuditType {
    return .all
  }

  override func handle(_ issue: XCUIAccessibilityAuditIssue) -> Bool {
    return false
  }
}
See the demo app for a full example.
How does it work?
The XCTest dynamically inserts test functions by creating functions using the Objective-C runtime and overriding XCTest’s testInvocations function.
Previews are discovered in the binary by parsing the __swift5_proto Mach-O section to see what types conform to PreviewProvider (and similar protocols generated by the #Preview macro). Details of how this works in the Swift runtime can be found in our blog post.
Add the package dependency to your Xcode project using the URL of this repository (https://github.com/EmergeTools/SnapshotPreviews-iOS).

Link your app to PreviewGallery and (optionally) to SnapshotPreferences to customize the behavior of snapshot generation.
Link your XCTest target to SnapshottingTests.
It’s strongly encouraged to use a display name for every preview, for example:
struct MyView_Previews: PreviewProvider {
  var previews: some View {
    MyView().previewDisplayName("My Display Name")
    // Note if you had more than one view here they should all have different display names.
  }
}

#Preview("My Display Name") {
  MyView()
}
The display name will show up in XCTest results and the EmergeTools UI. Display names should be unique within each PreviewProvider or within files in the case of preview macros.
It’s recommended to set the environment variable EMERGE_IS_RUNNING_FOR_SNAPSHOTS to 1 in your unit test scheme. This is also set when snapshots are generated from the EmergeTools snapshot testing service. Combine it with the Xcode previews variable like this:
extension ProcessInfo {
  var isRunningPreviews: Bool {
    environment["EMERGE_IS_RUNNING_FOR_SNAPSHOTS"] == "1" || environment["XCODE_RUNNING_FOR_PREVIEWS"] == "1"
  }
}
Check ProcessInfo.isRunningPeviews to disable behavior you don’t want in previews such as emitting logging data.
Tip
Using PreviewVariants greatly simplifies snapshot testing, by ensuring a consistent set of variants and that every view is provided a name.
Using multiple variants of the same view can ensure test coverage of all the ways users interact with your UI. Most are provided by SwiftUI, eg: .dynamicTypeSize(.xxxLarge). There is one built into the package: .emergeAccessibility(true). This function adds a visualization of voice over elements to your snapshot. You can automatically add variants using the PreviewVariants View that is demonstrated in the example app. It adds RTL, landscape, accessibility, dark mode and large text variants. You can use it like this:
struct MyView_Previews: PreviewProvider {
  static var previews: some View {
    PreviewVariants(layout: .sizeThatFits) {
      MyView(mode: .loaded)
        // PreviewVariants requires that every view has a name, so you can’t create one without a display name
        .previewVariant(named: "My View - Loaded")

      MyView(mode: .loading)
        .previewVariant(named: "My View - Loading")

      MyView(mode: .error)
        .previewVariant(named: "My View - Error")
    }
  }
}- How to use VariadicView, SwiftUI's Private View API: VariadicView is a core part of how multiple images are rendered for one PreviewProvider.
- The Surprising Cost of Protocol Conformances in Swift: Details of how protocol conformances work in the runtime, which is how previews are discovered in app binaries.
- Emerge Android: The android SDK for similar preview based snapshot testing, along with other EmergeTools features.
- ETTrace: Another open source iOS project from EmergeTools.