Google Pay™
Follow this guide to activate G Pay™ (Google Pay™ or Android Pay) on your merchant account
Activate G Pay™
G Pay™ or Google Pay™ is automatically activated on your hosted checkout and on the QR payment checkout once you enable card payments. As default you will be using HIPS default merchant account with G Pay payments. To use your own merchant account with G Pay; do the following:
- Go to Google Pay Console and create a merchant account
- Complete you business profile
- Add domain qr.hips.com and checkout.hips.com if you are using hips checkout, or your own domain if you are using Hips API and Hips.JS
- Submit the business profile for review
optional
5. If you use Google Pay on your own website, you should set gatewayMerchantID to your Hips Merchant ID. Hips gateway id in GooglePay is: hips
All merchants must adhere to the Google Pay APIs Acceptable Use Policy and accept the terms defined in the Google Pay API Terms of Service.
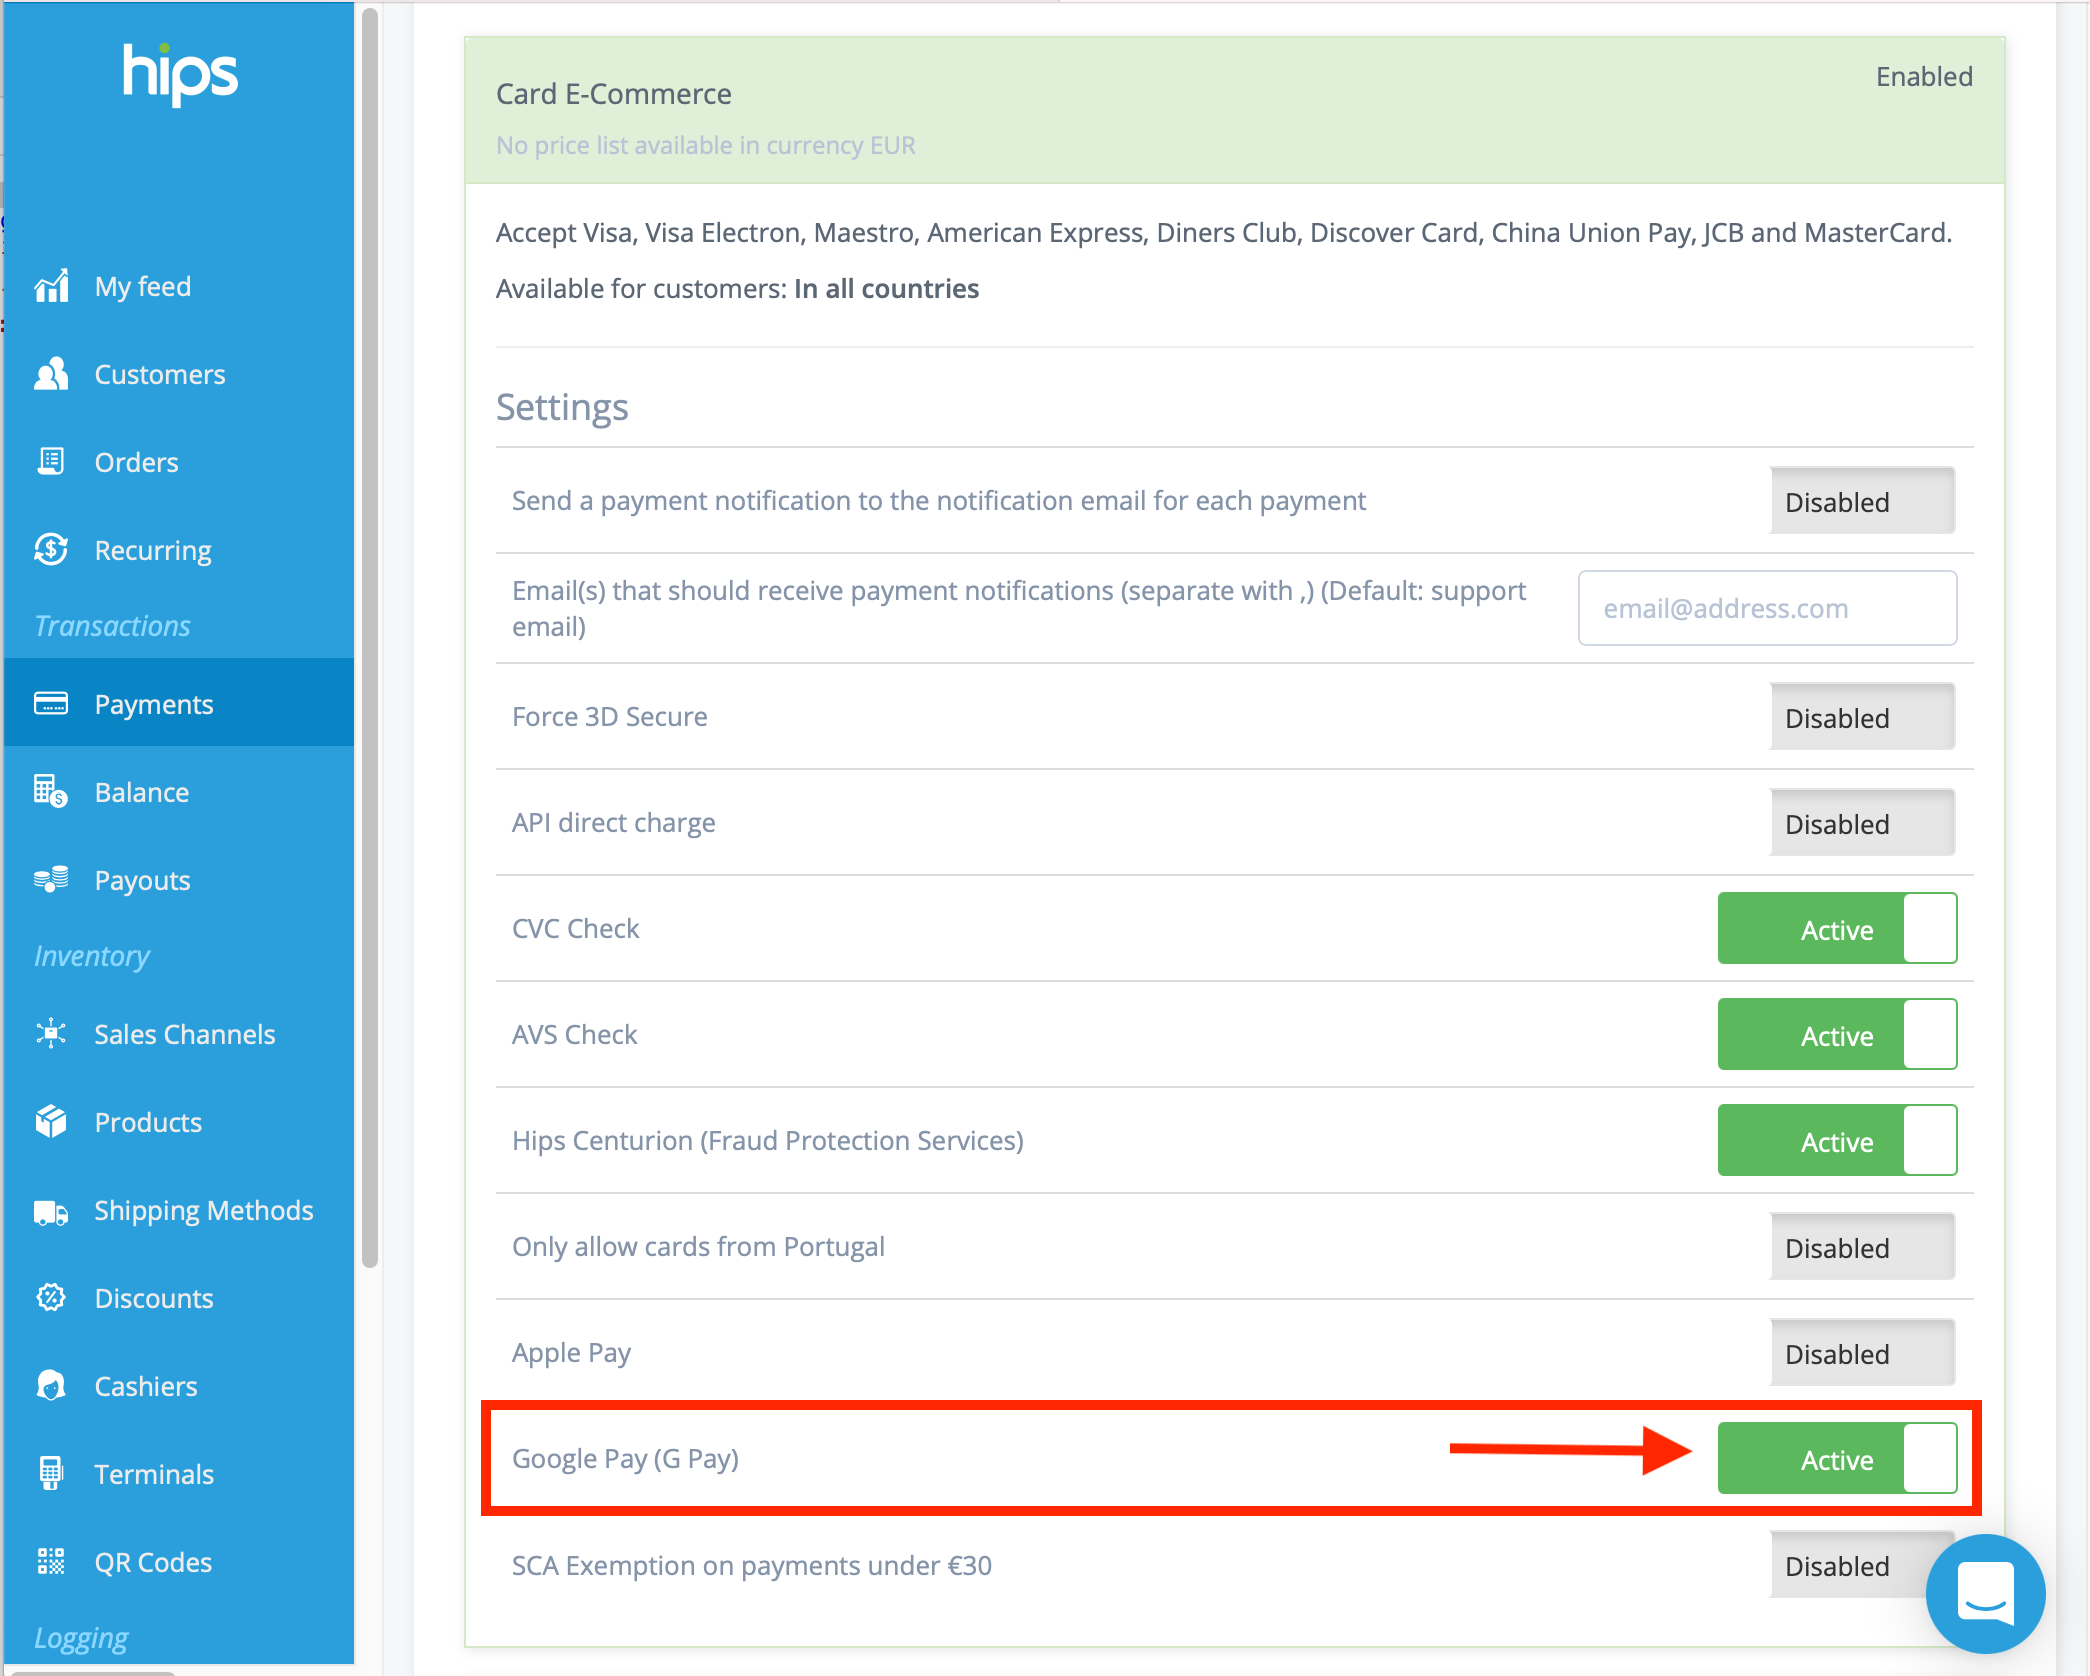
You will receive a G Pay merchant id once your merchant account is ready. Save that merchant id and login to your Hips Dashboard

Activate G Pay
If requested, enter your G Pay merchant ID.
Implementation paths
Google Pay Android developer documentation
Google Pay Android integration checklist
Google Pay Android brand guidelines
Google Pay Web developer documentation
Google Pay Web integration checklist
Google Pay Web Brand Guidelines
Linkes to Next Steps
Your own White label payment gateway
Your own Card Issuing
Your own Payment Facilitator (PayFac)
Updated almost 4 years ago
