-
Notifications
You must be signed in to change notification settings - Fork 165
Commit
This commit does not belong to any branch on this repository, and may belong to a fork outside of the repository.
Merge documentation for getting SLAM from etanx
Merge pull request #89 from etanx/master
Added documentation for SLAM
- Loading branch information
Showing
2 changed files
with
95 additions
and
0 deletions.
There are no files selected for viewing
This file contains bidirectional Unicode text that may be interpreted or compiled differently than what appears below. To review, open the file in an editor that reveals hidden Unicode characters.
Learn more about bidirectional Unicode characters
| Original file line number | Diff line number | Diff line change |
|---|---|---|
| @@ -0,0 +1,94 @@ | ||
|
|
||
| A quick summary to install Veloview on Windows 10 based on Veloview’s [Developer Guide](https://github.com/Kitware/VeloView/blob/master/Documentation/VeloView_Developer_Guide.md#superbuild-overview) and Pierre Guilbert's help in [Issue #51](https://github.com/Kitware/VeloView/issues/51). Note that the newer Veloview with pcl and ceres features must be installed. | ||
|
|
||
| # Installing Veloview | ||
|
|
||
| ## Veloview with SLAM on Windows 10 | ||
| 1. Follow Veloview's [Developer Guide](https://github.com/Kitware/VeloView/blob/master/Documentation/VeloView_Developer_Guide.md#superbuild-overview) instructions to build Veloview in Windows, and stop at step #5. For Step #6, a different command that enables pcl and ceres for SLAM features will need to be used. | ||
|
|
||
| 2. Use this cmake command instead of the one in step #6 of the Devloper's Guide so that superbuild will download pcl and ceres sources will be downloaded and compiled: | ||
| ``` | ||
| cmake C:\Veloview-source\Superbuild -GNinja -DCMAKE_BUILD_TYPE=Release -DUSE_SYSTEM_qt5=True -DQt5_DIR="C:/Qt/Qt5.10.0/5.10.0/msvc2015_64/lib/cmake/Qt5" -DENABLE_pcl=True -DENABLE_ceres=True | ||
| ``` | ||
| 3. To start building, type `ninja` in the command line. When build is complete, the Veloview.exe application can be found in `<work-directory>\VeloView-build\install\bin`. | ||
| 4. Enable pcl and ceres now that you have pcl and ceres files in build folder: | ||
| - Open a VS2015 cmd terminal and **change directory** to `${PATH_TO_BUILD}\common-superbuild\veloview\build` | ||
| - Open cmake-gui by typing `cmake-gui . `, including the fullstop ".". | ||
| - Enable options ENABLE_pcl and ENABLE_ceres by clicking the tickboxes | ||
| - Click 'Generate' to create relevant new files | ||
| - Close cmake-gui, recompile Veloview again by typing `ninja install` in the same location. | ||
| ## Veloview with SLAM on Linux | ||
| This has been tested with Ubuntu 16.04. | ||
| 1. Follow Veloview's [Developer Guide](https://github.com/Kitware/VeloView/blob/master/Documentation/VeloView_Developer_Guide.md#linux-dependencies) instructions to build Veloview in Linux, and stop at step #3. For Step #4, a different cmake command that enables pcl and ceres for SLAM features will need to be used. | ||
| 2. Change work directory to the build directory | ||
| `cd <work-directory>/VeloView-build` | ||
| 3. Use this cmake command instead of the one in step #6 of the Devloper's Guide so that superbuild will download pcl and ceres sources will be downloaded and compiled: | ||
| ``` | ||
| cmake <work-directory>/VeloView-source/Superbuild -DCMAKE_BUILD_TYPE=Release -DENABLE_pcl=True -DENABLE_ceres=True | ||
| ``` | ||
| 4. Start building with make. Replace <N> with number of cores to use! | ||
| `make -jN` | ||
| 5. Now you need to enable pcl and ceres from VeloView-build (in same directory): | ||
| - Navigate to veloview build folder `cd common-superbuild/veloview/build` | ||
| - Open Veloview cmake project `cmake-gui . ` including the "." | ||
| - Enable options ENABLE_pcl and ENABLE_ceres by clicking the tickboxes | ||
| - Configure and Generate files | ||
| - Close cmake-gui, recompile Veloview again by typing `make install` in the same location. | ||
| # Using SLAM in Veloview | ||
| See [Veloview's SLAM Presentation](https://github.com/etanx/VeloView/blob/master/Documentation/slam_presentation.docx) for more info about Veloview's SLAM algorithm. Note: SLAM has been tested with .pcap files from the VLP-32c. | ||
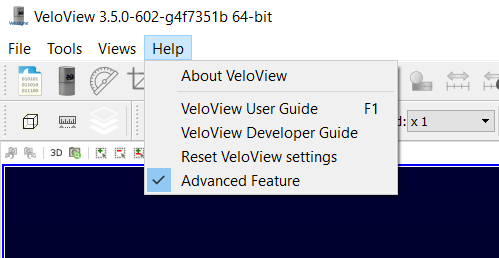
| 1. Open Veloview. Make sure Advanced Features are enabled. | ||
|  | ||
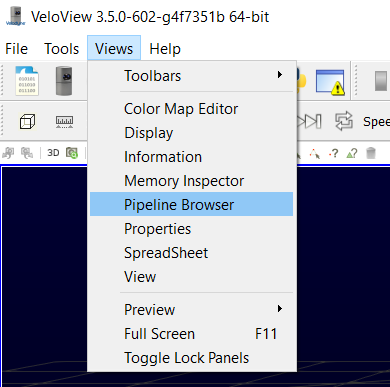
| 2. Enable Pipeline Browser and Properties under ‘Views’ tab. | ||
|  | ||
| 3. Open a previously recorded .pcap file. | ||
| 4. In Pipeline browser, select Calibration (the source), click on Filters tab and type ‘SLAM’ in search bar. | ||
| 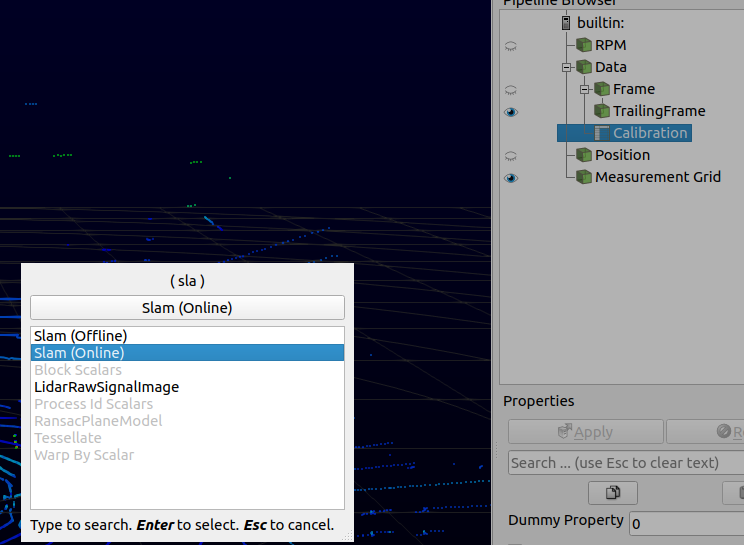 | ||
| 5. Hit ‘Enter’ to select a SLAM filter: Pick *Slam (online)* to see it do a test live display (not as accurate since it skips some frames), or *SLAM (offline)* for a full process. | ||
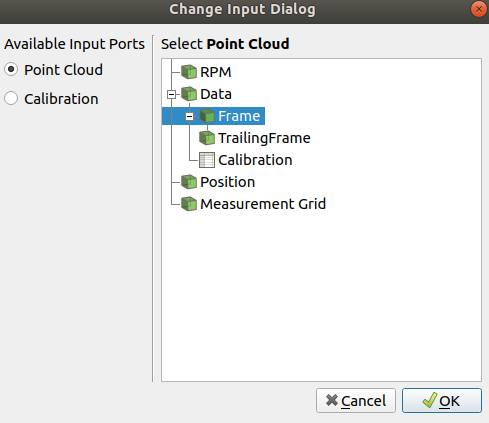
| 6. A new input dialog will appear. | ||
| - Click the Point Cloud input port, select the ‘Frame’ green cube. | ||
| - Click the Calibration input port, select the ‘Calibration’ entry. | ||
| - Hit ‘Ok’ when done. | ||
|  | ||
| 7. Under properties, hit ‘Apply’ | ||
| - If you chose online SLAM, a white frame will appear. Hit playback to play through the entire recording and watch it SLAM. | ||
| - If you chose offline SLAM, nothing will happen after you hit ‘Apply’, but that’s okay, the computer is working hard to SLAM stuff. | ||
| Once SLAM is complete, you can export the Trajectory as .poses to avoid running the SLAM again (selecting the Trajectory and ctrl + s). Then, to load the trajectory you can drag and drop the .poses file. | ||
| # Exporting Pointclouds | ||
| To export all frames processed, you need to instanciate a "Transforms Applier" and processes the pointcloud geenerator (data) and the trajectory (sensor path estimated by SLAM): | ||
| - Select the trailing frame and set the desired number of trailing frames (it will display the frames [|current_frame - Ntrailingframe, current_frame|]). | ||
| - Click on apply. You should now see all the frames aggregated in a non-sense way (all points being displayed using their coordinates of the reference frame attached to the sensor at the time of acquisition). | ||
| - Instantiate a "Transform Applier" with point cloud <-> the output of the Extract Surface and trajectory <-> the one estimated by the SLAM. | ||
| 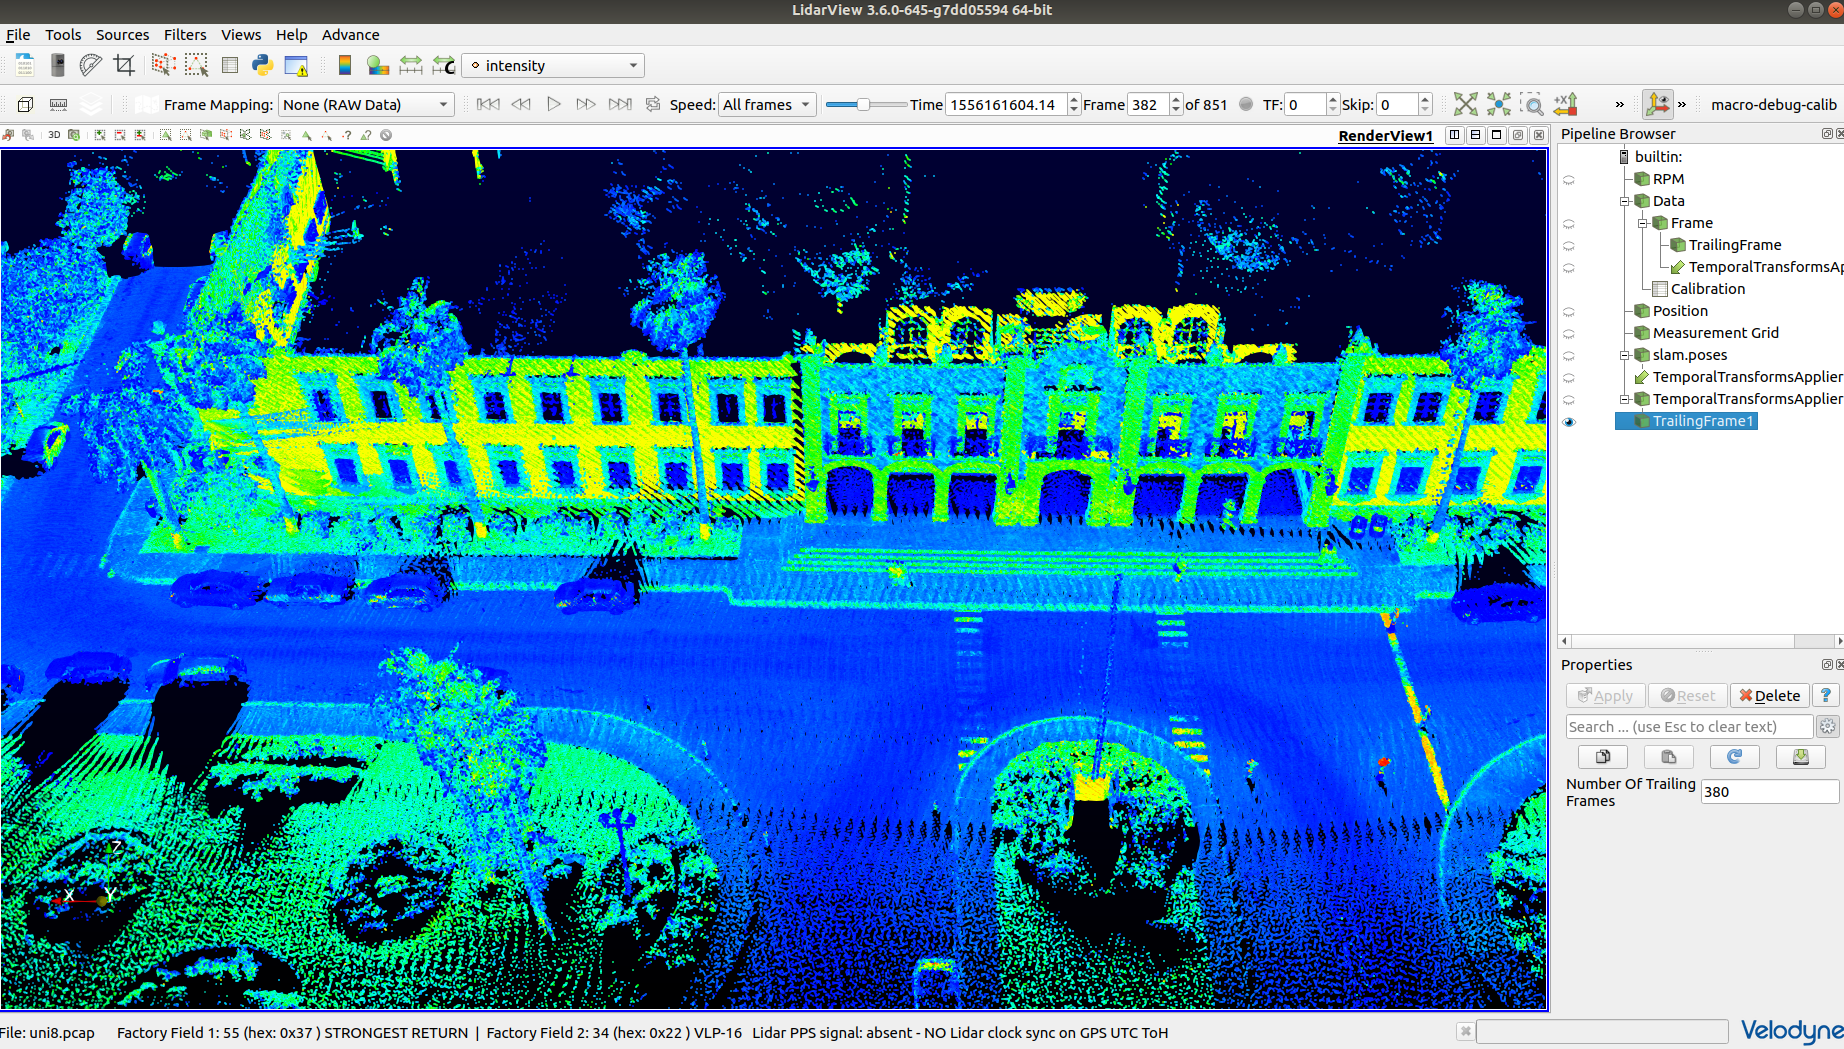 | ||
| To save the complete pointcloud, export the Edge and Blob in SLAM (green cube), and the Temporal Transform Applier (with the green box) by using ctrl + “Edge Map,” “Blob Map,” and “TemporalTransformApplier1”. | ||
| Note: The default SLAM parameters are a good compromise to make the SLAM working in outdoor urban area, indoor scene and poor geometric scene (forest recorded from UAV, glades, career, ...). However, the parameters can be adapted to the specific kind of environment you want to process to have an optimal result. | ||
This file contains bidirectional Unicode text that may be interpreted or compiled differently than what appears below. To review, open the file in an editor that reveals hidden Unicode characters.
Learn more about bidirectional Unicode characters